4 elt/ ng Up
3. Remove System Di
skett
e I fr om its pr
ot
ect ive
pap
er sleeve .
• H
old
the
di sk
ett
e O NLY by its bla ck, sea led en
velope
, and
00
NOT
try to re
mov
e th e di sk
ett
e fro m t his enve lope.
•
00
NOT
tou
ch any
of
th e expo sed surfac es o fthe disk
ette
, becau se
you m ay d est roy its read-w ri te cap abilit ies.
•
00
NOT
hold t he di sk
ett
e b y
pla
cing yo ur fi ngers t
hro
ugh the center
hol e.
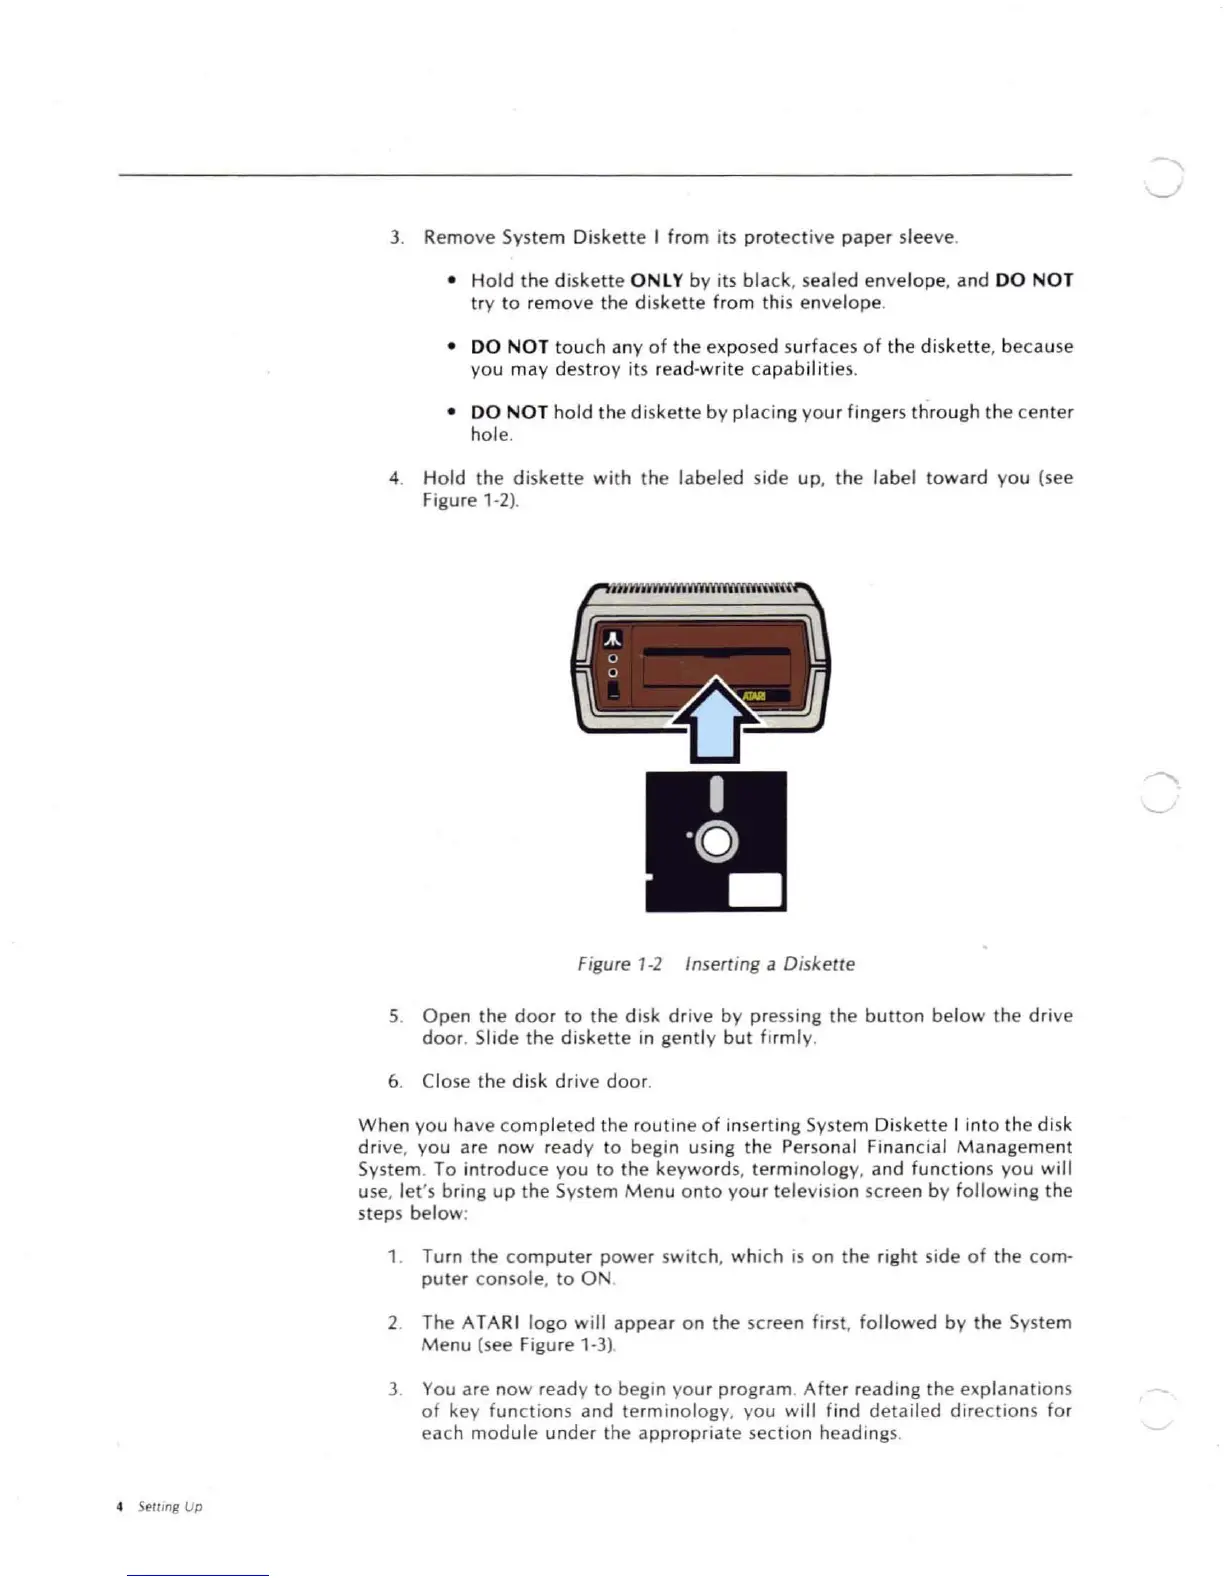
4. H
old
th e d isk
ett
e w ith th e lab eled side up , th e label tow ard yo u (se e
Figure 1-2).
Figure 1-2 Inserti ng a D iskette
5. Open th e doorto th edisk dr ive by pr essing the
but
ton below t he d riv e
door
. Sli de th e d isk
ett
e in gent
ly
bu t
fir
mly.
6 . Clo se the d isk dr ive door .
Wh en yo uhave co mpleted th e routine o f inserti ng System Disk et t e I int o th e di sk
drive , yo u are n
ow
ready to beginusin gthe Person al Finan ci al M anagem
ent
System. To int rod uce yo u to th e keyw
ord
s, te rmi no lo gy, and fun ct ion s yo u w il l
use, l
et'
s bring up t he Syste m
Me
nu onto your tel evi sion screen by fo
llo
wi ng t he
steps below :
1. Tu rn the co m pute r pow er swi tc h, w hich is o n t he right side
of
th e co m-
put
er co nsol e, to 0 .
2. The ATARI logo w
ill
appear on t he scree n
first
, fo
llo
wed b y t he System
M enu (seeFigu re 1-3).
3. You are now read y to beg in yo ur
prog
ram. A
ft
er re ad ing th e expla
natio
ns
o f ke y fu nc
tio
ns andterm ino logy, you wi ll find de ta ile d d ire
cti
on s fo r
eachmod ul e un der the appro priate sect io n head ings.