Manual, F/T Sensor, Ethernet Axia
Document #9610-05-Ethernet Axia-09
Pinnacle Park • 1031 Goodworth Drive • Apex, NC 27539 • Tel:+1 919.772.0115 • Fax:+1 919.772.8259 • www.ati-ia.com
41
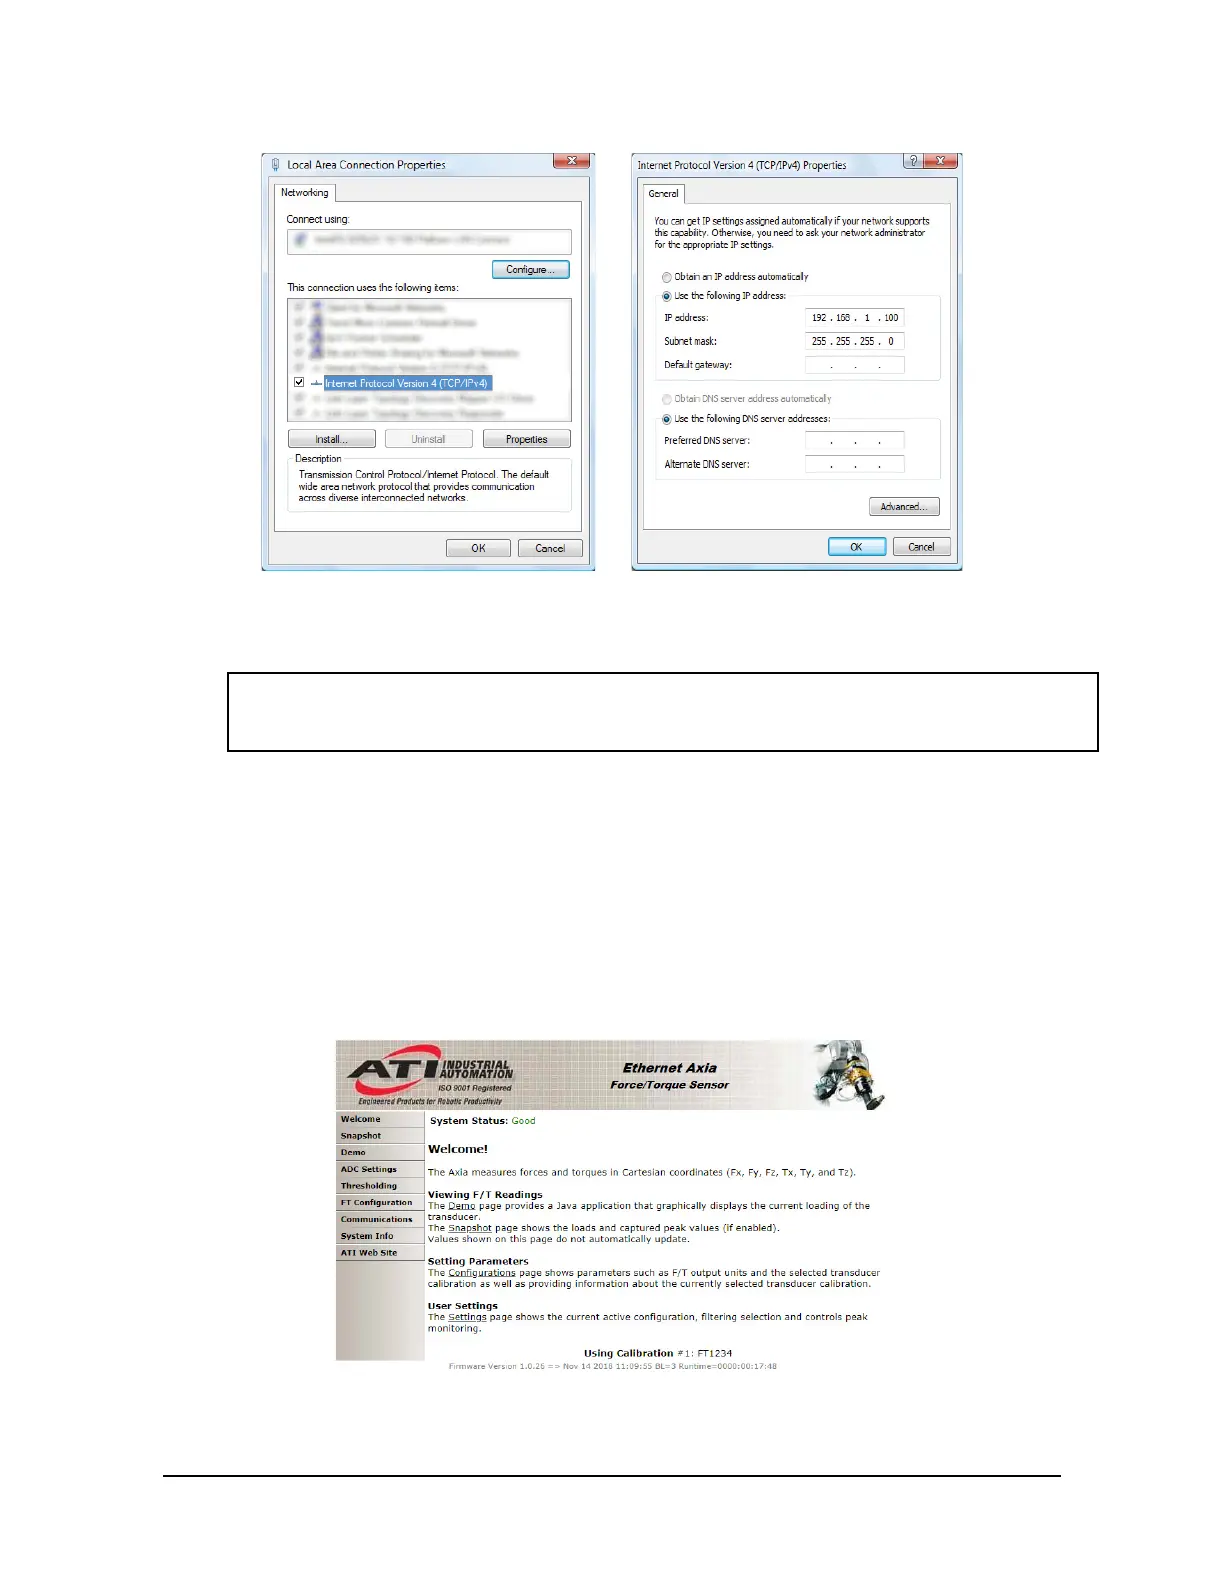
Figure 5.1—Windows Vista and Windows 7/8/10 Networking Information
3. Record the values and settings shown in the properties window. Save these values so that the computer
can be returned to its original conguration.
4. Select the Use the following IP address radio button.
NOTICE: IP addresses must be unique to each device. If 192.168.1.100 is already used
byanyotherdevicesonthenetwork,useanotherIPaddresswiththesamerstthree
eldsasthesensor.
5. In the IP address: eld, type 192.168.1.100.
6. In the Subnet mask eld, type 255.255.255.0.
7. Click on the OK button.
8. On the Local Area Connection Properties window, click the Close button.
9. Use an Ethernet cable to connect the sensor to the computer’s LAN connection. Wait a moment to ensure
the computer has time to recognize the connection.
10. Type the address 192.168.1.1 in the browser. The Ethernet Axia F/T’s Welcome page appears.
Figure 5.2—The Ethernet Axia F/T Sensor Welcome Page
 Loading...