Operating Instructions Xenotest
®
150 S+
37
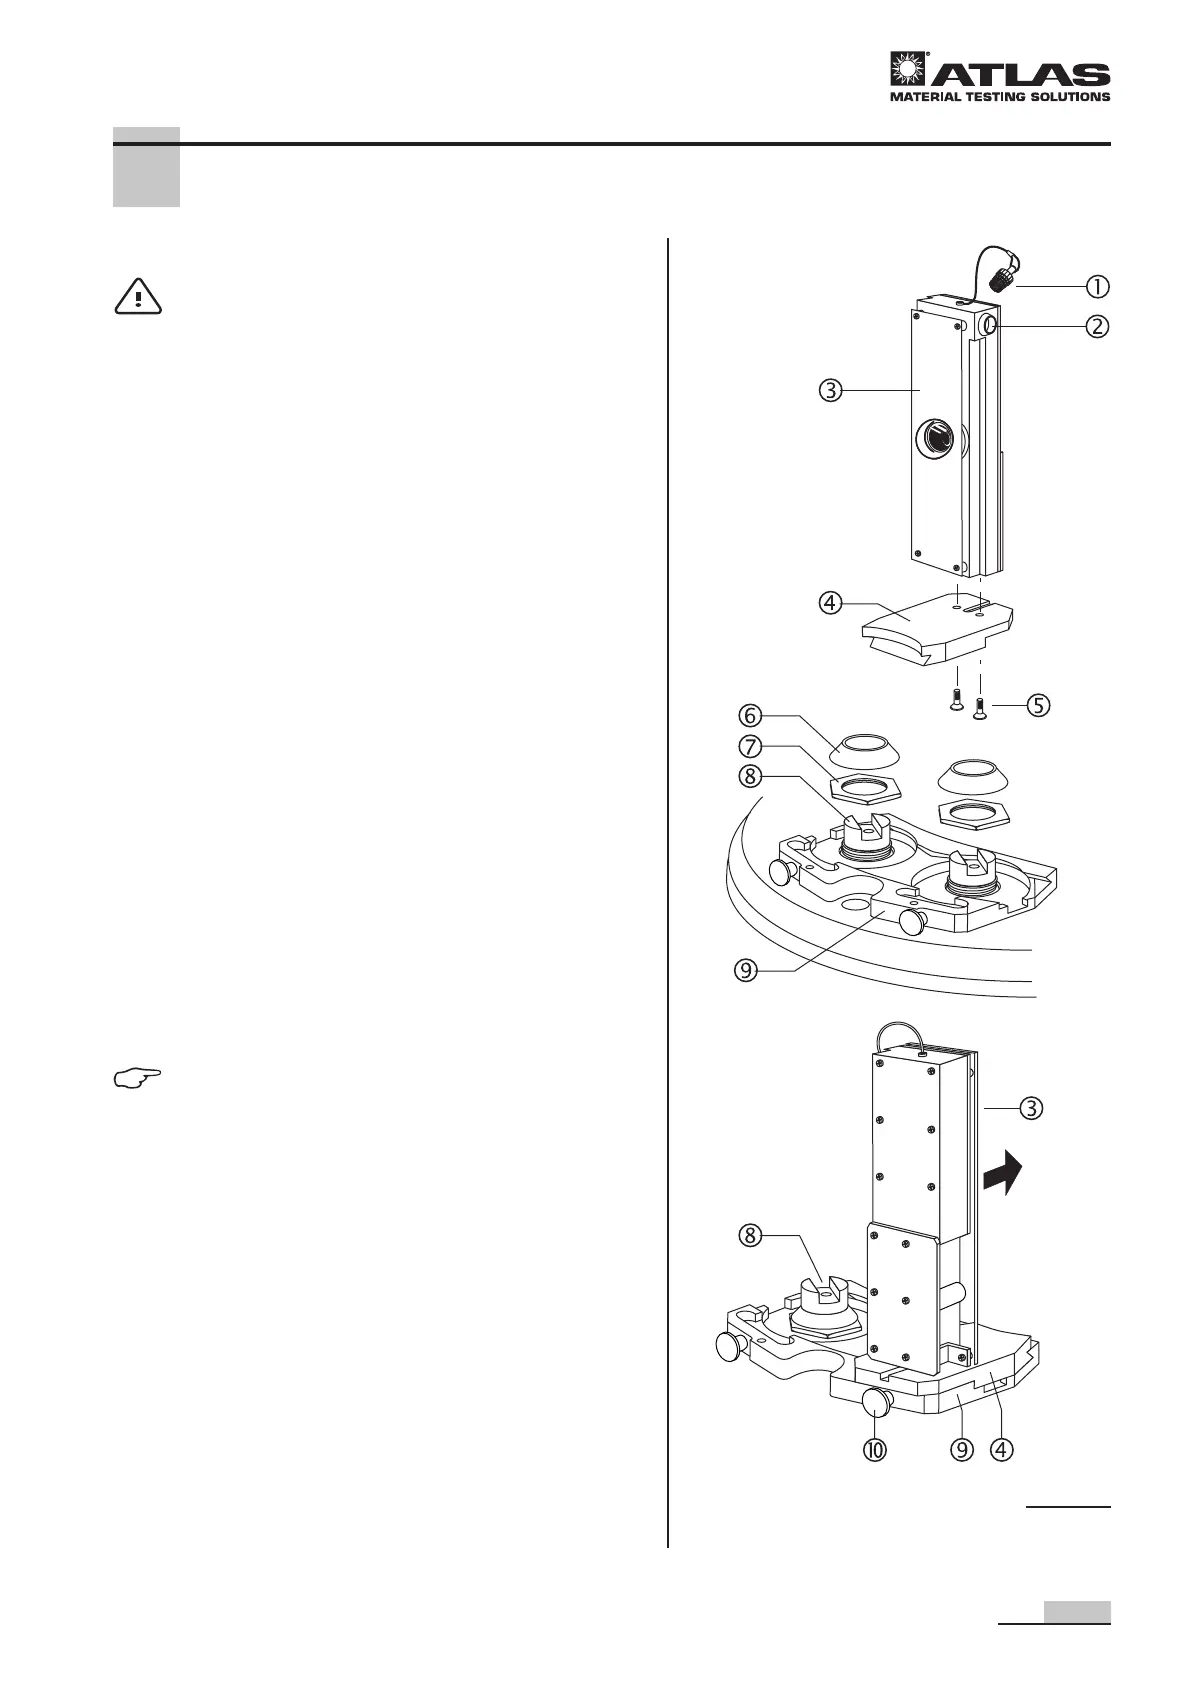
Installing the sensor, Fig. 23:
CAUTION - Risk of burns!
The test chamber is extremely heated du-
ring operation. Contact with heated test
chamber components may cause burns.
Prior to any sensor installation or rem-
oval, allow the test chamber to cool down
sufficiently!
1. Secure the sensor 3 to the adapter 4 using the two
retaining screws 5.
2. Remove the rubber insulators 6 from two adjacent
sample holder retainers 8 and remove the sample
holder retainer screws 7 (size 22).
3. Place the sensor mounting bracket over the two
sample holder retainers 8 and secure them to the
sample carousel using the retaining nuts 7.
Reattach the rubber insulators 6 to the two sample
holder retainers.
4. Align the sensor adapter 4 and the sensor with the
xenon lamp and attach it to the sensor mounting bra-
cket 9 over one of the two sample holder retainers 8.
5. Secure the sensor adapter to the sensor mounting
bracket by tightening the knurled screw A.
6. If the XenoCal sensor is offline, the socket 2 at the sen-
sor must be capped using the plug 1 to prevent moistu-
re from entering the sensor.
NOTE - Operation with XenoCal:
With the XenoCal sensor installed, the
sample carousel can be operated in syn-
chronous or in rotating mode.
6 Start-up
Fig. 23
 Loading...