Operating Instructions Xenotest
®
150 S+
42
6 Start-up
6.11 Set-up for optional printer
You can use the printer to print data of the stored program
as well as the voltage measuring values of the running pro-
gram on paper rolls.
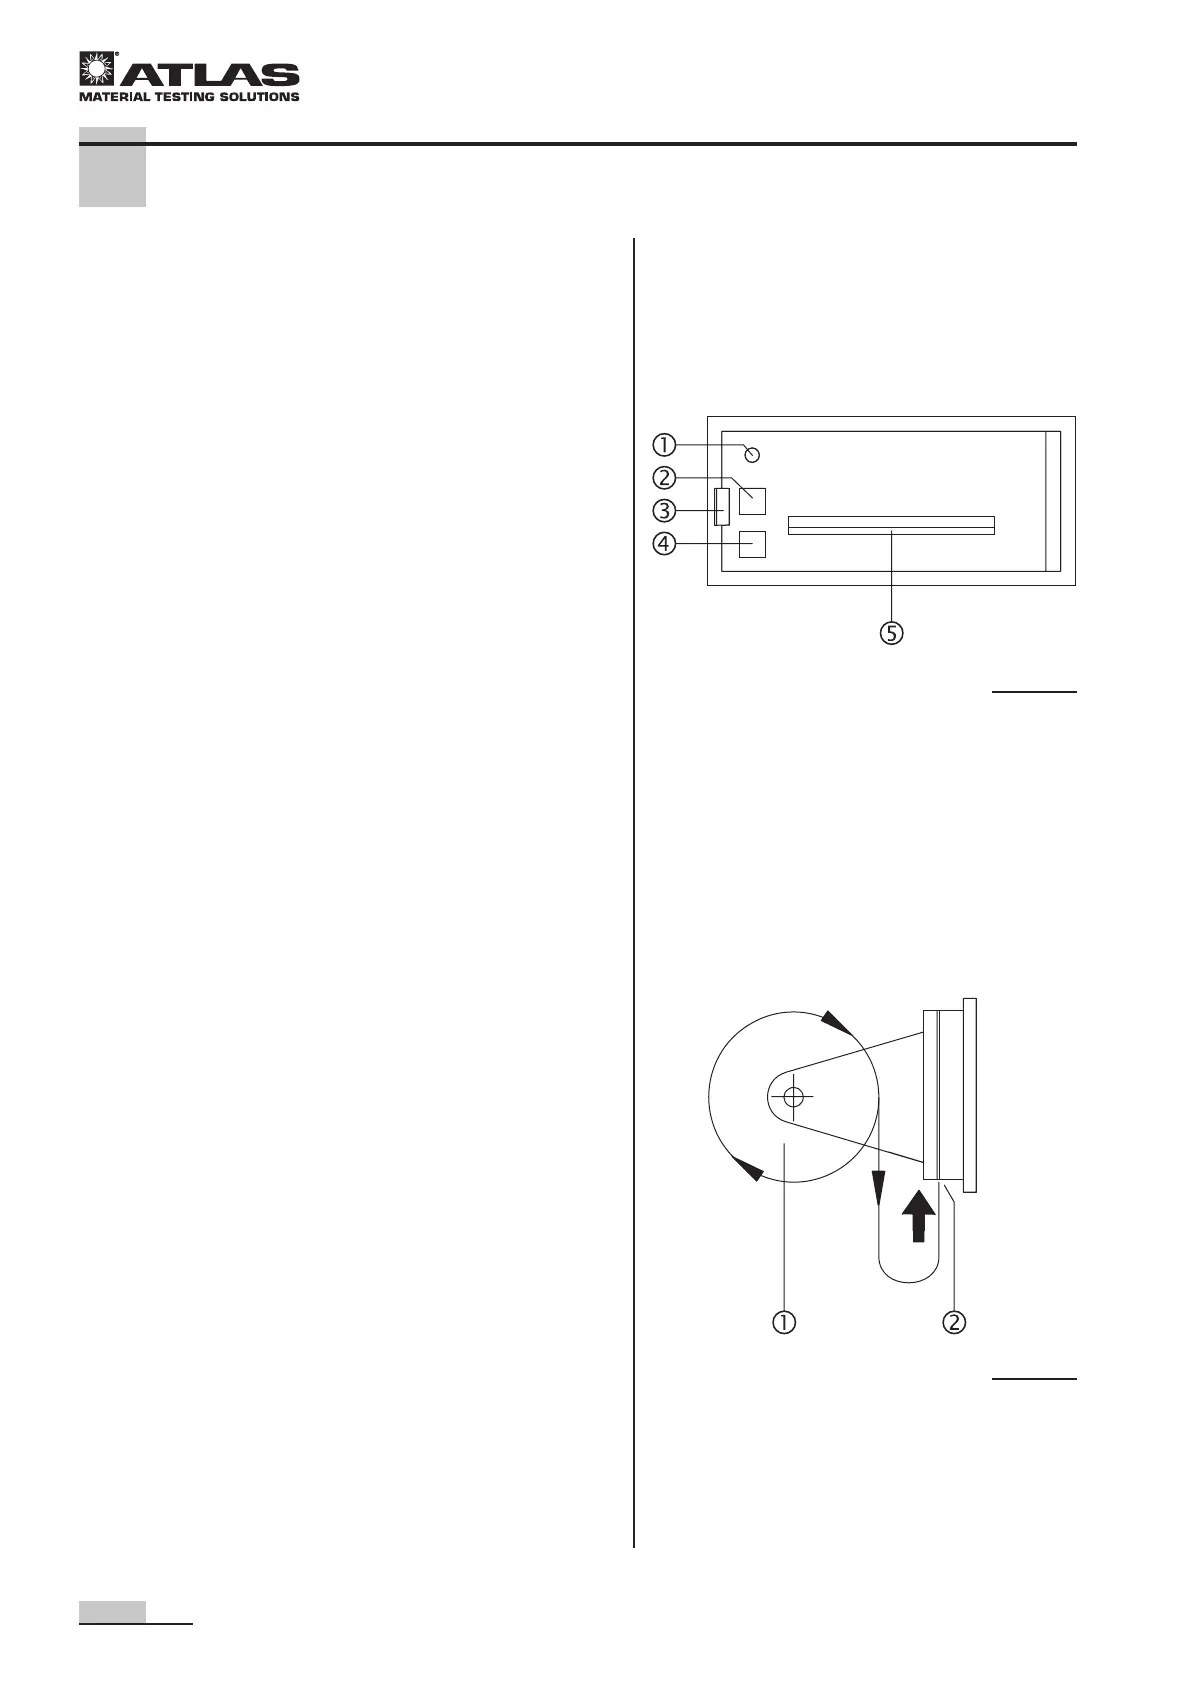
Operating and display elements, Fig. 28:
1 LED indicator: Signals the end of the paper roll.
2 Line Feed/Enter key: Dual-function key.
In print mode, the Line Feed key is used for manual pa-
per feed. If the menu program is opened, it is used as the
ENTER key for accepting and storing the selected para-
meters.
3 Front panel latch: The front panel can be opened for in-
serting the paper roll.
4 Line Menu/Select key: Dual-function key.
If the key is depressed for more than 3 seconds with the
Xenotest
®
150 S+ switched on, the printer switches to
menu program mode. In this mode, the printer parame-
ters can be changed.
If the menu program is opened, the Select key is used for
selecting the various instrument parameters.
5 Serrated edge to tear off the paper strip.
Installing a paper roll, Fig. 29:
1. Cut the leading edge of the paper roll to a point.
2. Press the lock to the right and swing the printer face
panel open.
3. Insert the paper roll 1 so that it will unwind in a clock-
wise direction.
4. Push the pointed leading edge into the guide slot 2.
5. Press the "LINE FEED/ENTER“ key until the leading
edge of the paper appears at the tear-off edge.
6. Close the face panel, making sure the lock latches.
The "ALARM" LED should go out. The printer is now
operational.
Fig. 28
Fig. 29
 Loading...