12. Convergence
12.2 Preparing for convergence adjustment
Necessary tools
•7mmfl at screwdriver.
• 3mm Allen wre nch.
How to set up the projector for convergence adjustment?
1. Remove the top cover from of the projector.
2. Remove the left s ide cover from of the pro jector.
3. Remove the left cover plate of the Light Processor compartment.
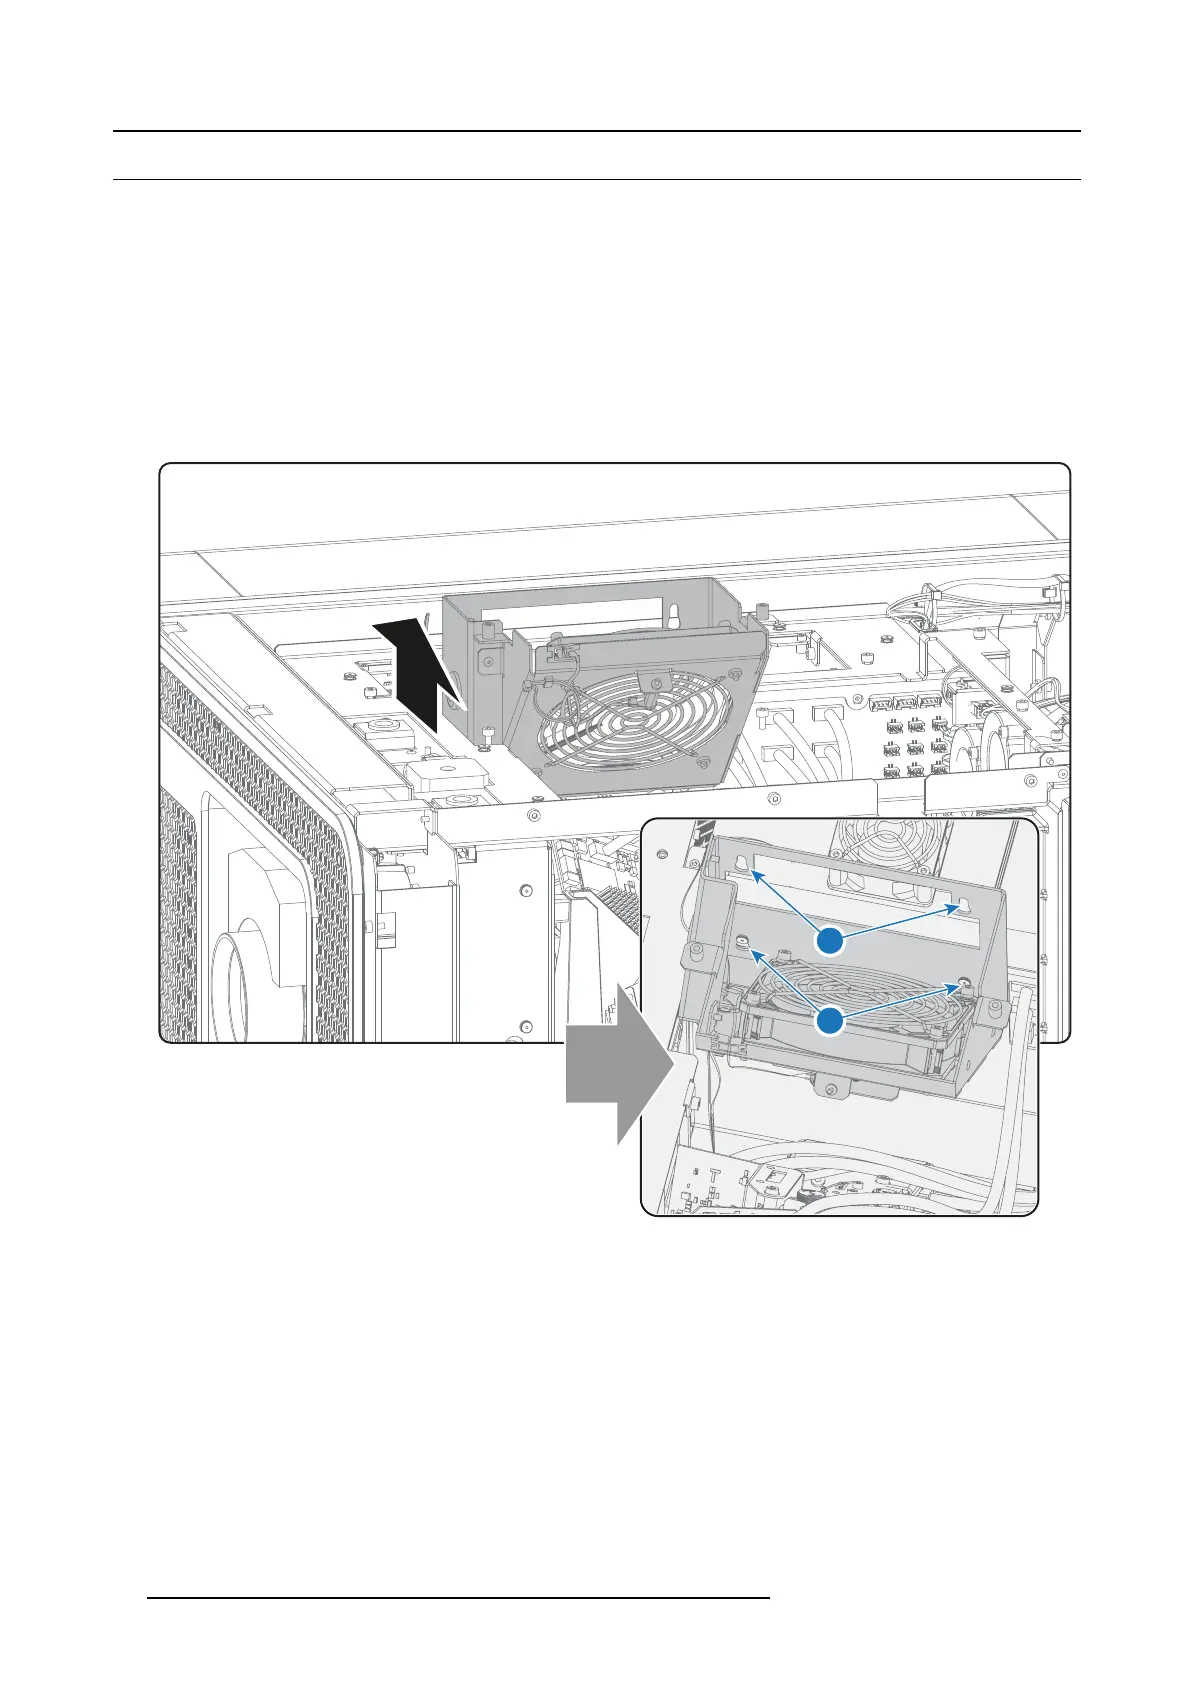
4. Place the fan on top of the Light Processo r in the upper position as illustrated. Do this by engaging the two lower slots ( 2) into
the upper mounting pins as illustrated. The two upper slots ( 3) remain free.
3
2
Image 12-3
5. Switch on the projector, ignite the lamp and open the dows er.
6. Select the conv ergence test pattern, which is illustrated below (im age 12-4). Use the communica tor to activate the co nvergenc e
test pattern.
Note: The convergence test pattern can NOT be activated via the PATTERN button on the Local Keypad.
94
R5906693 DP2K-E SERIES 19/06/2015