5. Physical installation
5.2 Connecting the projector with the power n et
WARNING: The total electrical installation sh ould be protected by an app ropriate rated an d readily accessi-
ble disconnect switch, circuit breakers and ground fault current interrupters. The installation shall be done
according to the lo cal electrical installation co des.
CAUTION: The cross-sectional area of the conductors in the Power Supply Cord shall be not less than 1mm
2
(18AWG).
Necessary tools
No tools.
Necessary parts
Power supply cord 1mm
2
(18AWG), m in. 300V with IEC 60320 - C13 connector
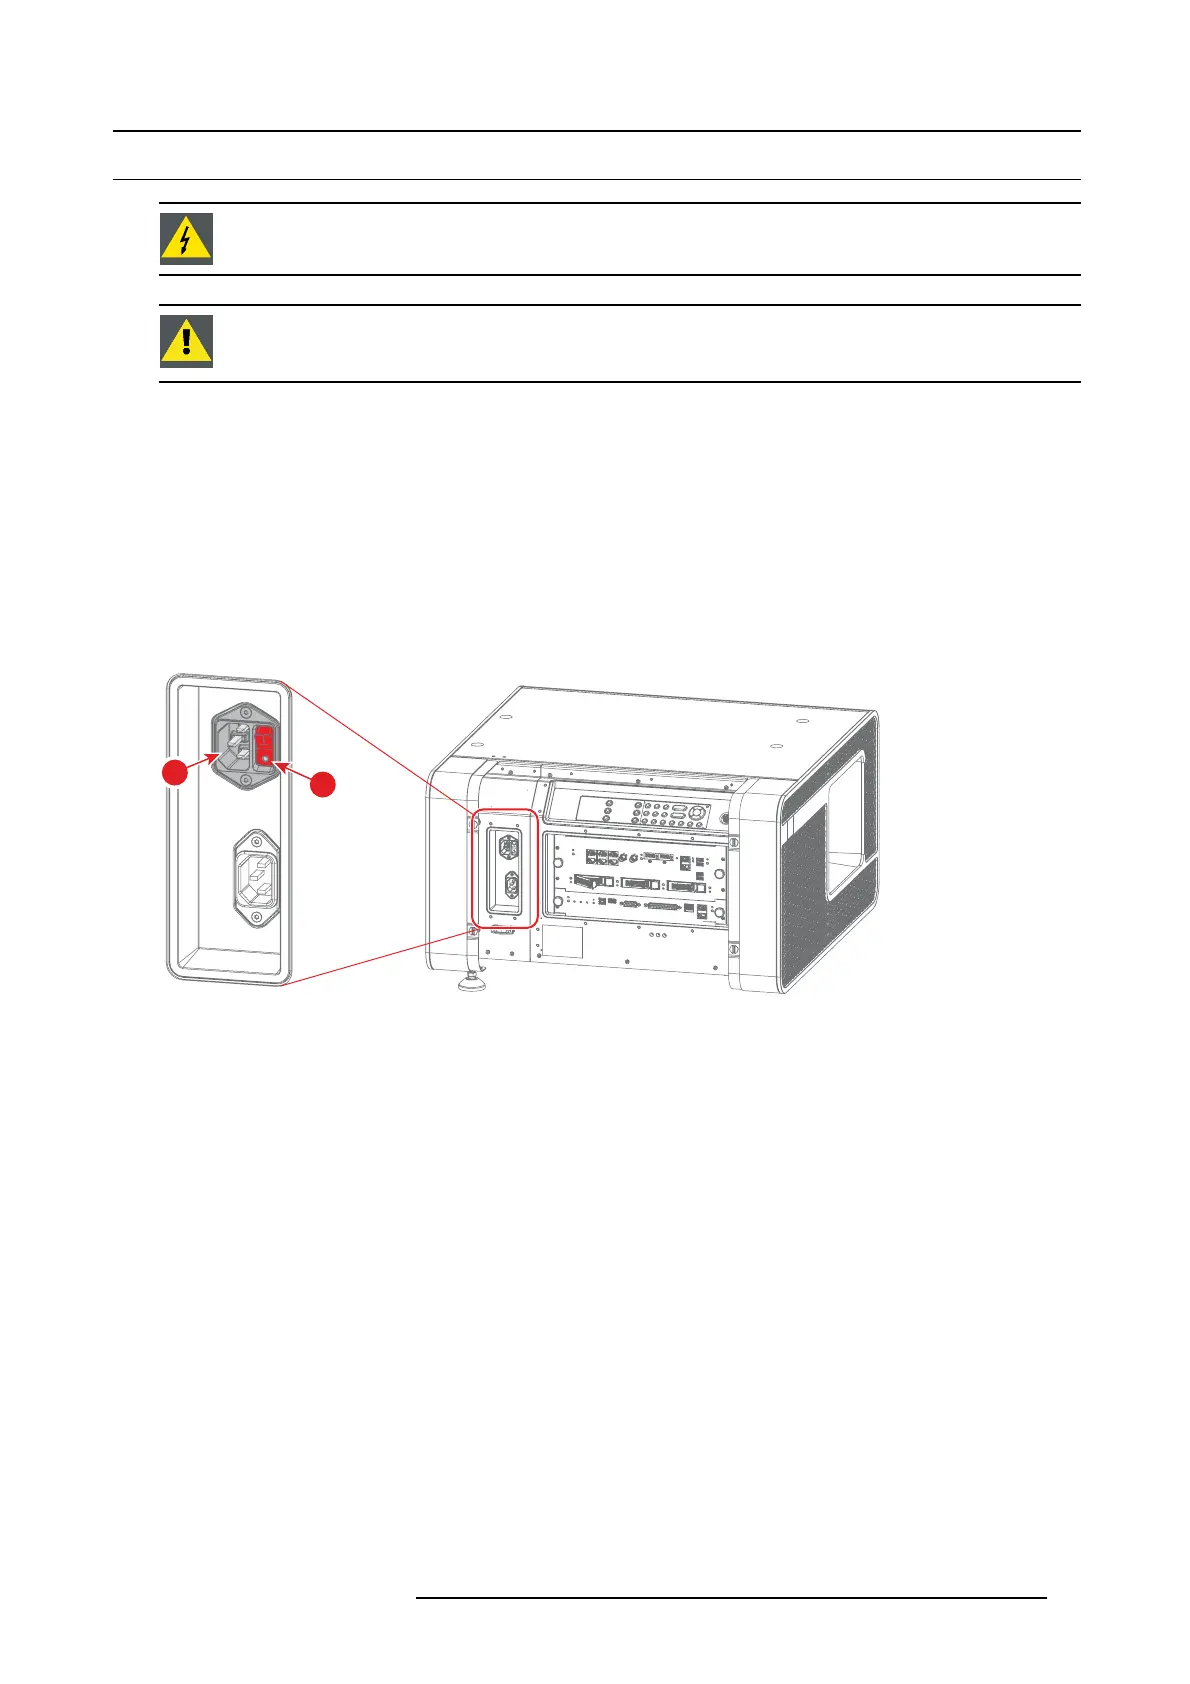
How to connect the main AC power with the DP2K-E series projector projector?
1. Remove the right side cover of the projector. See procedure "Rem oval of the right side cover", page 125.
2. Make sure that the projector is switched off. Position the power s witch in the ’0’ (OF F) position (1).
3. Connect the female side of the power cord with the power input socket of the pr ojector (2).
1
2
Image 5-5
4. Connect the male side of the po wer cord to the local power net.
5. Install the right side cover of the projector. S ee
procedure "Installation of the right side cov er", page 130.
R5906693 DP2K-E SERIES 19/06/2015
27