R5906788-03 Thor series 119
Image 11-15
2. Fully loosen the Scheimpflug nut at the lower left of the Lens Holder (reference 4 Image 11-16). Use a 13mm
nut driver.
Image 11-16
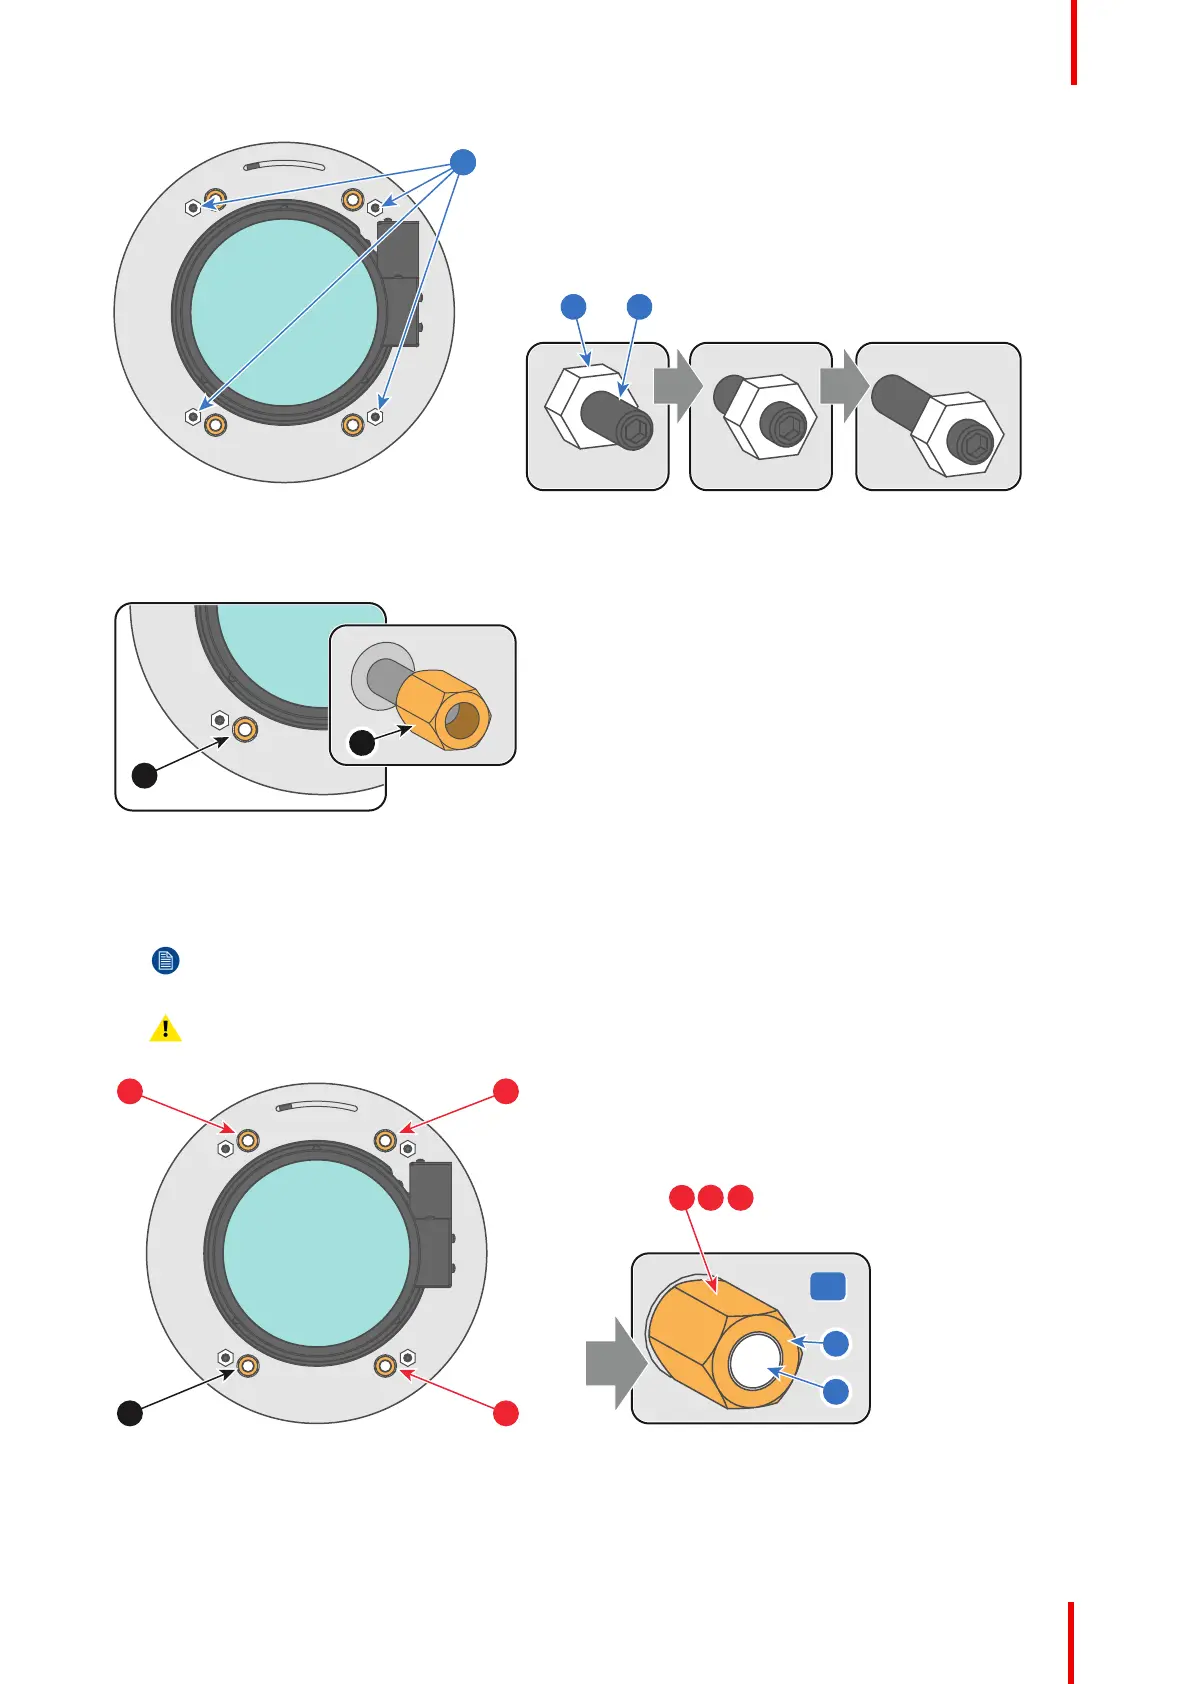
3. Turn the three Scheimpflug adjustment nuts, reference 1, 2 and 3 Image 11-17, until the front of the nut
(reference 5 Image 11-17) is equally aligned with the front of the threaded rod (reference 6 Image 11-17). Use
a 13mm nut driver.
Note: This is the nominal position of the Lens Holder.
Caution: Do not remove any of the Scheimpflug adjustment nuts completely from the threaded rod.
Otherwise the lens holder front plate with lens will fall off.
Image 11-17
4. Zoom the lens for maximum image on the screen (WIDE) and focus the center of the projected image using
the motorized focus control (Local Keypad).
Scheimpflug
 Loading...


