36 Bend-Tech Dragon A400
Assembly Manual
Trolley
06
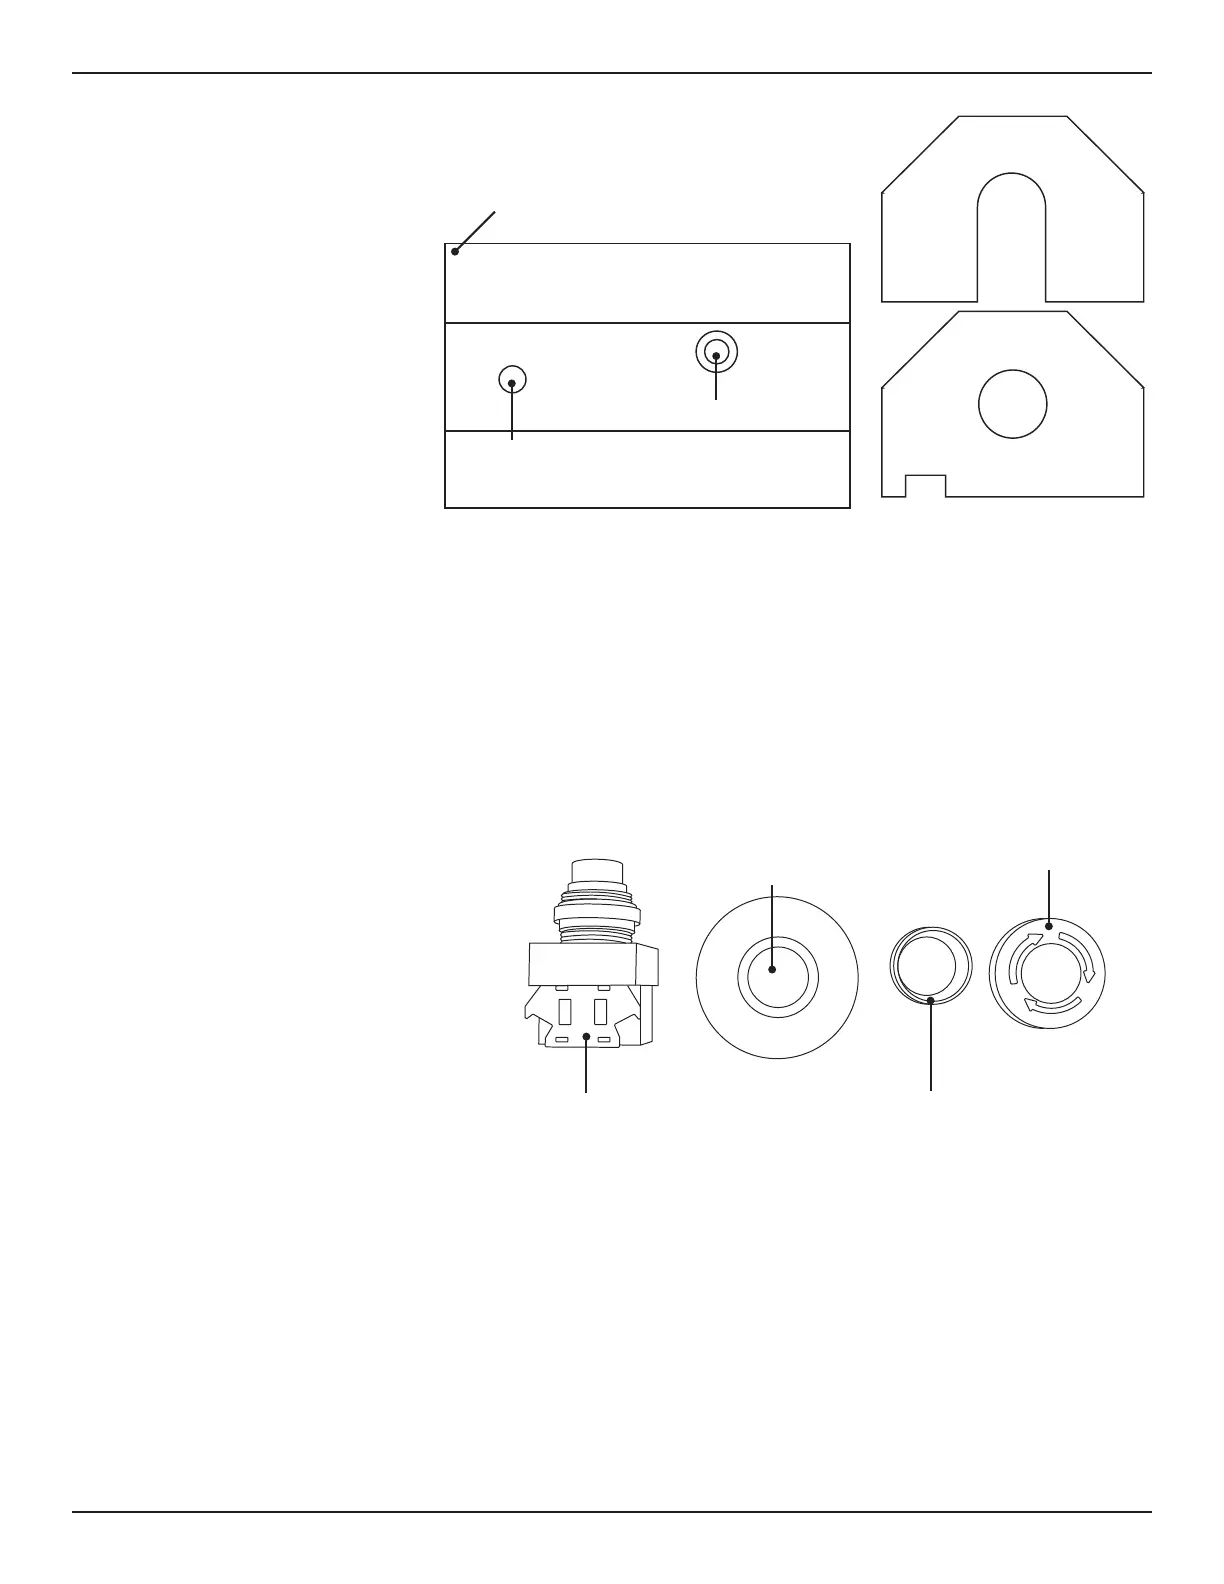
6.2.1 Front Plate
Begin assembling
the Trolley Cover by
attaching the Front Plate
to the Chuck Housing.
The Front Plate attaches
to the Chuck Housing via
10 screws. Tighten the 10
screws securely using a
6.2.2 E-Stop
The Trolley is equipped with an E-Stop switch. Find the Switch on the Trolley. Remove the red
button on the switch by unscrewing it counterclockwise. Remove the chrome plastic collar on
the switch by unscrewing it counterclockwise. Remove the yellow label ring.
6.2.3 E-Stop Mounting
Feed the threaded E-Stop switch
mount through the top of the
Chuck Housing from the inside.
Place the yellow plastic label on
the switch. Thread the chrome
plastic collar onto the E-Stop
button. Tighten Securely by hand.
Thread the red E-stop button
clockwise onto the E-Stop switch.
Tighten gently by hand.
6.2.4 Attaching To The Trolley
Place the Chuck Cover with the Front Plate mounted onto the Trolley. Secure to the Trolley
using screws from Hardware Bag No. 5. Tighten securely by hand.
Chuck Housing
E-Stop Location
Front of Trolley
Chuck Key Housing
Rear Plate
Front Plate
S
T
O
P
E
M
E
R
G
E
N
C
Y
E-Stop Switch
Yellow Label Ring
Chrome Plastic Collar
Red Button

 Loading...


