SECTION 3 OPERATING THE BIS VISTA MONITORING SYSTEM
______________________________________________________________________
3-13
3.5 Menu Selections
Before using the BIS VISTA monitor for the first time, you may want to update the monitor
with your desired screen settings and the current date and time. You should also familiarize
yourself with the various menu options available. This section describes the menu options
available and how they work. These menu options are discussed below. For more detail on
what the settings mean, refer to “BIS Trend Data Screen” in Section 3.3.
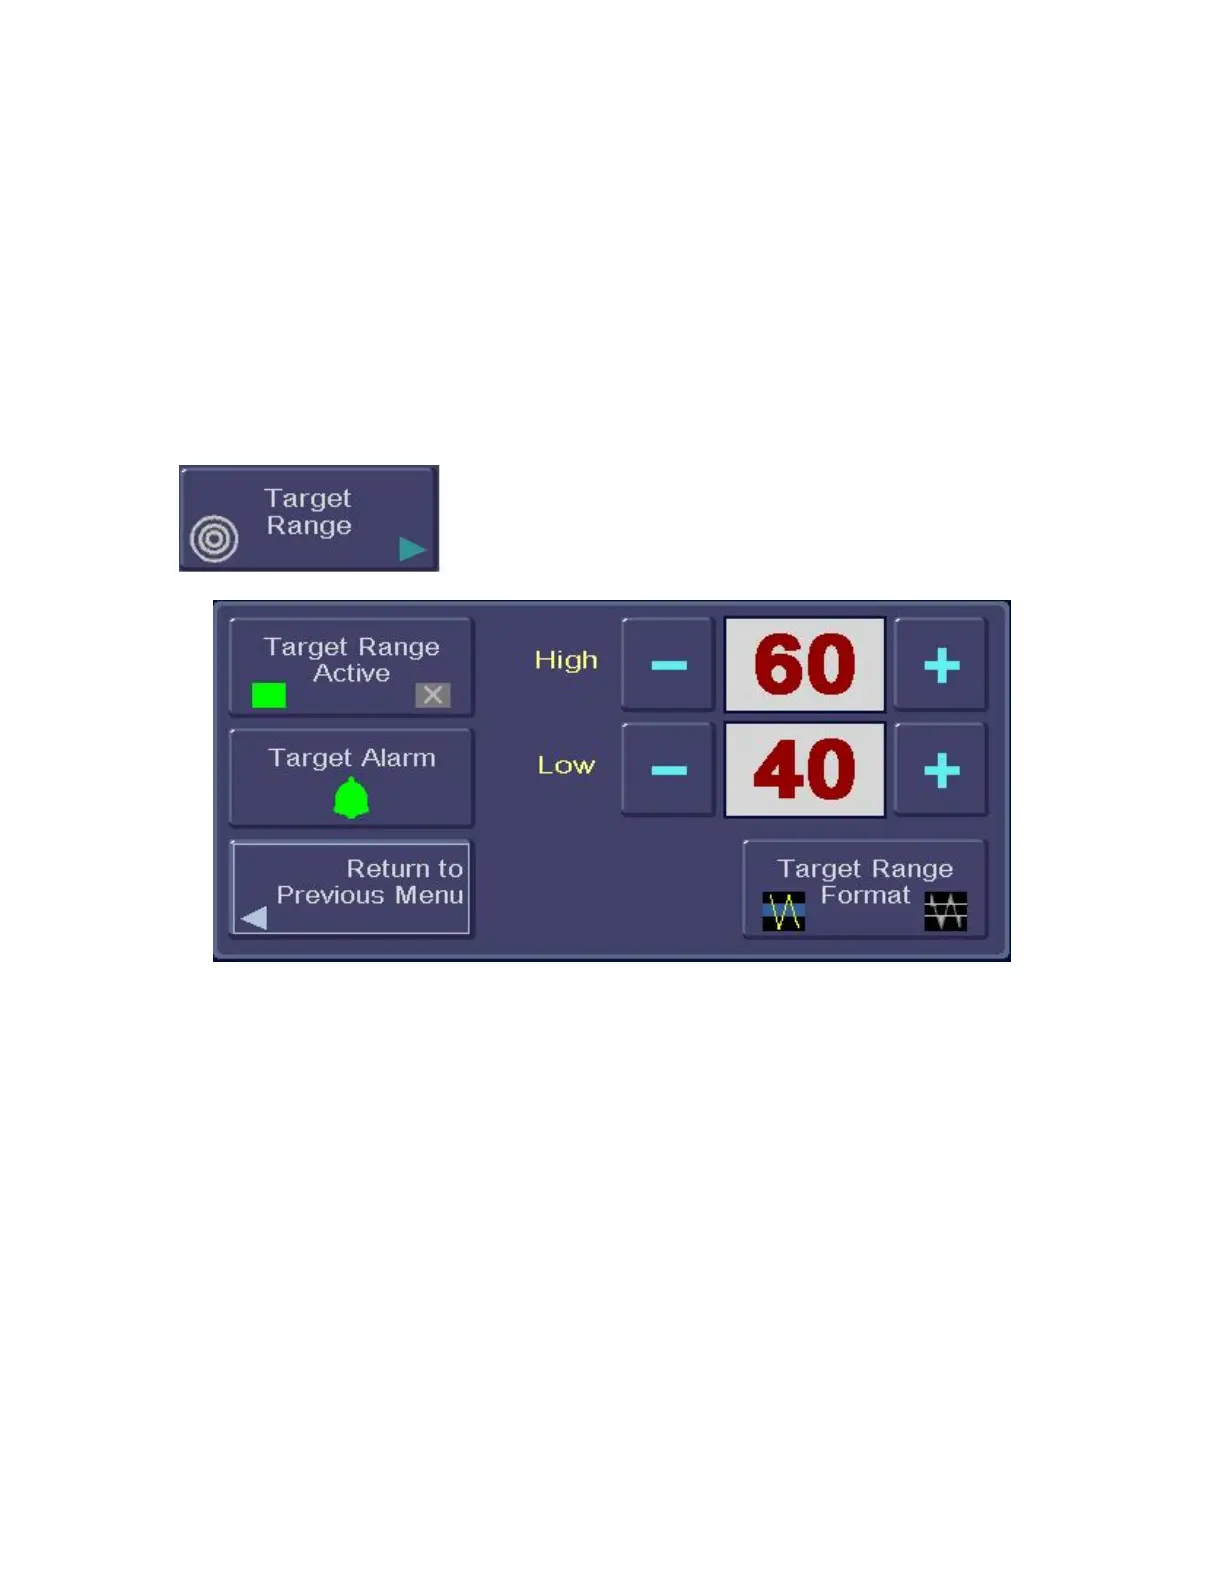
3.5.1 Target Range
To access the Target Range, press [MENU].
Figure 13 - Target Range
To aid in patient management, a target range of desired BIS values may be set. When the
Target Range is activated, the selected range displays on the BIS Trend Graph. The BIS
VISTA monitor will notify the user when the patient’s BIS value is outside of the intended
range. The Target Range menu has four components:
1. Activating the Target Range feature so that the range displays on the BIS Trend
Graph.
2. Setting the Target Range display format (colored band or two horizontal lines).
3. Setting the audible alarm to sound when a BIS value falls outside of the range.
4. Setting a Target Range of desired BIS values.
To set the Target Range options, press [Target Range]. The Target Range Screen displays.
1. To activate the Target Range so that it displays on the BIS Trend Graph, or
deactivate it so that it does not, press [Target Range Active].
• When the Target Range is active, a green box displays.
• When the Target Range is inactive, a red box with an ‘X’ displays.