70 MT55 Operation & Maintenance Manual
AIR CLEANER SERVICE
Replacing The Filter Elements
It is important to change the air filter element at regular
intervals.
For the correct service interval (See SERVICE
SCHEDULE on Page 61.)
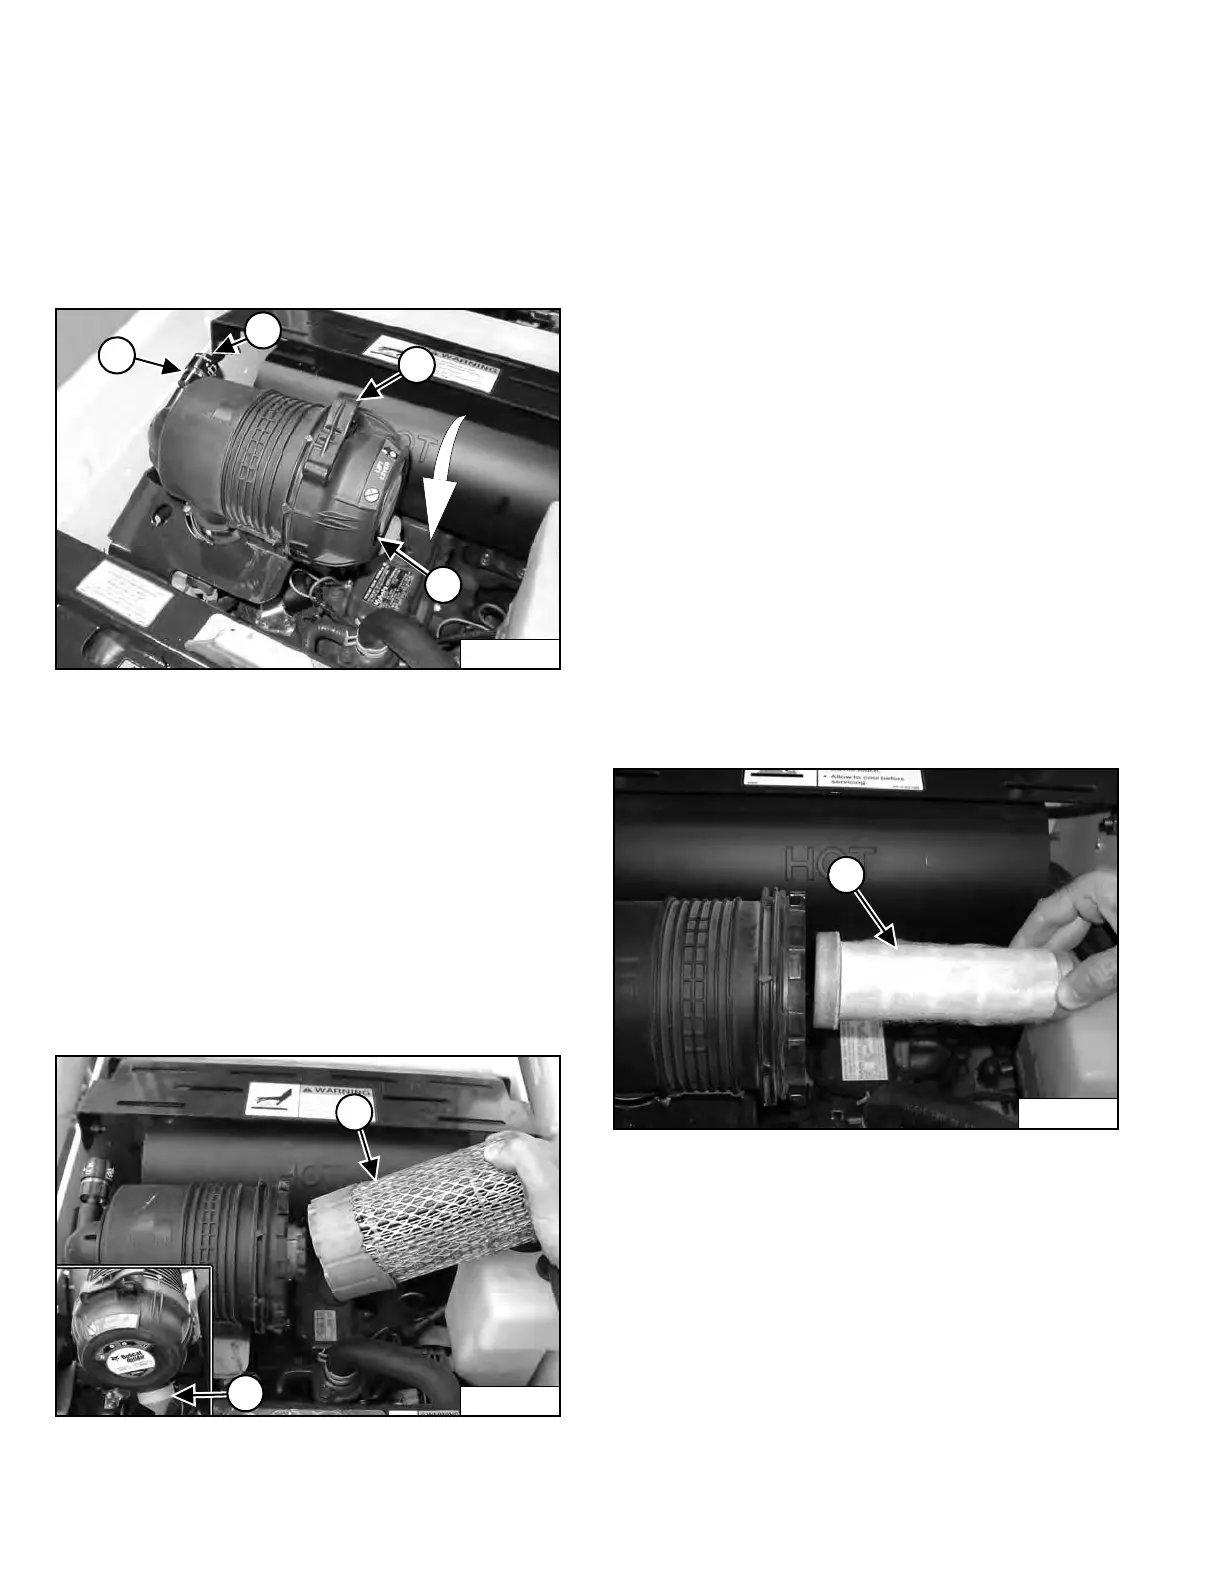
Figure 81
Replace the outer filter only when the red ring shows in
the condition indicator window (Item 1) [Figure 81].
Replace the inner filter every third time the outer filter is
replaced or as indicated below.
Outer Filter
Pull up on the locking lever (Item 2) and hold while
turning the dust cover (Item 3) [Figure 81]
counterclockwise.
Remove and clean the dust cover.
Figure 82
Remove the outer filter element (Item 1) [Figure 82].
NOTE: Make sure all sealing surfaces are free of dirt
and debris. Do not use air pressure to clean.
Install a new outer filter element.
Install the dust cover. Be sure the air cleaner valve (Item
2) [Figure 82] is down. Turn the dust cover clockwise and
engage the locking lever.
Check the air intake hose and the air cleaner housing for
damage. Make sure all connections are tight.
Press the button (Item 4) [Figure 81] to remove the red
ring on the condition indicator.
Inner Filter
Only replace the inner filter under the following
conditions:
• Replace the inner filter every third time the outer filter
is replaced.
• After the outer filter has been replaced, press the
button (Item 4) [Figure 81] on the top of the condition
indicator and start the engine. Run at full rpm, then
reduce engine speed and stop the engine. If the red
ring shows in the condition indicator, replace the inner
filter.
Figure 83
Remove the dust cover, outer filter and inner filter.
NOTE: Make sure all sealing surfaces are free of dirt
and debris.
Install the new inner filter (Item 1) [Figure 83].
Install the outer filter.
Install the dust cover. Be sure the air cleaner valve (Item
2) [Figure 82] is down. Turn cover clockwise 1/8 turn to
engage the latch.
Press the button (Item 4) [Figure 81] on the condition
indicator to remove the red ring.
Dealer Copy -- Not for Resale