45
Re-recording only a mistake—Punch-in/out
Advanced Use
Manually punching in and out
using a foot switch
Using the foot switch
If you wish to use a separately sold foot switch (such as the
DP-2 or BOSS FS-5U) to punch-in/out, connect the foot
switch to the FOOT SW jack. Use the following procedure to
set the function of the FOOT SW jack.
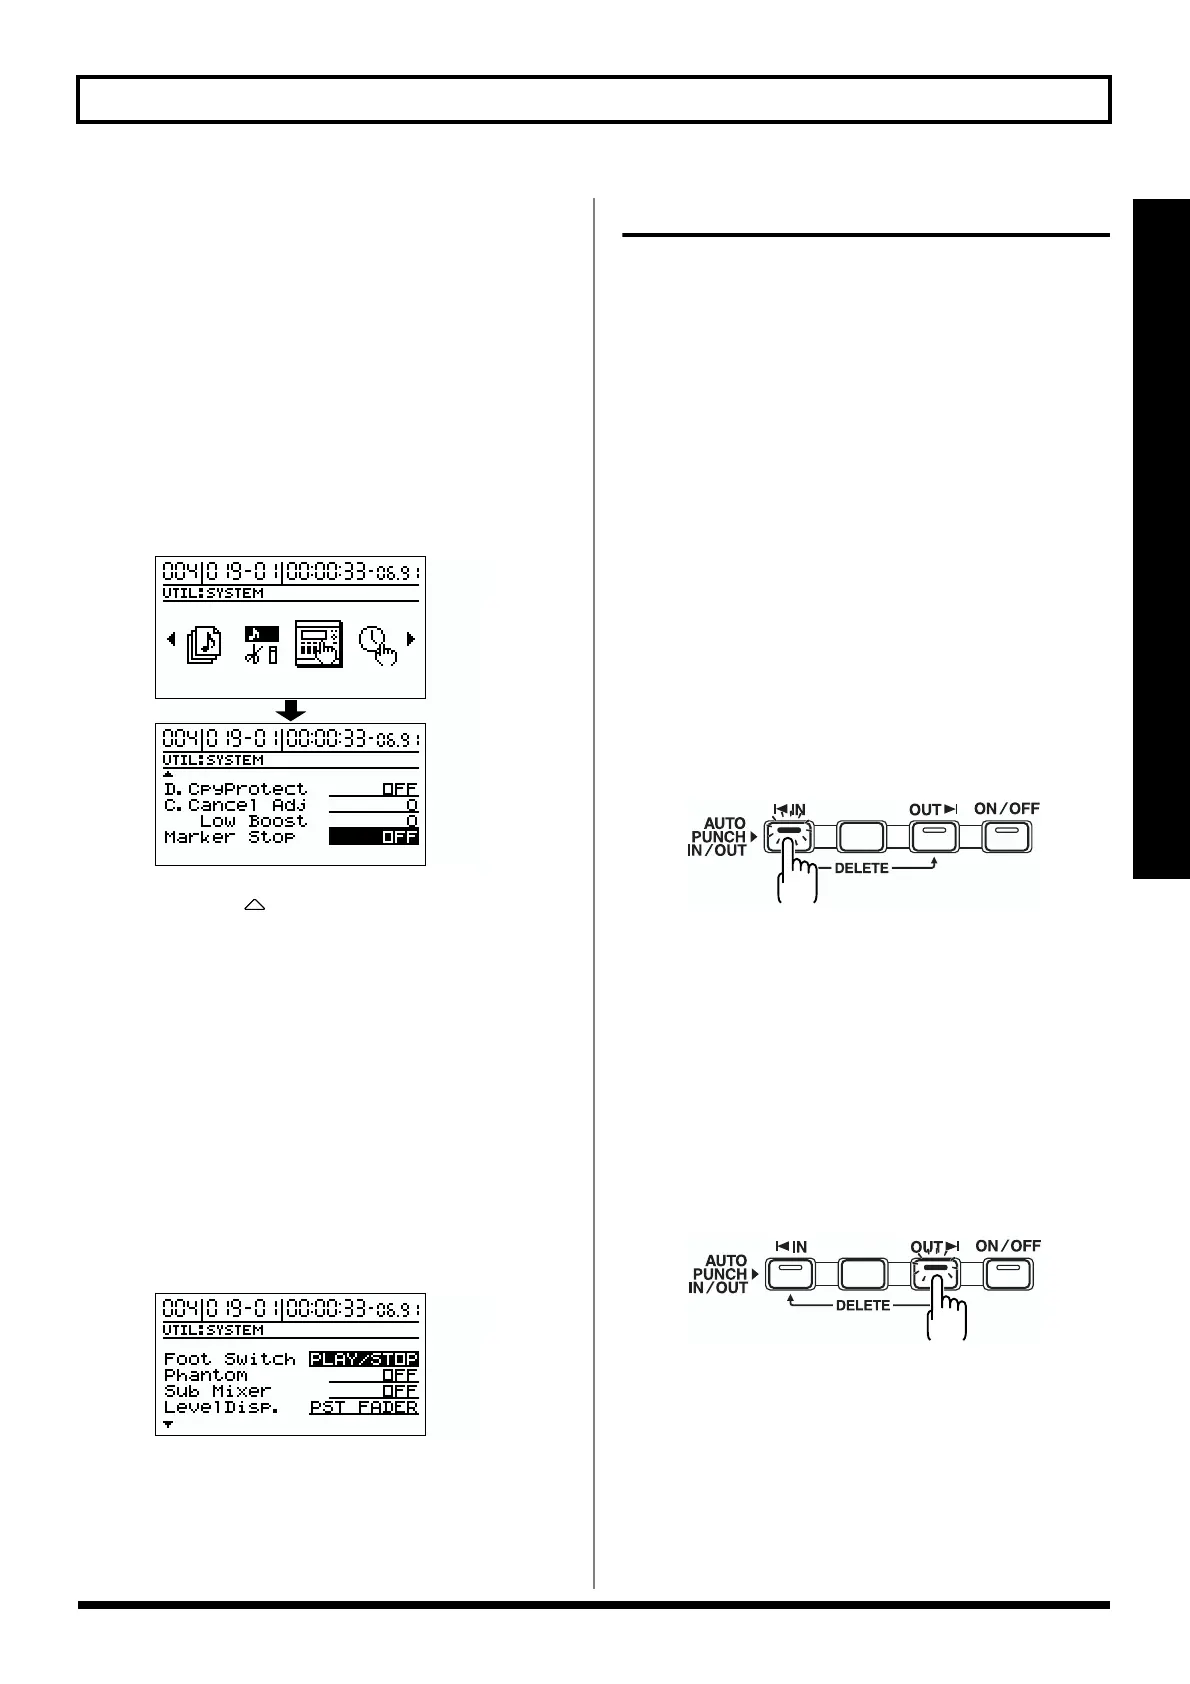
1. Press [UTILITY].
2. Use [CURSOR] to select the “SYSTEM” icon, and press
[ENTER].
fig.R01-03
3. Use CURSOR [ ] to move the cursor to the “Foot
Switch” location, and use the TIME/VALUE dial to
select “PUNCH I/O.”
Foot Switch
This is the parameter for setting the function of the foot
switch connected to the FOOT SWITCH jack.
PLAY/STOP:
The song will alternate between play and stop each time
you press the foot switch.
PUNCH I/O:
The foot switch will have the same function as [REC].
Use this to switch between record and playback during
manual punch-in recording.
fig.R01-04
4. Press [EXIT] several times to return to the top screen.
Auto punching in and out
Automatically punching in and out at predetermined
locations (or times) in the song is referred to as “auto
punching in/out.” When you want to punch in and out at
accurate times or when you want to concentrate on playing
rather than punching in and out manually, the auto punch
in/out function is very useful.
* You can use the Undo function (p. 75) to revert to the
condition before re-recording.
Specifying the area for recording
Before you begin recording, you must register the locations
at which punch-in and punch-out will occur automatically.
1. Register the location where you want to punch in.
Move to the location where you wish to punch-in. Press
AUTO PUNCH IN/OUT [IN], and the current location
will be registered as the punch-in location. At this time,
the [IN] indicator will light, showing that the punch-in
location has been registered.
fig.R01-05
* After setting the punch-in location, you can jump to the
punch-in location by pressing this button.
* To re-do the registration, hold down [DELETE] and press [IN].
The registration will be cleared, and the indicator will go out.
2. Register the location where you want to punch out.
Move to the location where you wish to punch-out. Press
AUTO PUNCH IN/OUT [OUT], and the current
location will be registered as the punch-out location. At
this time, the [OUT] indicator will light, showing that the
punch-out location has been registered.
fig.R01-06
* After the punch-out location is set, you can press this button
to automatically jump to the punch-out location.
* To re-do the registration, hold down [DELETE] and press
[OUT]. The registration will be cleared, and the indicator will
go out.
* At least 0.5 seconds are required between a punch-in and the
punch-out. It is not possible to set the punch-out point less
than 0.5 seconds after the punch-in point.


 To Next Page