50
Putting multiple tracks together—Bouncing
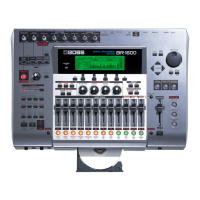
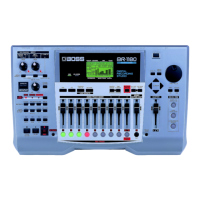
Although the BR-1180/1180CD allows the simultaneous
playback of ten tracks, when you run out of tracks, the BR-
1180/1180CD also lets you copy the recordings of multiple
tracks together onto one track (V-Track).This is called
“bouncing” (also known as bounce recording or ping-pong
recording). By combining multiple tracks in this way, you
can free up other tracks in order to record additional
performances.
* For example if you are bouncing to two tracks in stereo, you
will be able to play back the tracks that are not recording
destinations; i.e., you will be able to play back eight tracks
simultaneously during bounce recording.
The following example explains how to record tracks 1 and 2
in mono, mix it with a performance recorded in stereo to
tracks 3 and 4, then bounce and record these to tracks 9/10.
1. Set the pan for tracks 1 and 2 to the locations you
desire, set the pan for track 3 all the way to the left
(L100), and the pan for track 4 all the way to the right
(R100).
“Setting the left-right positioning (pan) of the sound” (p. 40)
2. Play back the song and adjust the volumes for the four
tracks using the REC TRACK faders.
The overall volume is adjusted by the MASTER fader. At
this time, raise the volume as high as possible without
allowing the sound to distort.
For the tracks (5–8) that you do not wish to mix, you can
either lower the faders or use [TRACK MUTE] to mute
them (p. 38). However, if these tracks did not contain
any recorded performance, this step is not necessary.
Also, if you don’t want to include the Rhythm Guide and
Loop Phrase sounds in the mix, lower the fader for track 11.
* During bounce recording, the sound of the Loop Effect (p. 40)
will also be mixed in and recorded.
3. Press [REC MODE] to switch the recording mode to
BOUNCE.
The BOUNCE indicator will light.
The [INPUT SELECT] indicator goes out, and the input
source is automatically muted. This means that the input
source will not be mixed in and recorded during bounce
recording. However if you want to mix in the input
source during bounce recording, you may use the
INPUT SELECT buttons to select the input source.
In addition, REC TRACK [9/10] are automatically
specified as the recording-destination stereo tracks at
this time. Furthermore, the lowest-numbered of the
available open V-tracks for the track is selected.
If there are no unused V-tracks, V-track 8 will be
selected. In this case, the REC TRACK indicator will light
alternately in orange and green, indicating that a track
that already contains recorded data is selected as the
recording destination.
If you wish to change the recording destination track,
use the REC TRACK buttons to do so.
If you wish to bounce-record to mono (a single track),
press the REC TRACK button to specify one of the stereo
tracks that are currently selected as the recording
destination.
Furthermore, since tracks 9/10 are linked as a stereo
pair, you cannot select them as monaural tracks.
4. After the current position returning to the beginning of
the song, press [REC] and then [PLAY] to start the
bounce recording.
5. When you finish recording, press [STOP].
6. Check the recording of the sounds bounced to tracks 9/10.
In this case, we want to hear only the sound that was
recorded on tracks 9/10, so either lower the TRACK
faders of tracks 1–4 or use the TRACK MUTE button to
mute them.
The V-tracks of the bounce destination tracks (9/10) will
be assigned names of “BOUNCE.” V-tracks are
automatically assigned a name only when that V-track is
recorded for the first time. You can change this name
later if desired.
To change the name, refer to “Naming a track” (p. 49).
If you have selected stereo tracks other than tracks 9/10
as the bounce destination, set the panning for the tracks
so that one is panned completely to the left and the other
completely to the right.
7. Press the [PLAY] button to play back tracks 9 and 10.
8. If you are satisfied with the result of bouncing, press
[REC MODE] to set the recording mode to INPUT so
that you can record additional performances.
At this time the INPUT indicator will light.
When you switch the recording mode from BOUNCE to
INPUT, the tracks (1–8) that were not selected as the
bounce destination (9/10) will be automatically switched
to the lowest-numbered of the unused V-tracks, in
preparation for the next recording.
When bouncing tracks, you can have the insert effects be
applied to specific tracks, or to all of the tracks.For more
details, refer to “Changing the insert effect connections” (p. 55).


 To Next Page