97
Using loop phrases
Advanced Use
2) Move the cursor to “DEL” or “ERASE,” then press
[ENTER].
The loop phrase is erased from the rhythm arrangement.
When “DEL” is selected:
Loop phrases following the erased loop phrase are
shifted forward.
When “ERASE” is selected:
The location of the erased loop phrase is left blank. There
is no change made to other loop phrases.
When you want to add a loop phrase
You can use the following procedure to insert a new loop
phrase between existing loop phrases.
1) Use [CURSOR] to move the cursor to “MEASURE,”
then rotate the TIME/VALUE dial to select the measure
where you want to have the loop phrase inserted.
2) Move the cursor to “INS,” then press [ENTER].
An “EMPTY” loop phrase is inserted, and any loop
phrases following the inserted loop phrase are moved
back.
3) Move the cursor to the loop phrase number, then rotate
the TIME/VALUE dial to select the loop phrase to be
inserted.
10.When you have finished making the settings, press
[EXIT] to return to the original screen.
11.Press [RHYTHM ON/OFF] several times until the
indicator lights up or flashes, then press [PLAY].
The loop phrase is performed in time with the playback
only while the recorder is playing back the data.
12.To save the edited settings, use the steps 10–11 (p. 84) in
the following section “Creating rhythm arrangements.”
Copying loop phrases arranged in
rhythm arrangements to audio tracks
If you have loop phrases arranged in the current rhythm
arrangement, you can copy those loop phrases to the audio
tracks as a single set of audio data.
* Only the loop phrases can be copied. You cannot copy the
rhythm patterns.
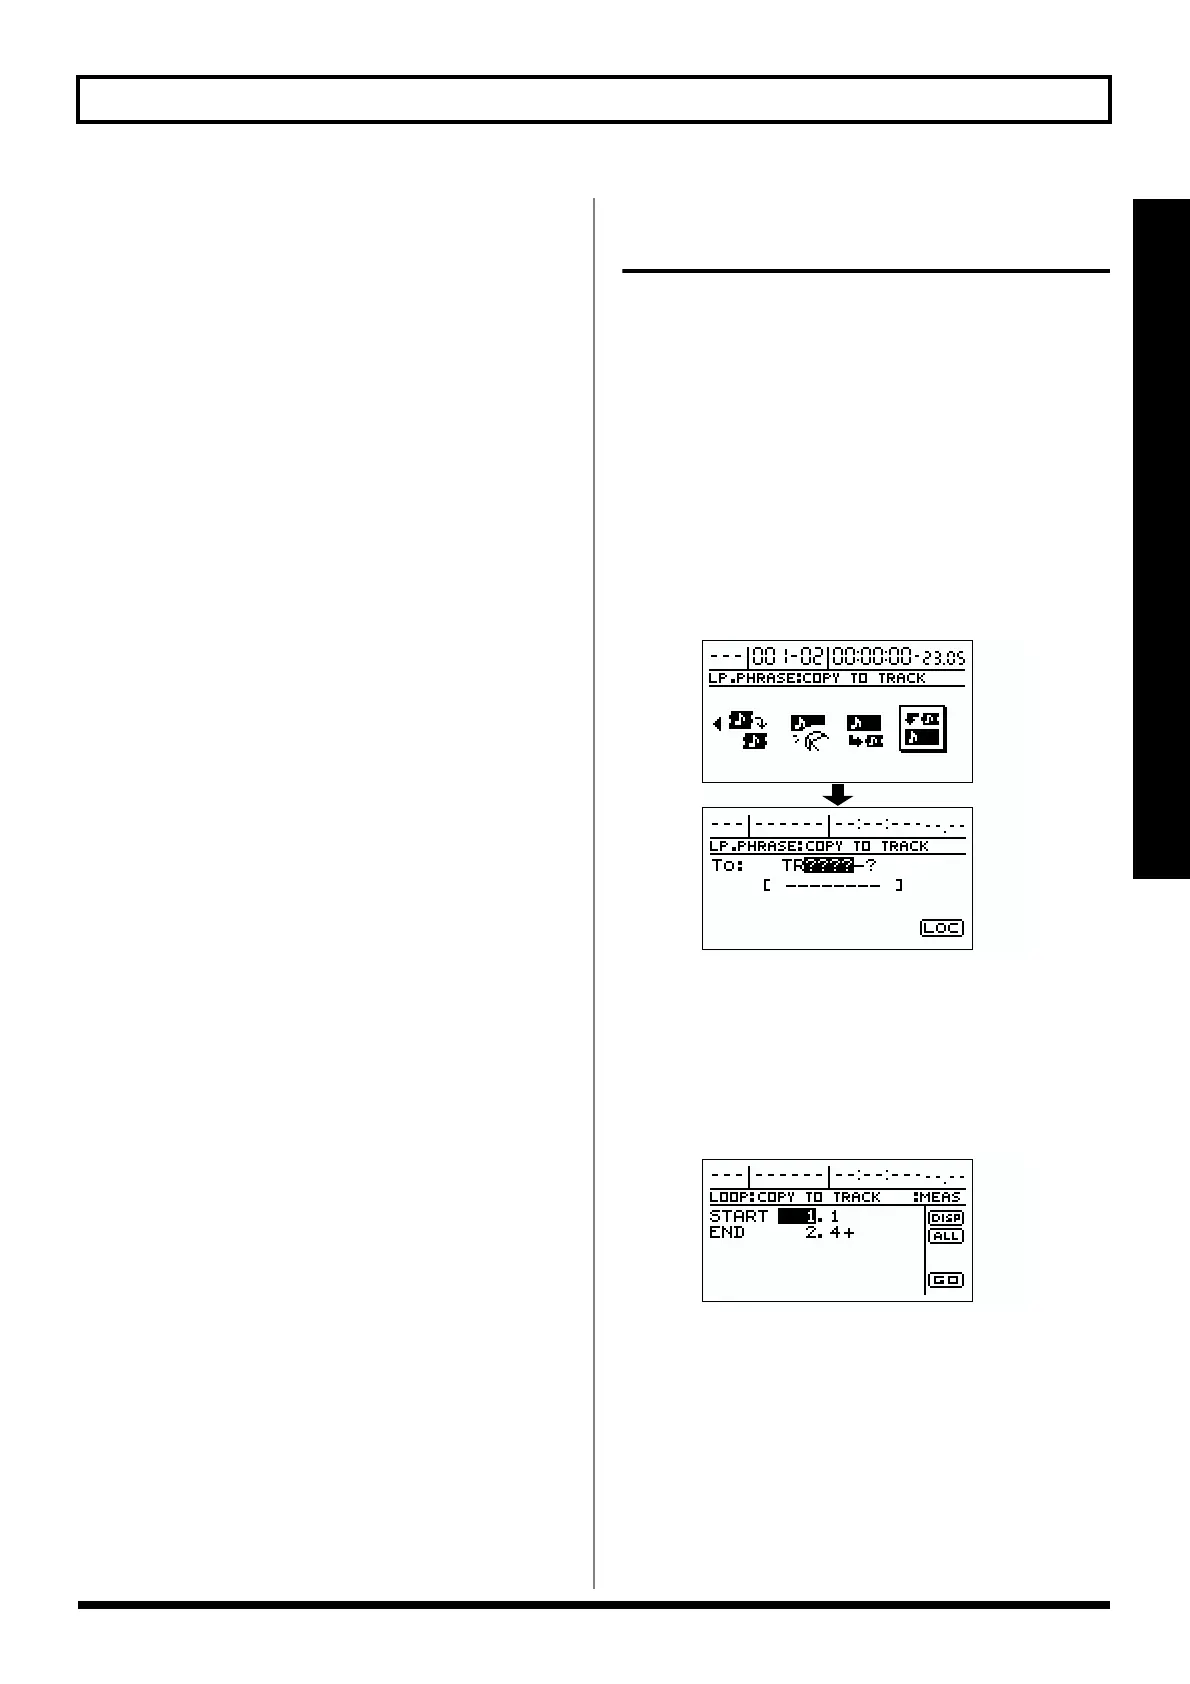
1. Press [LOOP PHRASE IMPORT], causing the button to
light up.
2. Use [CURSOR] to select the “COPY TO TRACK” icon,
then press [ENTER].
The screen for selecting the copy-destination track
appears.
fig.R14-50
3. Use [CURSOR] and the TIME/VALUE dial to select the
copy-destination track.
4. Move the cursor to “LOC,” then press [ENTER].
The screen for setting the time range to be copied
appears.
fig.R14-51
5. Use [CURSOR] and the TIME/VALUE dial to set the
range to be copied.
At this time, you can select “DISP” and press [ENTER] to
switch between ways to specify the location (measures,
time, markers).
 Loading...