49
Utilizing the V-Tracks
Advanced Use
Naming a track (Track Name)
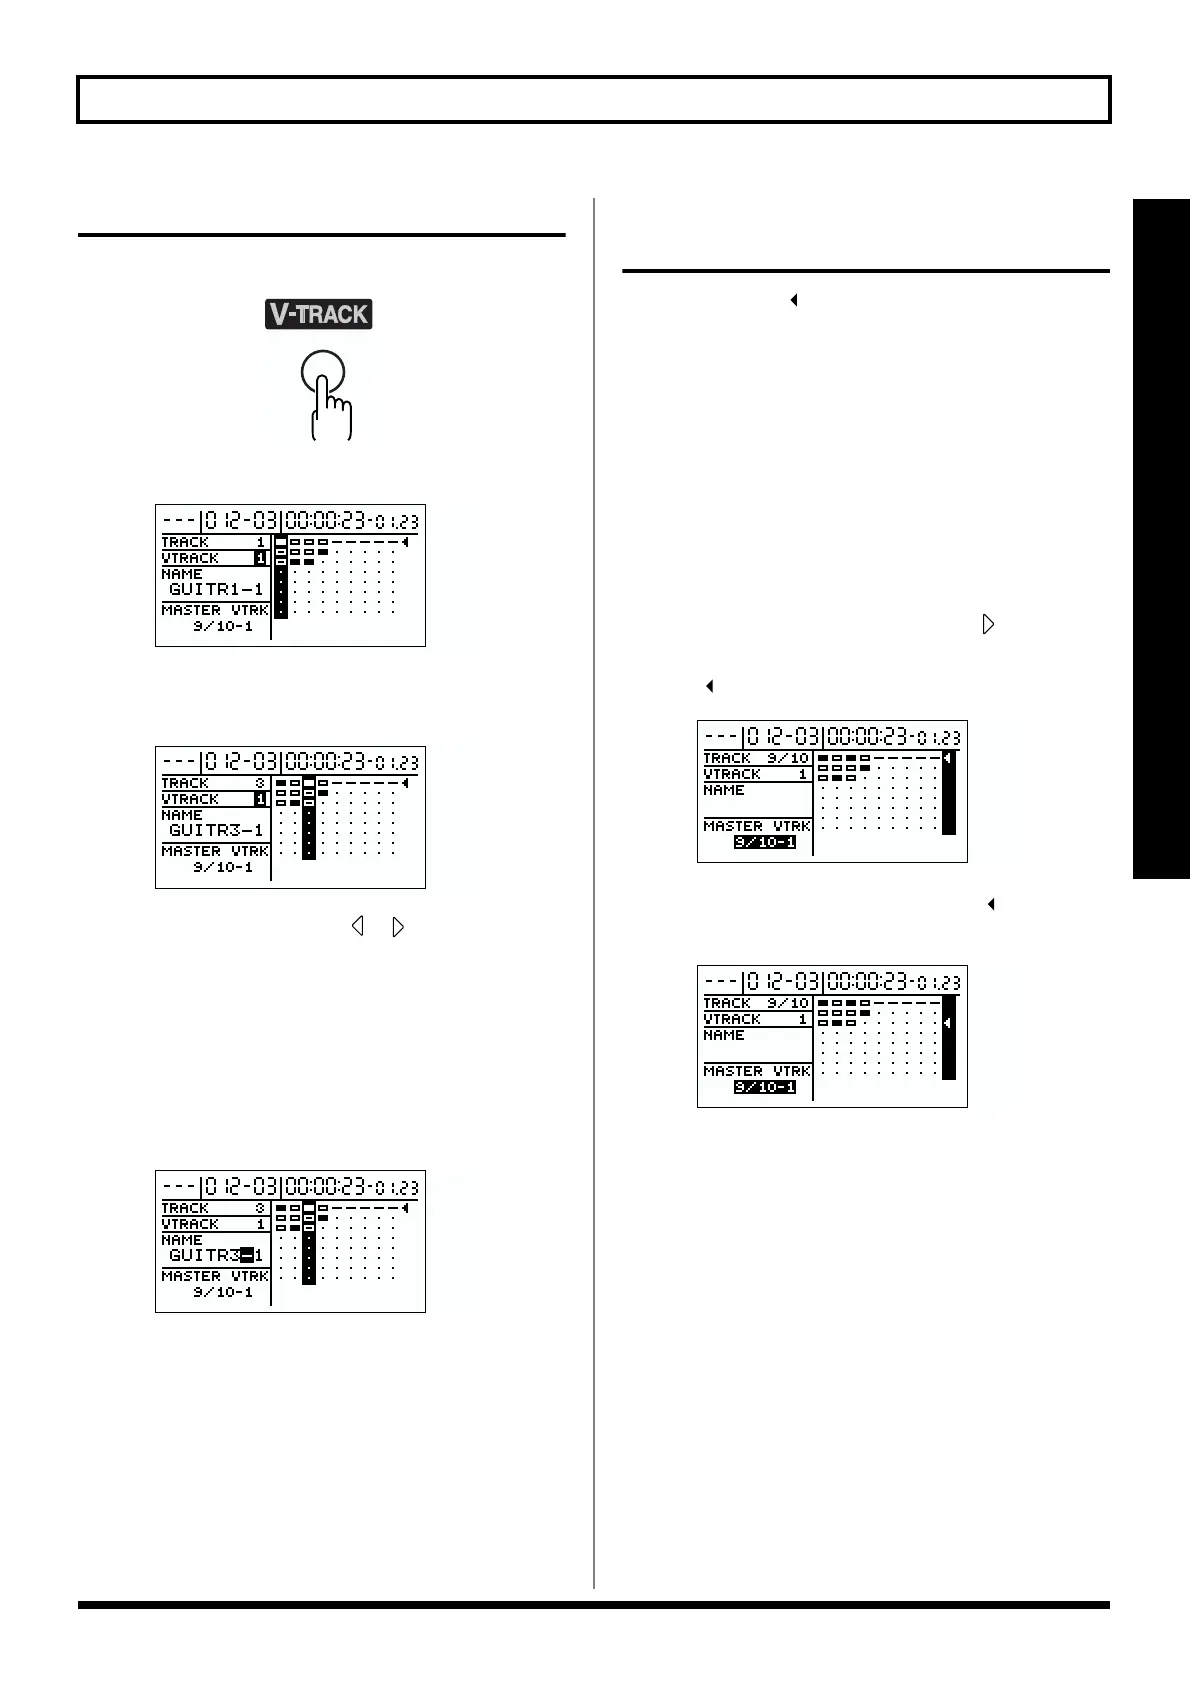
1. Press [V-TRACK] to access the V-track screen.
fig.R02-01
The V-track screen will appear.
fig.R02-02
2. Use [CURSOR] and the TIME/VALUE dial to select the
V-track that you are going to name.
fig.R02-04
* In addition to using CURSOR [ ] [ ] to change the track
selected, you can also select a track directly with the REC
TRACK buttons.
The name of the currently selected V-track appears at the
screen’s center left.
3. Use [CURSOR] to move the cursor to the location
within the name that you wish to change, and use the
TIME/VALUE dial to change the character.
fig.R02-06
4. When you have finished changing the track name,
press [V-TRACK] or [EXIT].
This returns you to the top screen.
Changing the final mastering
tracks
In Mastering Mode, automatically appears next to V-
tracks from tracks 9/10 that have undergone final mastering.
These V-tracks are called “final mastering tracks.”
When you create an audio CD after setting the final
mastering tracks, those tracks are selected automatically and
written to the CD-R/RW disc, allowing you to carry out the
process more efficiently.
* For more on mastering, refer to “Creating audio CDs” (p. 99).
When there are multiple mastered V-tracks, use the following
procedure to select the V-tracks you like best as the final
mastering tracks.
1. In the V-Track screen, press CURSOR [ ] to move the
cursor to the far right of the screen.
The “ ” row is highlighted.
fig.R02-50
2. Rotate the TIME/VALUE dial to move “ ” next to the
final mastering tracks.
fig.R02-51
* The selected final mastering track is saved with the song when
the song is saved.
* Note that if you select a different song or turn off the power
without saving the song, the settings will be lost.
* Only track 9/10 V-tracks can be selected as final mastering
tracks.


 To Next Page