86
Using the Rhythm Guide
Creating rhythm patterns
When creating a rhythm arrangement by stringing together
rhythm patterns, there may be times when you do not find
anything suitable among the preset rhythm patterns, or
when you want to get a rhythm pattern that sounds exactly
the way you want. In such cases, you can create your own
original rhythm patterns.
There are two ways to create rhythm patterns.
Realtime Recording
In Realtime Recording, you record while tapping the TRACK
buttons in time with the metronome. Rhythm patterns are
played back repeatedly, and the data being input is mixed in
with these sounds.
Additionally, even if your timing is a little off when tapping
the buttons, you can use the Quantize function to rectify the
input so the timing is correct.
Step Recording
Here, drum sounds are input graphically at the desired
timing, using a grid showing the precise time divisions
within each measure. This lets you input rhythm patterns
easily, while visually confirming your progress toward
creating the rhythm pattern.
Recording preparations
Before starting Realtime Recording or Step Recording, first
select and prepare the pattern to be recorded.
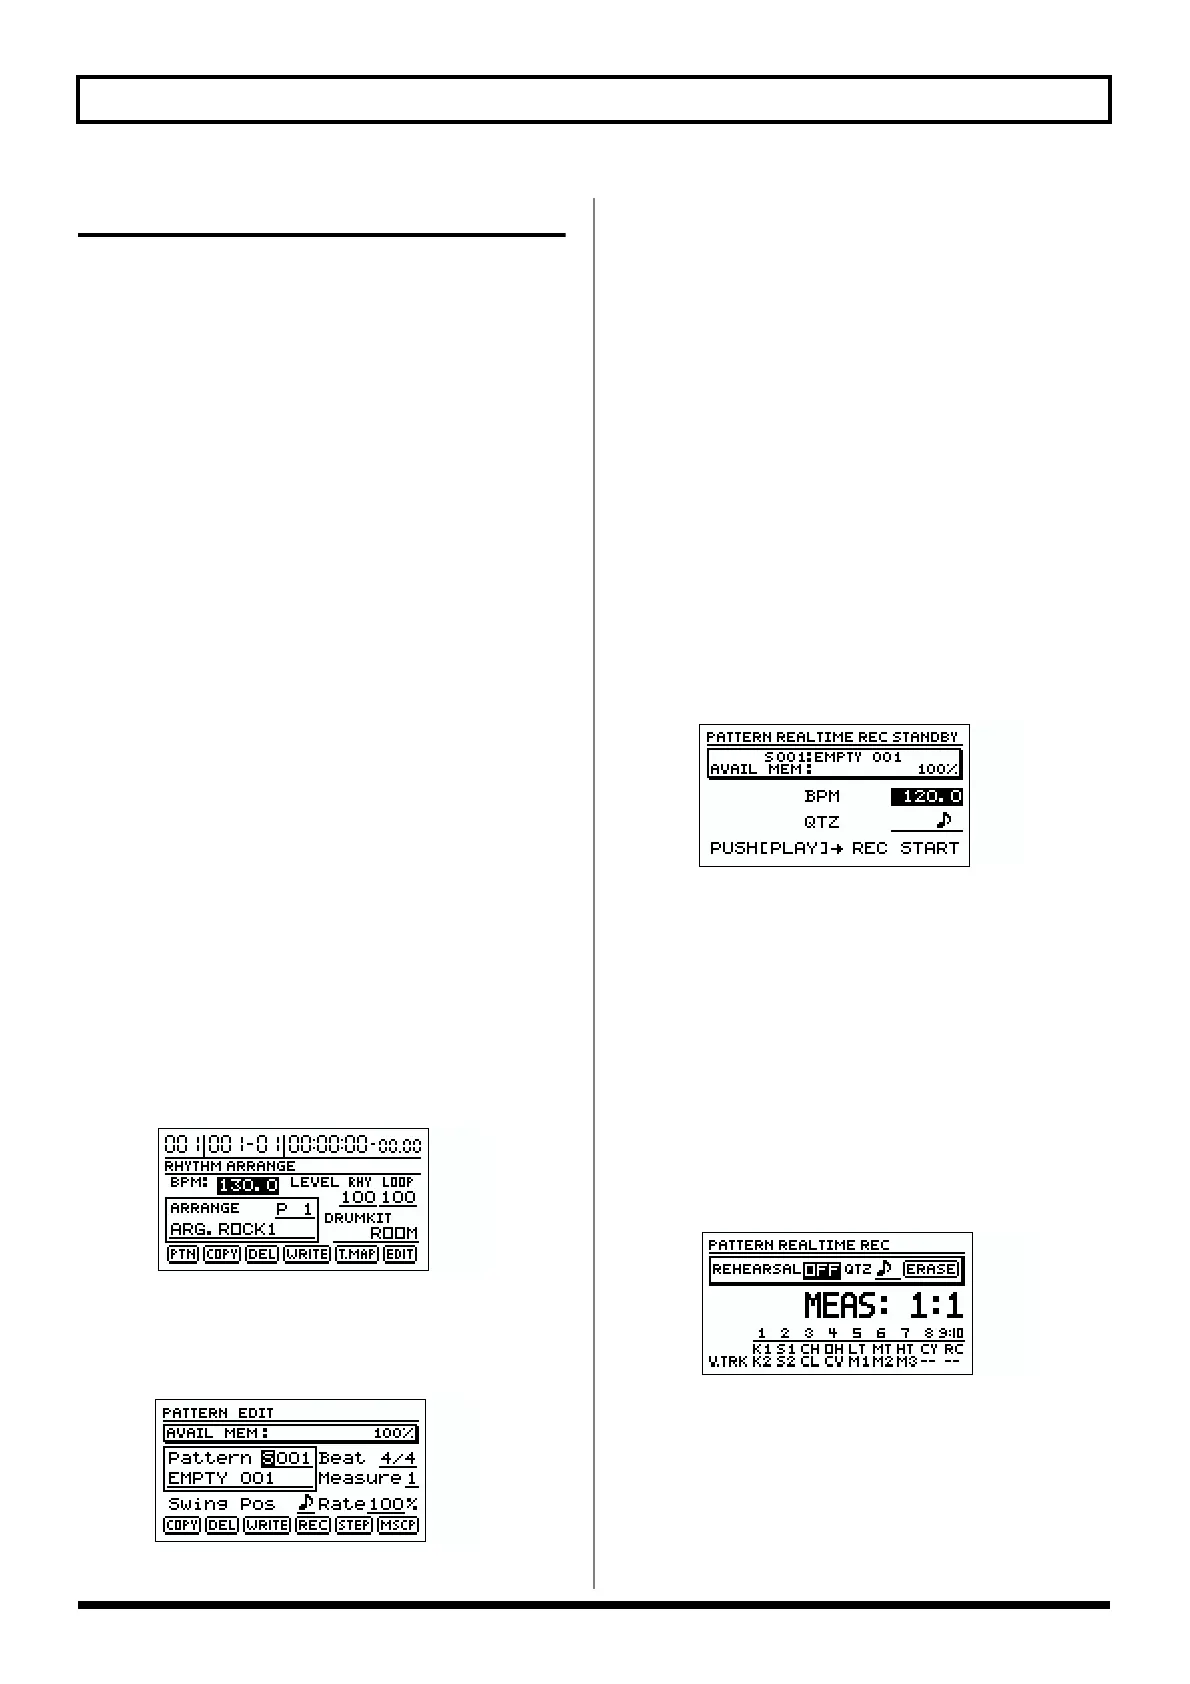
1. Press RHYTHM/LOOP [EDIT], causing the indicator to
light up.
The Rhythm Arrangement screen appears.
fig.R13-04
2. Use [CURSOR] to move the cursor to “PTN,” then press
[ENTER].
The pattern edit screen appears.
fig.R13-08
3. Move the cursor to “Pattern,” and use the TIME/
VALUE dial to select the pattern you want to record.
* If you press [PLAY] at this point, the pattern will play back.
However, as shipped from the factory, the User and Song
Rhythm Patterns contain no data, so no sound will be
produced.
4. Use [CURSOR] and the TIME/VALUE dial to set the
rhythm pattern’s measure count and beat (time
signature).
The rhythm pattern changes to “TMP” in the display.
Creating rhythm patterns using
Realtime Recording
1. After carrying out the steps in “Recording Preparations,”
press [REC].
The Realtime Recording standby screen appears, and the
metronome sound begins to play.
fig.R13-09
2. Use [CURSOR] to move the cursor to “BPM,” and
rotate the TIME/VALUE dial to set the tempo for the
recording.
* The tempo setting here is applied exclusively to the recording.
This tempo is not stored in the rhythm pattern (you cannot
make any individual tempo settings for the rhythm patterns
themselves).
* By pressing [TAP] four or more times at a steady interval, you
can set the tempo so it matches that interval.
3. Press [PLAY].
After a one-measure count, Realtime Recording begins.
fig.R13-71
4. Input the drum sounds using REC TRACK [1]–[9/10]
and [V-TRACK].


 To Next Page