67
Editing the performance—Track Editing
Advanced Use
The Track Copy screen appears, allowing you to select
the tracks/V-tracks of the copy source and copy
destination.
* If you select the “COPY + INS” icon, first a blank of the
specified length will be inserted into the copy destination, and
then the copy will be performed.
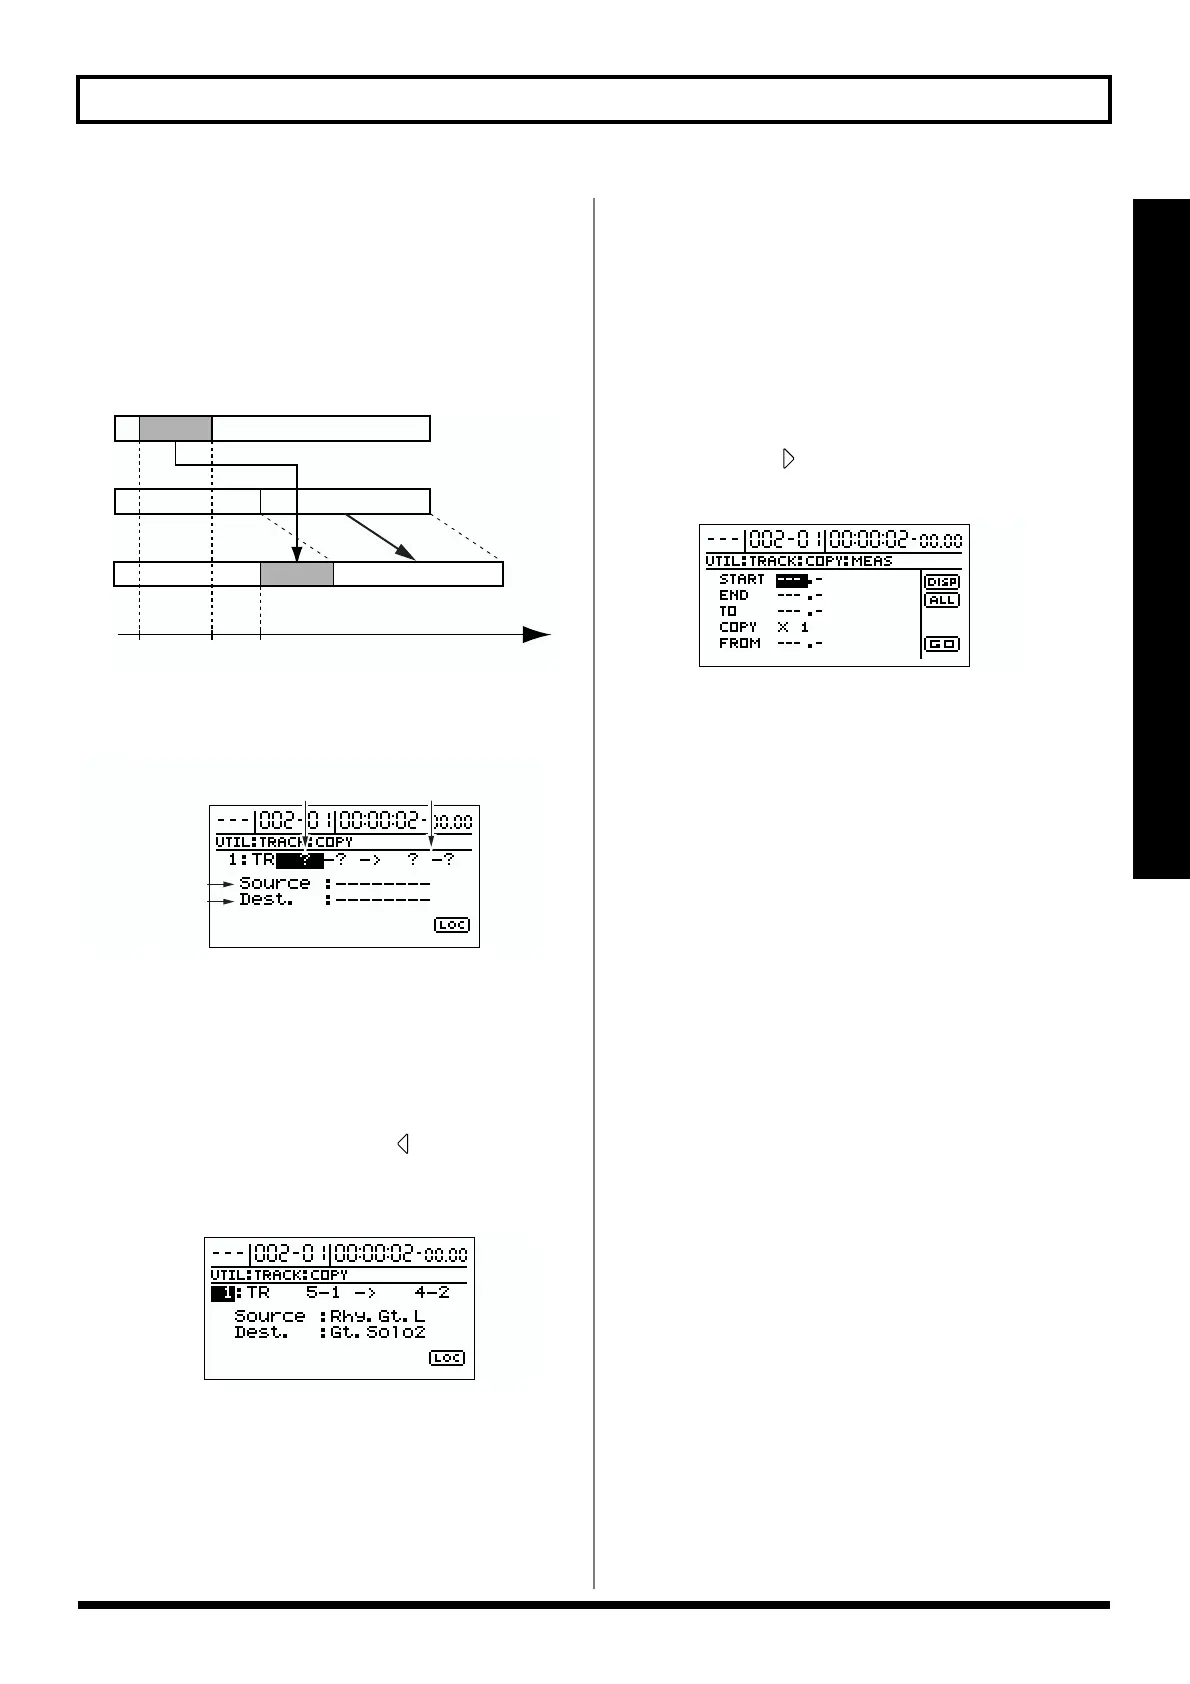
Example 4: Track Copy + Insert
fig.R10-07
* With the Track Move + Insert, you cannot select the same
track for the source and destination.
fig.R10-08
4. Use [CURSOR] and the TIME/VALUE dial to select the
copy-source and copy-destination track/V-track.
* If a name has been assigned to the selected track, the track
name will be displayed.
5. If you wish to copy other tracks with the same settings
(range, location), press CURSOR [ ] several times to
move the cursor to the following location, and rotate
the TIME/VALUE dial.
fig.R10-09(LCD)
Now you can specify another copy source and copy
destination track.
In this case, it is not possible to specify a copy
destination track that coincides with another copy source
track.
If you wish to cancel the copy operation for a track,
rotate the TIME/VALUE dial to the left and make it read
“?.”
* The copy operation will not be executed for a line that contains
even one “?.”
* Tracks 9/10 are stereo tracks; they cannot be selected
individually.
6. Specify the copy range and copy destination location.
Use CURSOR [ ] to move the cursor to “LOC,” and
press [ENTER]. The Track Copy (MEAS) screen appears.
fig.R10-10
At this time, you can select “DISP” and press [ENTER] to
switch between ways to specify the location (measures,
time, markers).
Set the following items.
START (start point):
Specify the starting location of the copy source data.
END (end point):
Specify the ending location of the copy source data.
TO (to point):
Specify the reference location of the copy destination.
FROM (from point):
Specify the location of the copy source in the “TO” point.
Normally you will set this to the same location as the
“START” point.
COPY (copy time):
Specify the number of copies (1–99).
* If, after specifying the above items as time locations, you then
switch to the measure or marker display, a “+” symbol may
appear, indicating that the currently displayed locations are
different than the actual locations. If you are specifying these
items as measure or marker locations, you can eliminate this
discrepancy by using the TIME/VALUE dial in each screen to
specify the location.
* If you want the copy range to be from the beginning of the
song to the end, select the “ALL” icon and press [ENTER].
7. When you have finished making settings, use
[CURSOR] to move the cursor to the “GO,” and press
[ENTER].
The copy is executed.
8. Press [EXIT] several times to return to the top screen.
A
START END TO
A'
Time
copy source
(tracks/V-tracks)
copy destination
name
(copy source)
name
(copy destination)


 To Next Page