12
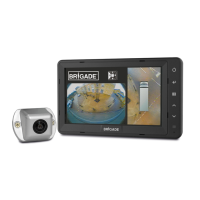
It may be necessary to mount the cameras on a horizontal plane, such as under slung on the vehicle body. When
mounted in this orientation the camera needs to be rotated through 180° on its mounting bracket. Additional drain
holes should be made in the lower corner of the camera housing.
Camera rotated 180° in mount
Camera Mounting Height
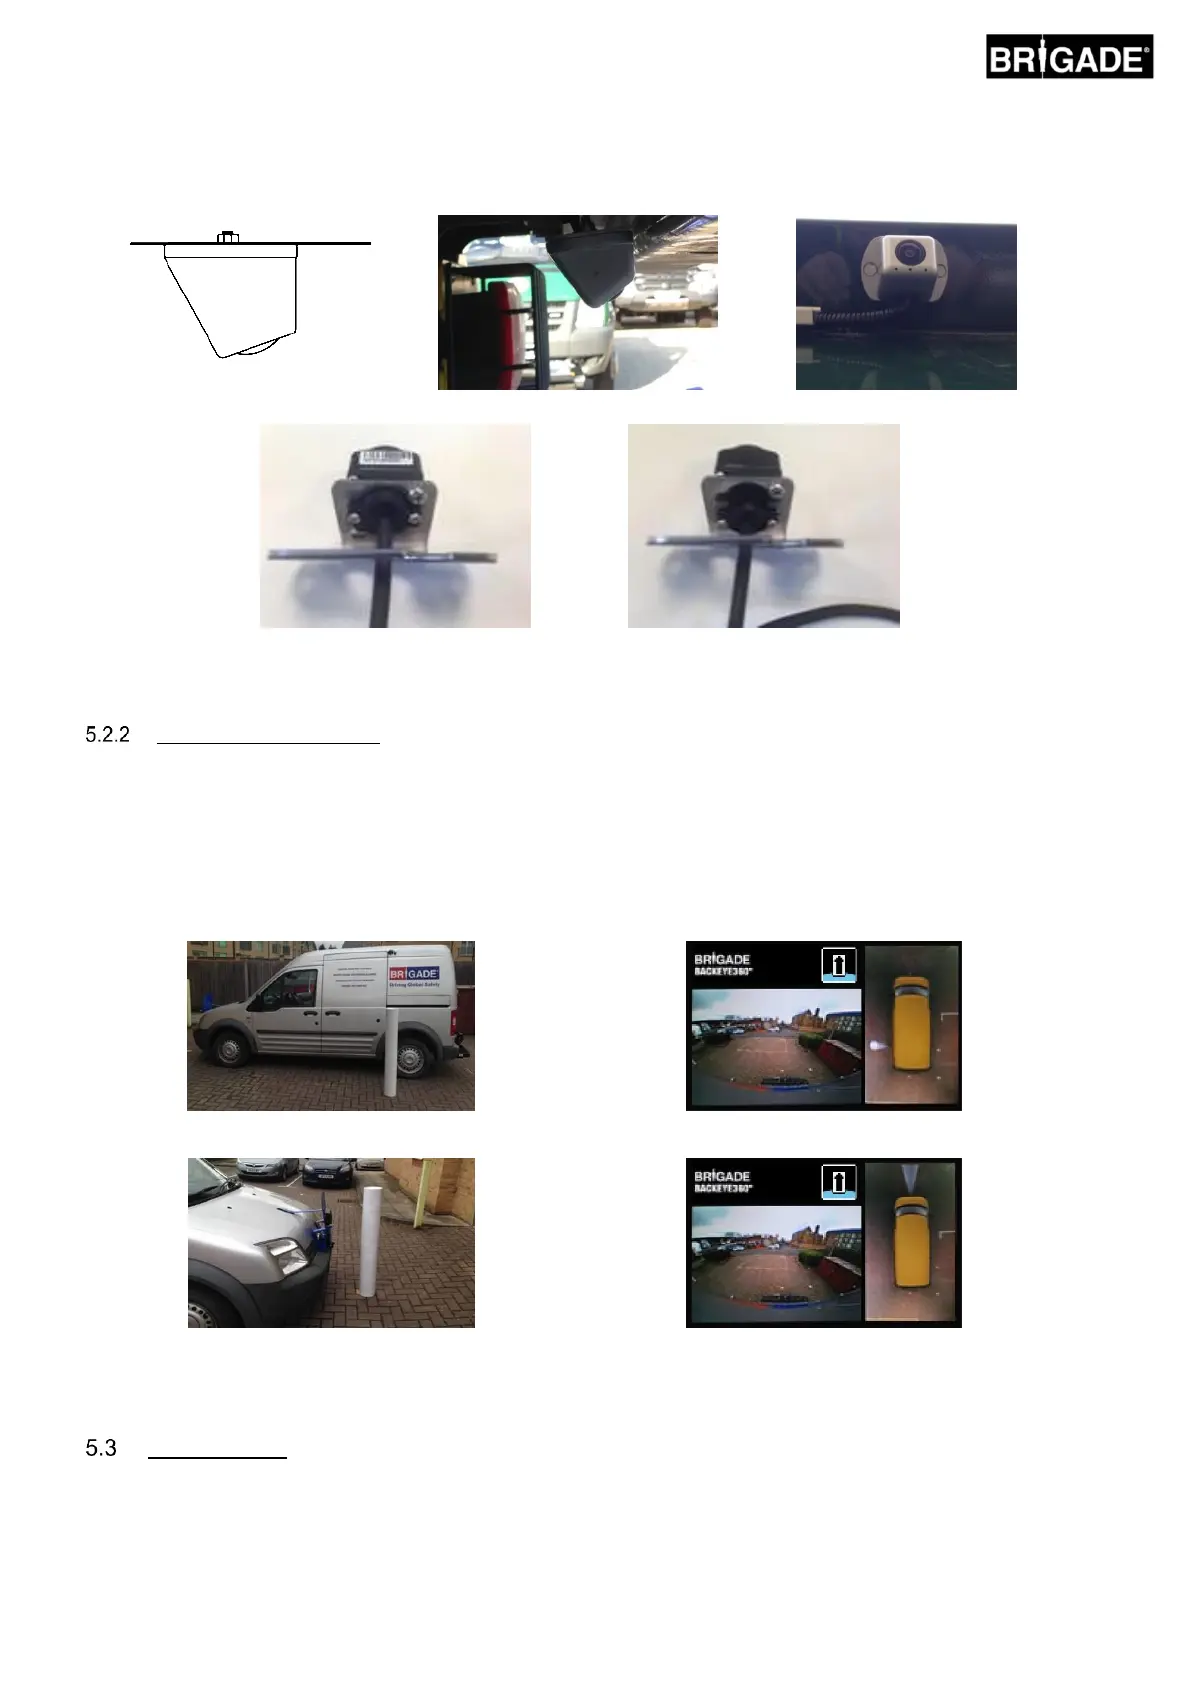
The mounting height of the camera is crucial to the quality of the 360° image. Typically, cameras mounted higher
on a vehicle will produce a better 360° surround view image however the minimum mounting height will be
dependent on a number of variables i.e. the length of the vehicle, the position of the cameras etc. As long as each
camera can see the markers as shown in section 6.2 the system will calibrate, however the overall performance
may not be deemed suitable. Cameras mounted too low will affect the perspective of objects above ground level. In
the image below the 1m pole appears as expected on the side cameras where the mounting height is good but
appears distorted for the front camera that is mounted at 0.6m:
1m long pole below a camera mounted at 1.8m
Top of pole seen from a top view perspective
1m long pole in front of a camera mounted at 0.6m
Full length of pole seen from a top view perspective
Cable Routing
Camera cables should be run in conduit and along suitable cable runs throughout the vehicle. Avoid running cables
with vehicle power cables to prevent possible interference. To prevent cable damage always allow a reasonable
radius when folding excess cable and do not over tighten cable ties. Note: a 13mm hole is required to pass connectors
through.