Do you have a question about the CAME BKV Series and is the answer not in the manual?
Important safety instructions for installers. Follow all instructions to avoid serious bodily harm.
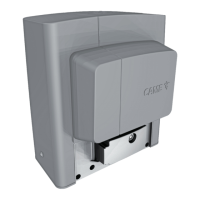
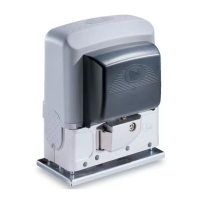
This operator is designed for sliding gates in apartment block and industrial settings.
Specifies maximum gate leaf length, weight, and pinion module for different models.
Details protection rating, power supply, motor voltage, consumption, power, temperature, thrust, speed.
Provides external dimensions of the operator unit for installation planning.
Illustrates the typical components and their placement for a standard gate installation.
Lists and identifies all parts included in the operator system with corresponding numbers.
Emphasizes that only skilled, qualified staff should install the product.
Ensures slide-guides are friction-free, mechanical stops are present, and mounting surface is solid.
Provides cable length and type recommendations for power supply, photocells, and controls.
Guides through the physical installation process of the gate operator system.
Instructions for digging a hole and setting up tubes for wiring from the junction pit.
Guides on setting up a foundation frame, sinking it, and reinforcing it with an iron cage.
Steps to place the operator on the anchoring plate and manage cable passage.
Procedure for adjusting rack-and-pinion coupling distance or fastening the rack.
Using threaded feet to adjust coupling distance for smooth gate operation.
Completing the adjustment and fastening the gearmotor to the plate.
Instructions for setting mechanical limit switches for opening and closing operations.
Guide for setting magnetic limit switch tabs for opening and closing operations.
Overview of the control board and its functions, including fuse types and connections.
Detailed list and identification of all terminals and connectors on the control board.
Instructions for connecting all wires and cables in compliance with legal requirements.
Setting the line voltage input and accessories power supply output.
Wiring guide for flashing lights and gate state warning output.
Details on connecting stop buttons, opening/closing controls, and radio receivers.
Covers configuration of safety devices like photocells and safety tests.
Guides on configuring photocell inputs for various safety functions like reopening or obstruction.
Procedure to verify the functionality of safety devices after each command.
Configuration for sensitive safety-edges, including clean contact or 8K2 resistor types.
Setting up one or two sensitive safety-edges for reopening or reclosing functions.
Instructions for plugging in and configuring wireless accessories with the RIOCN8WS module.
Guides on viewing date/time and setting auxiliary contacts to function at preset times.
Enables system control and configuration via remote or onsite connection.
Connecting RGSM or UR042 module using CAT 5 cable for remote system management.
Connecting CAME KEY for onsite control and configuration via PC, tablet, or smartphone.
Connecting two operators for single control using CAT 5 cable and RSE card.
Saving and uploading user data, settings, and configurations using the Memory Roll.
Guides through initial procedures like language selection, system type, and opening direction.
Details on using programming commands, ESC, <>, and ENTER keys.
Explains the function of each command button used in the programming menus.
Interprets the various icons and symbols displayed on the control board's screen.
Overview of the main configuration sections and their parameters.
Adjusting opening direction, motor test, type, speed, and slow-down parameters.
Setting opening/closing speeds, slow-down points, and obstruction sensitivity.
Configuring inputs for safety devices like photocells and sensitive safety-edges.
Associating RIO-EDGE and RIO-CELL wireless safety devices with specific functions.
Setting the function for command input 2-7, e.g., step-by-step or sequential.
Configuring maintained action, output B1-B2, and obstruction removal features.
Adjusting automatic closing waits, partial closing, and pre-flashing times.
Configuring gate open warning lights and courtesy lights.
Configuring RSE1/RSE2 connectors for combined or CRP modes and communication speed.
Saving and reading data to/from the memory roll for configuration backup.
Referencing the commissioning chapter for the guided procedure setup.
Accessing the user management menu to add or remove users.
Procedure for adding up to 250 users and associating commands with them.
Steps to select and delete a specific user from the system.
Procedure to delete all users from the system after confirmation.
Setting the radio-frequency coding type for transmitters (all, rolling, TW key block).
Selecting the accessory type for operator control (Transponder or Keypad).
Changing the command associated with an added user.
Viewing FW version, maneuver counters, and setting maintenance intervals.
Restoring initial settings, excluding radio frequency and motor type.
Displaying the last eight errors chronologically for troubleshooting.
Using commands like Open, Close, Stop for testing procedures.
Choosing the preferred language for the operator interface.
Setting up a password to protect access to the main menu and configuration.
Procedure to remove the existing password protection from the control board.
Steps to change the existing password for accessing the main menu.
Accessing the timer menu, available with SIPA06 control board.
View the current date and time displayed on the system.
Instructions for setting the day, month, year, hour, minutes, and seconds.
Enabling or disabling automatic adjustment for Daylight Saving Time.
Switching between 24-hour clock and 12-hour clock (am/pm) format.
Setting operating times for functions like Open, Partially open, or Output B1-B2.
Procedure to delete a timer that has been previously created.
List of simplified functions accessible via the 'F' menu.
Instructions for saving and reading data to/from the Memory Roll.
Details on wiring, programming, and operating modes for combined gate systems.
Connecting two operators and control boards for combined operation.
User entry procedure must be performed only on the MASTER control board.
Configuring the MASTER control board for combined system operation.
Describes STEP-STEP, ONLY OPEN, and PARTIAL OPENING commands for dual leaves.
Lists common error messages, their causes, and recommended fixes for the operator.
Fastening cables, fitting the control board cover, and securing operator casing screws.
Environmental guidelines for disposing of packaging and the operator unit responsibly.
| Brand | CAME |
|---|---|
| Model | BKV Series |
| Category | Gate Opener |
| Language | English |