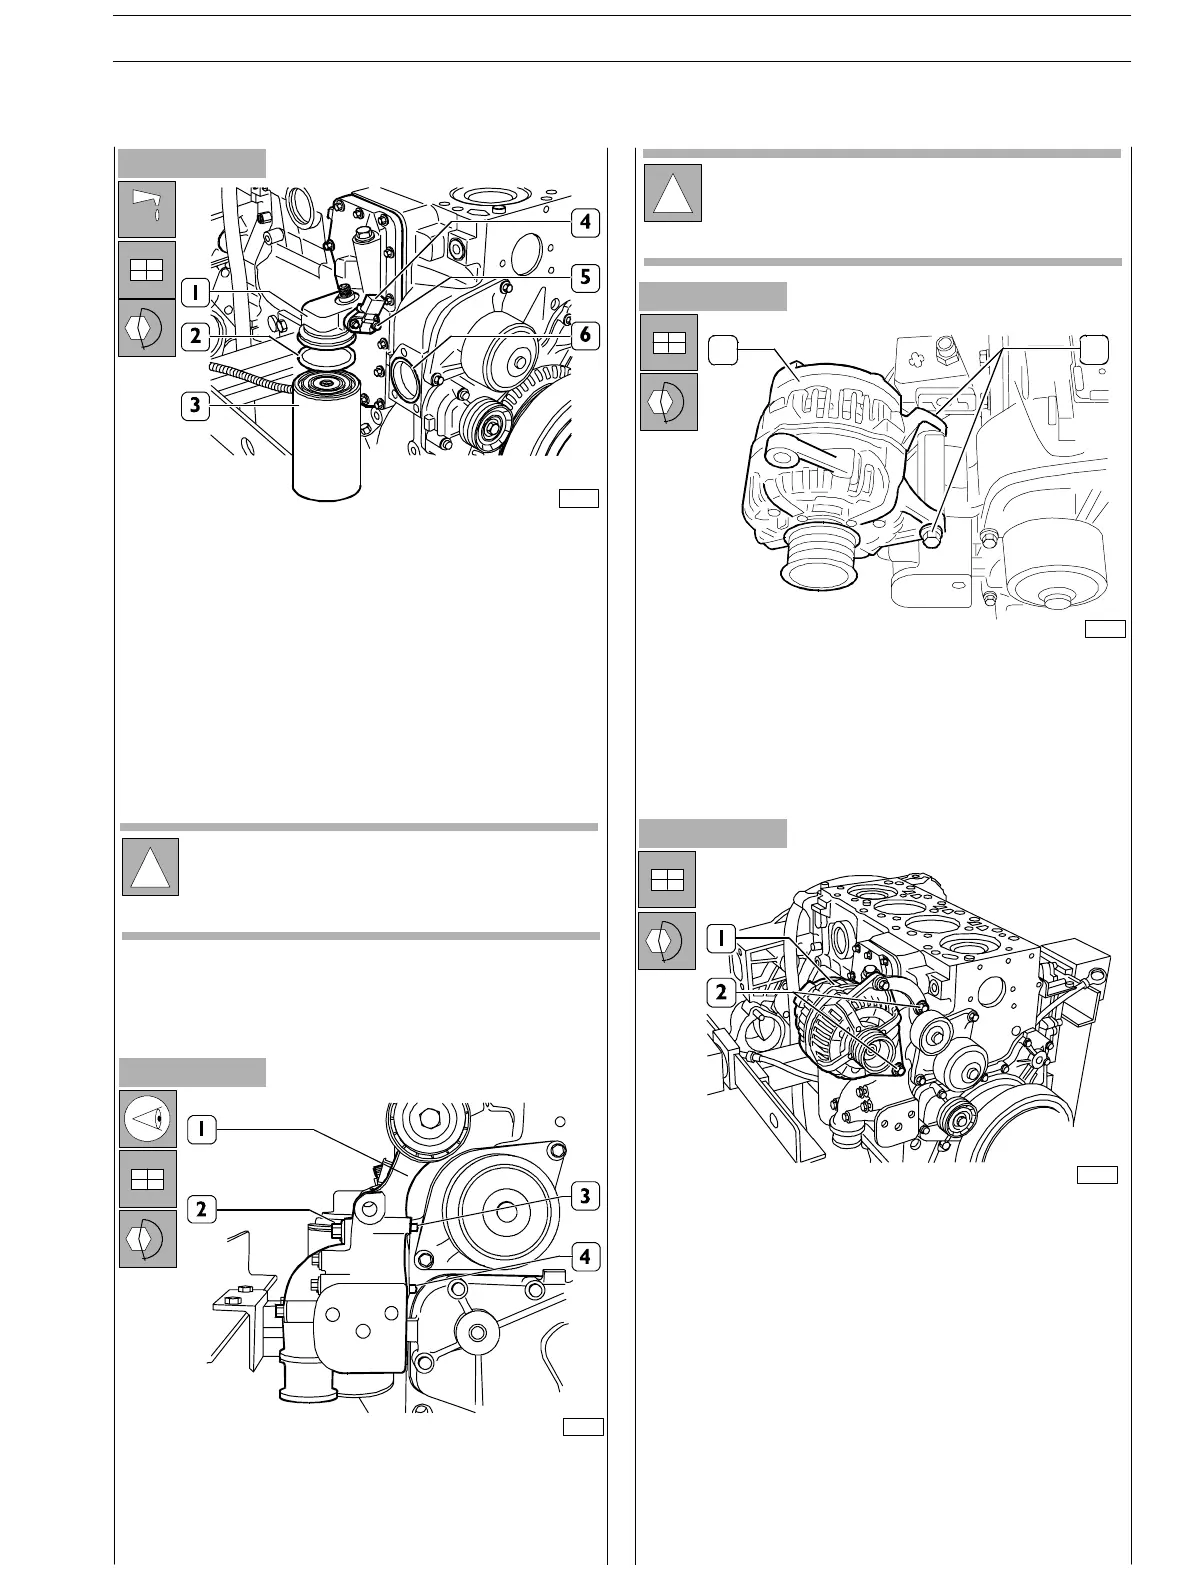
Figure 168
Figure 169
- Lubricate the fixing ring (2) using engine oil and place it
on the oil filter (3).
- Manually start the oil filter (3) on the bearing union (1)
until counter−boring, further screw up the oil filter (3)
by 3/4 turn.
- Apply, (if needed) new fixing ring on the oil
temperature/pressure sensor (4) and assemble it to the
bearing (1) tightening the fixing screws to t h e prescribed
couple.
- Tighten the screw (5) and lock it t o the prescribed
couple.
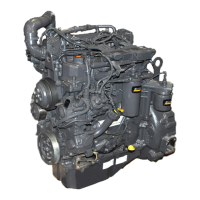
- Assemble the alternator bearing (1) ensuring that the
pins (3 and 4) are against the engine block.
- Tighten the screws (2) and lock them to the prescribed
couple.
Figure 170
- Place a new fixing ring on the block housing (6).
Figure 171
76113
!
In some applications, the bearing of the exchanger
shall be assembled to a screw threaded un ion
connected to the filter on the opposite side of the
engine, t hroughout two pipelines (see Figure 105).
70234
!
Before assembly, always check that the threads of the
ports and of the screws have no evidence of tear and
wear nor dirt.
12
75686
- Reassemble the alternator (1).
- Tighten the screw (2) and lock it t o the prescribed
couple.
74177
- Refit the alternator (1).
- Tighten the screw (2) to the specified torque.
SECTION 3 − DUTY − INDUSTRIAL APPLICATION E NG I NE S
55
ED. FEBUARY 2003
zs