VeriFast
TM
MicroView 1.0 – User Manual – Version 1.9
33
To access and teach the parameters/positions for robot applications using the Step Thru Teach
Screen, do the following:
1. Before using the Step Thru Teach Screen, access the Teach screen (see Teach Screen
section on page 31).
2. (While on the Teach screen) Select the device (Device 1 or Device 2). Ensure that the desired
device remains selected.
3. (While on the Teach screen) Select, name, and/or rename the desired schedule. Ensure that the
desired schedule remains selected.
4. (While on the Teach screen) Press on the
button. The screen below will be
displayed.
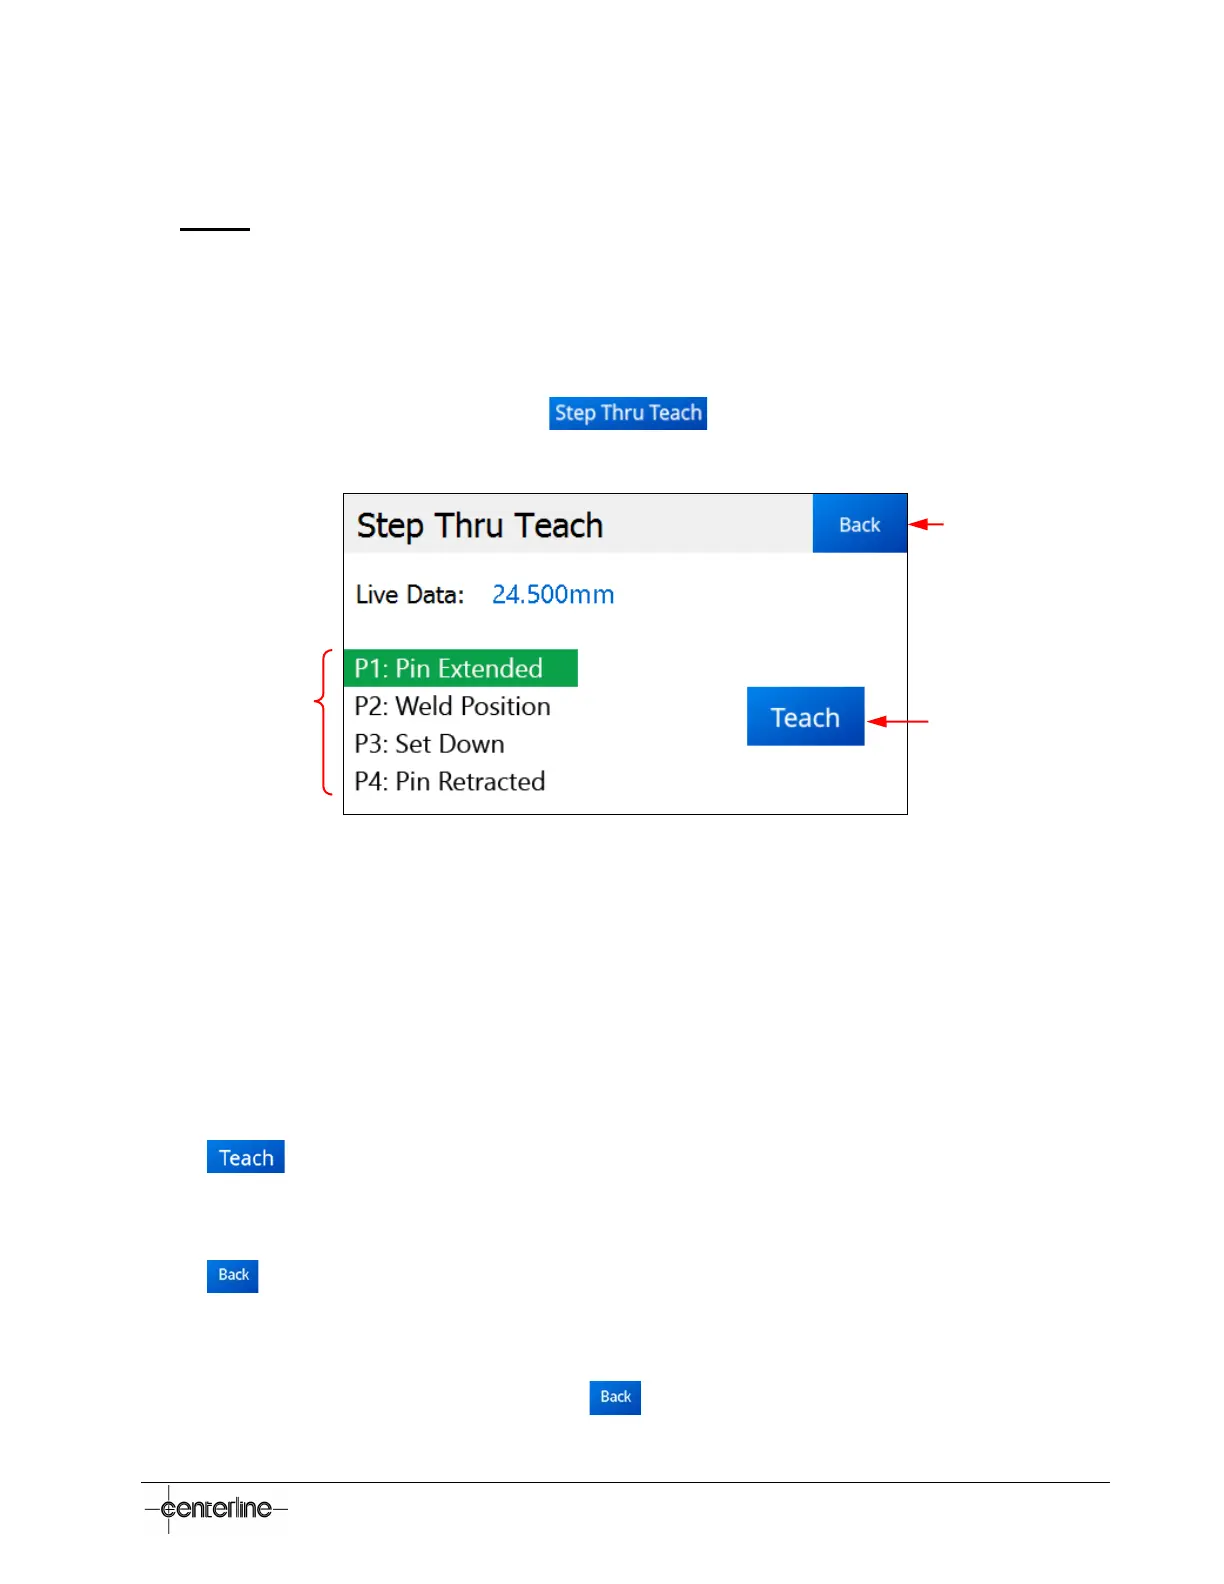
Figure 14 – Step Thru Teach Screen
The following areas can be identified on the Step Thru Teach screen above:
• Live Data field displays the instant value corresponding to the live position of the monitored
device. For example, for a VeriFast™ LVDT unit connected to the MicroView as Device 1,
this field will indicate the real time position of the weld pin on the VeriFast™ LVDT unit)
• Device Specific Positions/Statuses (e.g., Pin Extended, Weld Position, etc.) are
automatically defined according to the type of the device selected. To learn how to teach
these parameters/positions, see step 5 below.
•
– Press this button to instantly teach (assign) the displayed live data position to the
position/status that is currently highlighted green. Once a position/status is taught, the next
position/status on the list is automatically highlighted (selected). For more details on how to
teach these parameters/positions, see step 5 below.
•
– Takes the user back to the previous screen (the Teach screen).
5. Teach the Device Specific Positions/Statuses according to the Teaching the MicroView
section on page 42.
6. Exit from this screen by pressing on the button.
Device Specific
Positions/Statuses
Teach Button
Back to Teach screen
 Loading...