ChroMate™ ChroMate™ Operator’s Manual Doc. 4300 Rev. E 21
4.1.1 Selecting a Plate Format
Standard microplates can be read in either the left/right direction (8 well strips) or in
the front/back direction (12 well strips) beginning at well A-1.
It may be necessary to switch formats in order to perform assays from different
manufacturers. ChroMate software can be configured for reading and presenting
data using either format.
Selecting a Plate Format:
Description
To begin, ensure that the ChroMate is
connected via USB cable to your personal
computer (see Section Instrument Setup &
Software Installation) and power up the
instrument.
The instrument will annunciate a beeping
sound; the LED power indicator will light
(the light will pulse/flash); and the
instrument will warm-up.
When the instrument has completed its
initialization process, it will annunciate
three short beeping sounds signaling it is
operational.
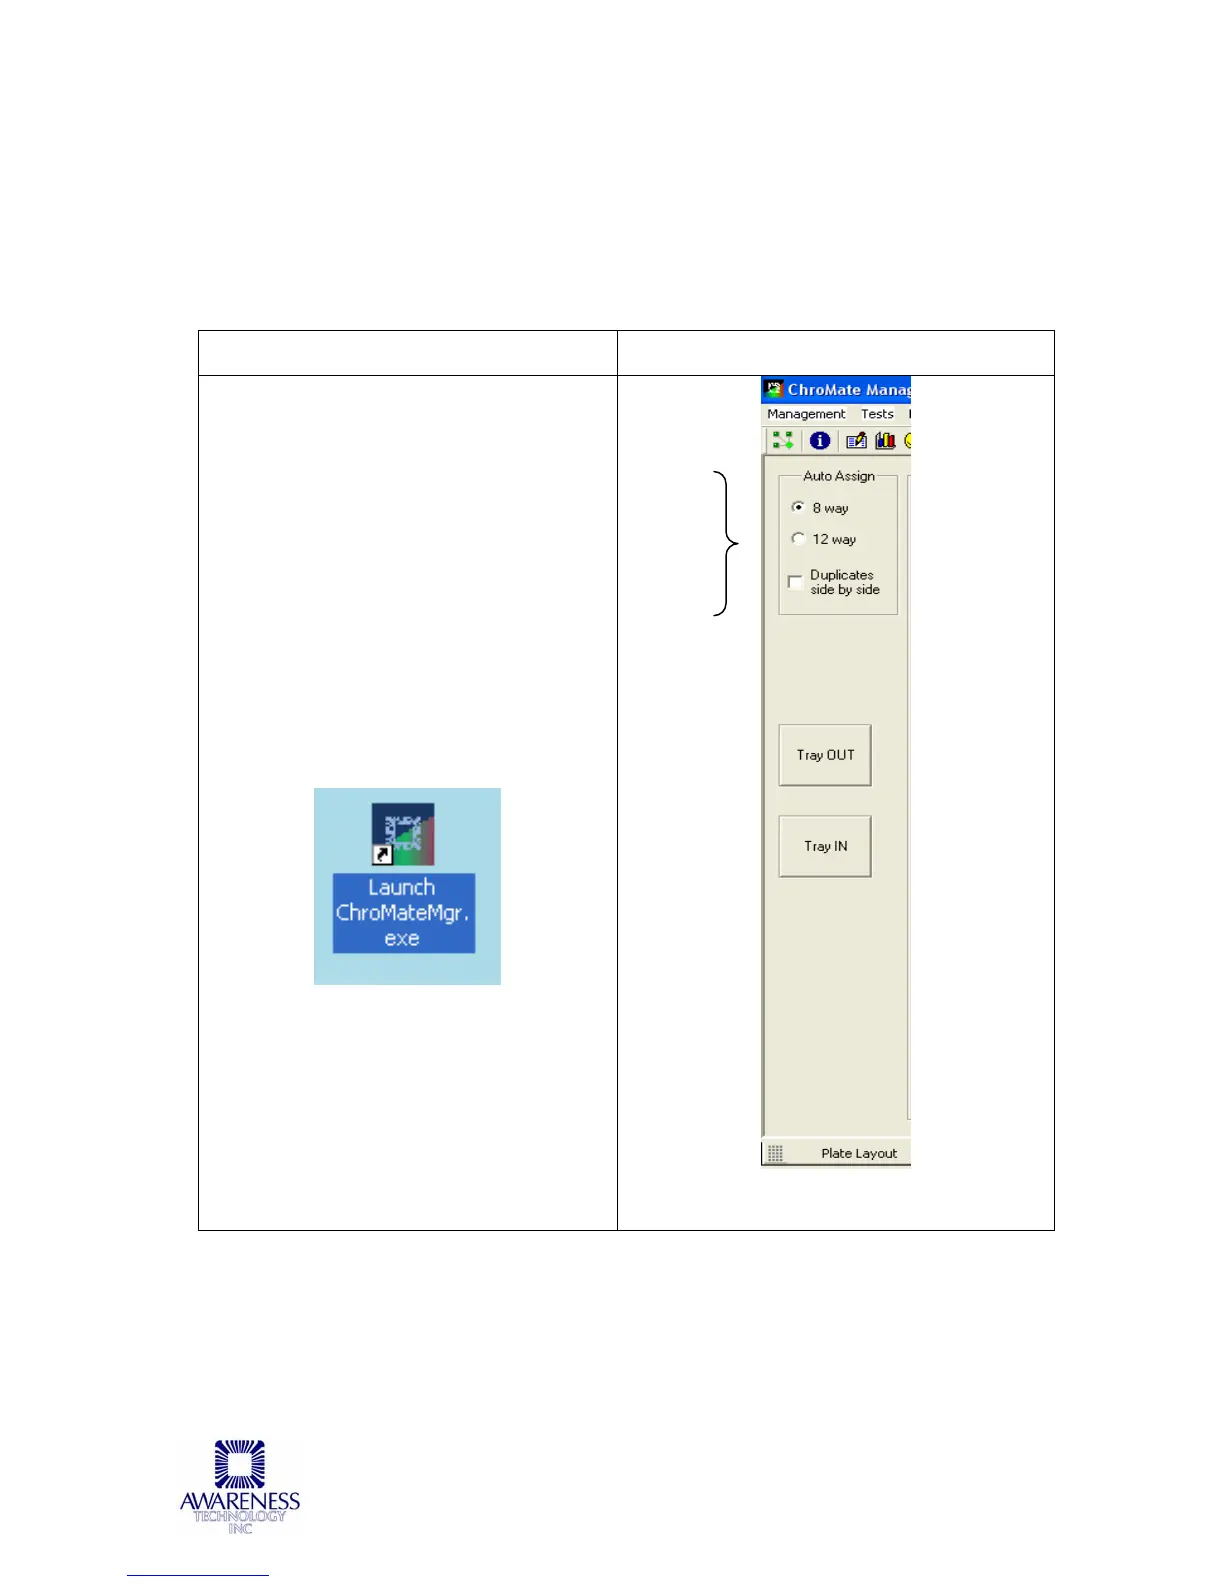
Click on the Chromate Manager icon:
The Plate Layout screen will display on the
PC monitor.
The plate format is chosen by clicking on
the 8-way or 12-way buttons. Once a
format is selected, it stays selected until
the user changes it.
Click to
choose
8 way
or
12 way
plate
format:
Plate
Layout
screen:
 Loading...