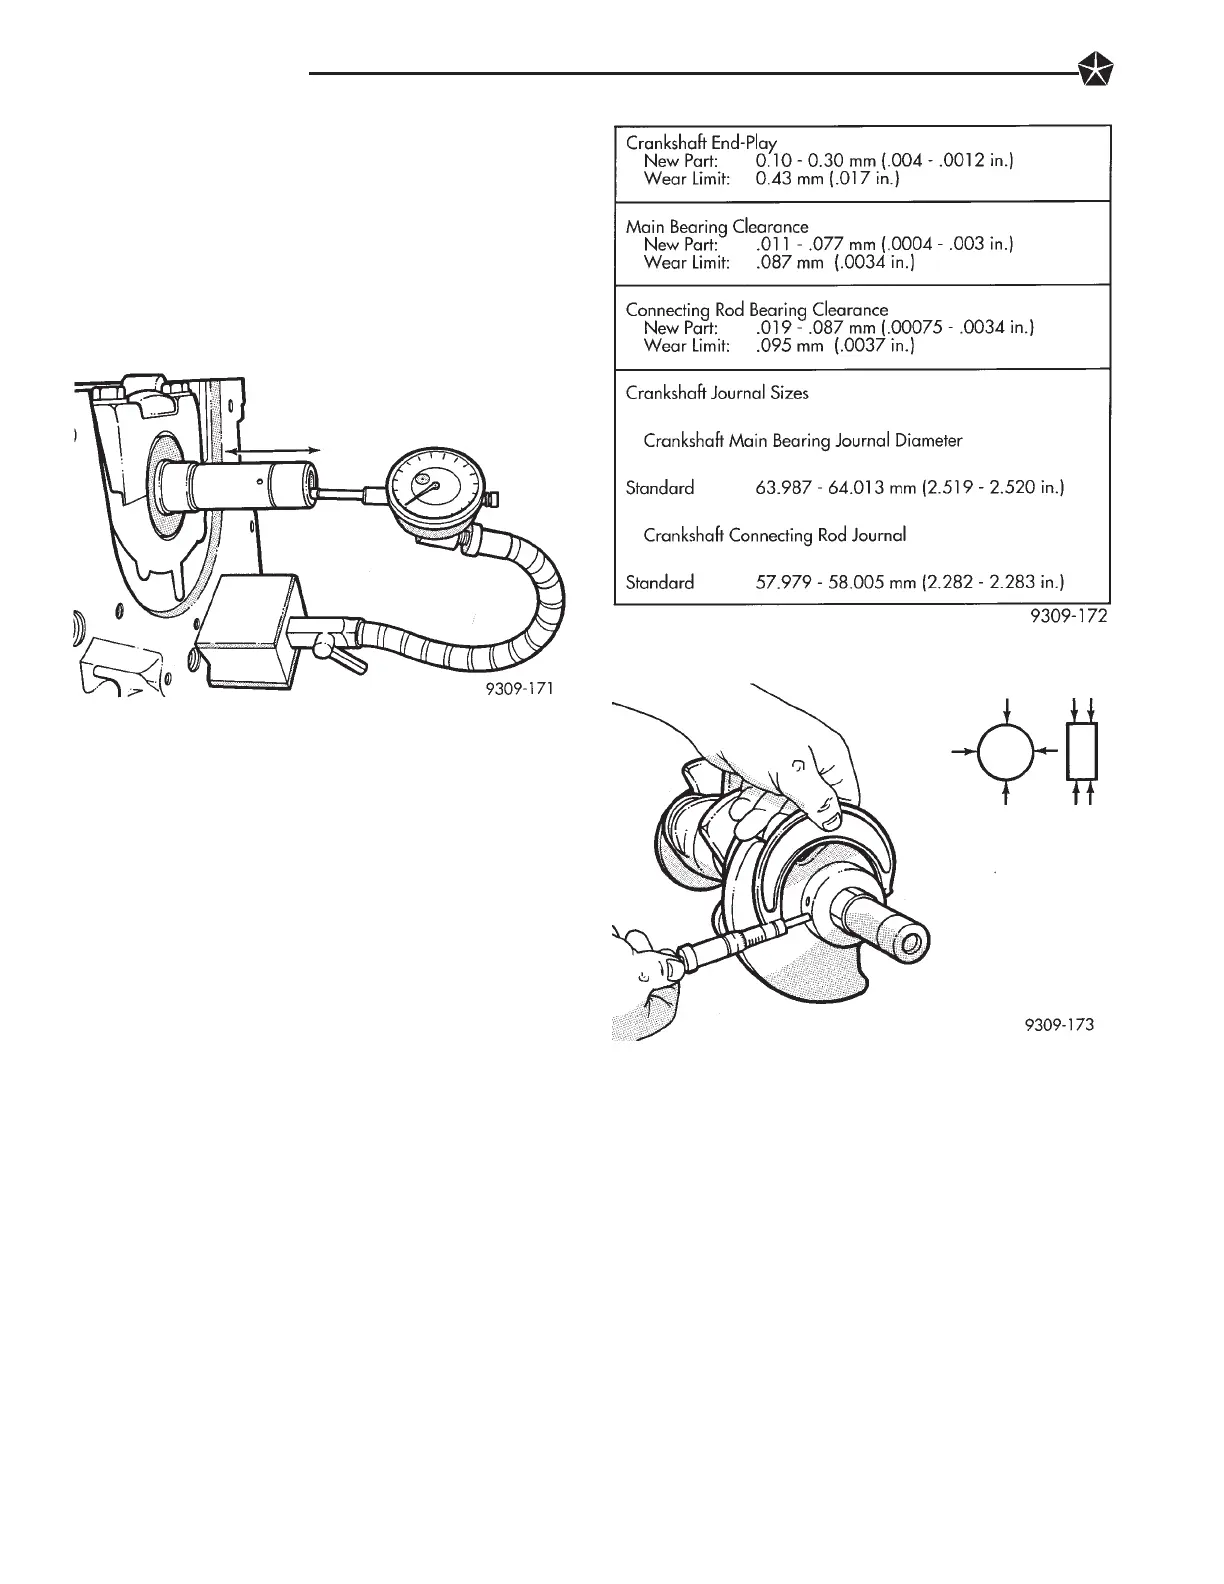
CHECKING CRANKSHAFT END PLAY
(1) Mount a dial indicator to front of engine, locat-
ing probe on nose of crankshaft (Fig. 5).
(2) Move crankshaft all the way to the rear of its
travel.
(3) Zero the dial indicator.
(4) Move crankshaft all the way to the front and
read the dial indicator. Refer to (Fig. 6) for specifica-
tion.
CRANKSHAFT END PLAY CHECK—OPTIONAL
(1) Move crankshaft all the way to the rear of its
travel using a lever inserted between a main bearing
cap and a crankshaft cheek using care not to damage
any bearing surface.Do notloosen main bearing cap.
(2) Use a feeler gauge between number 2 thrust
bearing and machined crankshaft surface to deter-
mine end play. Refer to (Fig. 6) for specification.
CRANKSHAFT OIL CLEARANCE
(1) Measure the journal outside diameter as shown
in (Fig. 7). Refer to specification (Fig. 6).
PLASTIGAGE (OIL CLEARANCE)
MEASUREMENT
(1) Remove oil from journal and bearing shell.
(2) Install crankshaft.
(3) Cut plastigage to same length as width of the
bearing and place it in parallel with the journal axis
(Fig. 8).
(4) Install the main bearing cap carefully and
tighten the bolts to specified torque.
CAUTION: Do not rotate crankshaft or the plasti-
gage will be smeared.
(5) Carefully remove the bearing cap and measure
the width of the plastigage at the widest part using
the scale on the plastigage package (Fig. 8). Refer to
specification (Fig. 6) for proper clearances. If the
clearance exceeds the specified limits. Replace the
main bearing(s) and if necessary have the crankshaft
machined to next undersize. Also see Measuring
Main and Connecting Rod Bearing Clearance in
Standard Service Procedures.
CAUTION: Do not rotate crankshaft or the Plasti-
gage may be smeared.
CRANKSHAFT OIL SEALS SERVICE
REMOVAL
Pry out rear seal with screwdriver. Be careful not
to nick or damage crankshaft flange seal surface or
retainer bore (Fig. 9).
Fig. 5 Checking Crankshaft End Play
Fig. 6 Crankshaft specification
Fig. 7 Measure Crankshaft Journal O.D.
9 - 60 3.5L ENGINE