8-24
Cisco ASR 1000 Series Aggregation Services Routers Hardware Installation Guide
OL-13208-11
Chapter 8 Cisco ASR 1002 Router Overview and Installation
Installing the Cisco ASR 1002 Router in a Rack
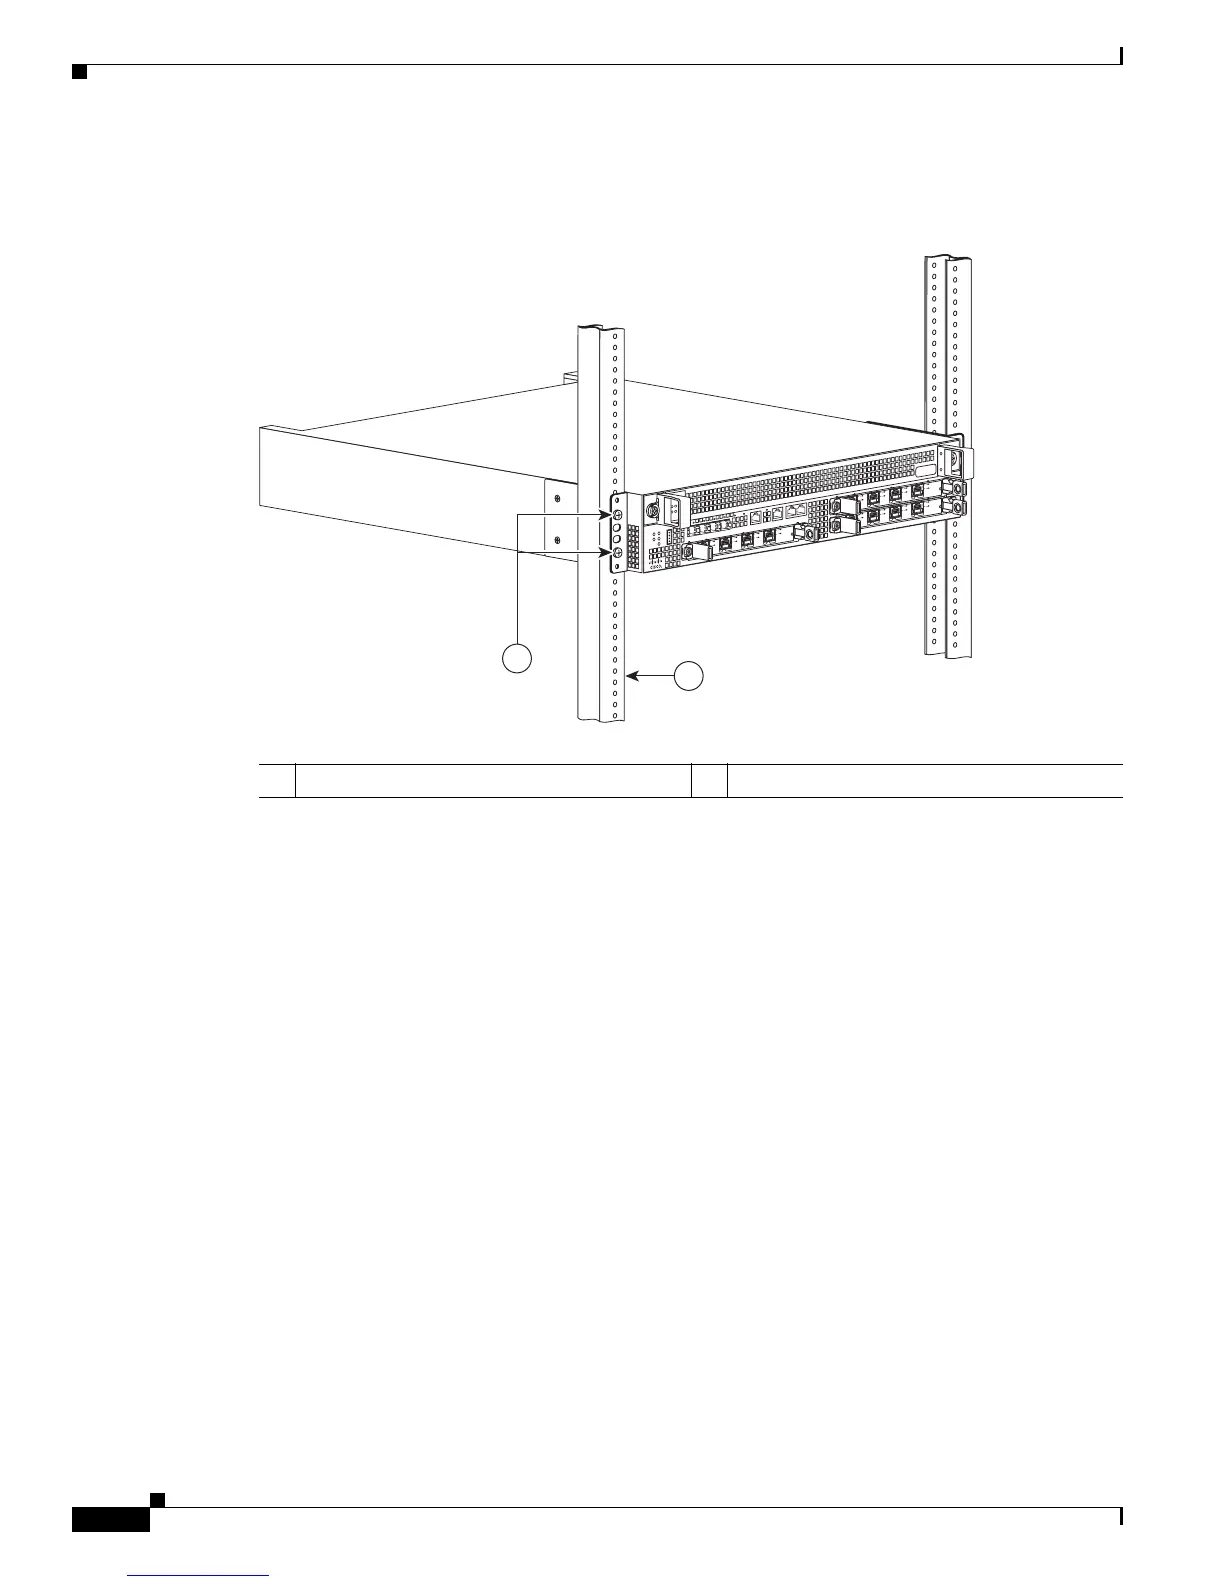
Figure 8-14 shows where to attach the rear rack-mount brackets to the Cisco ASR 1002 Router.
Figure 8-14 Attaching the Rear Rack-Mount Brackets to the Cisco ASR 1002 Router
Step 2 Slide the chassis into the rack, pushing it back until the brackets meet the mounting strips or posts on
both sides of the rack.
Step 3 Keeping the brackets flush against the posts or mounting strips, align the holes in the brackets with the
holes on the rack or mounting strip.
Step 4 For each bracket, insert and tighten two screws to the rack on both sides.
This completes the procedure for installing the chassis on a two-post rack. Proceed to the “Attaching a
Chassis Ground Connection” section on page 8-27 to continue the installation.
Four-Post Rack Installation
The Cisco ASR 1002 Router can be flush-mounted in a 19-inch equipment rack using the rack-mounting
kit provided with your system. The Cisco ASR 1002 Router can be mounted into the rack using two
recommended methods:
• Installing the chassis in an existing rack with equipment.
• Installing an empty chassis in a rack with no equipment installed.
When handling the chassis, always follow proper lifting practices. See the “Chassis-Lifting Guidelines”
section on page 5-23.
1 Rack equipment rail 2 Rack-mount bracket ear and holes
280282
ASR
10
02
s
tat
pw
r
m
i
n
m
aj
c
ri
t
S
P
A-
4XOC
3
-
P
O
S
ST
A
T
U
S
0
1
2
3
C
/
A
A
/
L
C
/
A
A
/
L
C
/
A
A
/
L
C
/
A
A
/
L
S
P
A-
4XOC
3-
P
O
S
S
T
A
T
U
S
0
1
2
3
C
/
A
A
/
L
C
/
A
A
/
L
C
/
A
A
/
L
C
/
A
A
/
L
S
P
A
-
4
X
O
C
3
-
P
O
S
S
T
A
T
U
S
0
1
2
3
C
/
A
A
/
L
C
/
A
A
/
L
C
/
A
A
/
L
C
/
A
A
/
L
1
2

 Loading...


