11-12
Cisco ASR 1000 Series Aggregation Services Routers Hardware Installation Guide
OL-13208-11
Chapter 11 Cisco ASR 1013 Router Overview and Installation
Attaching the Rear Rack-Mount Brackets
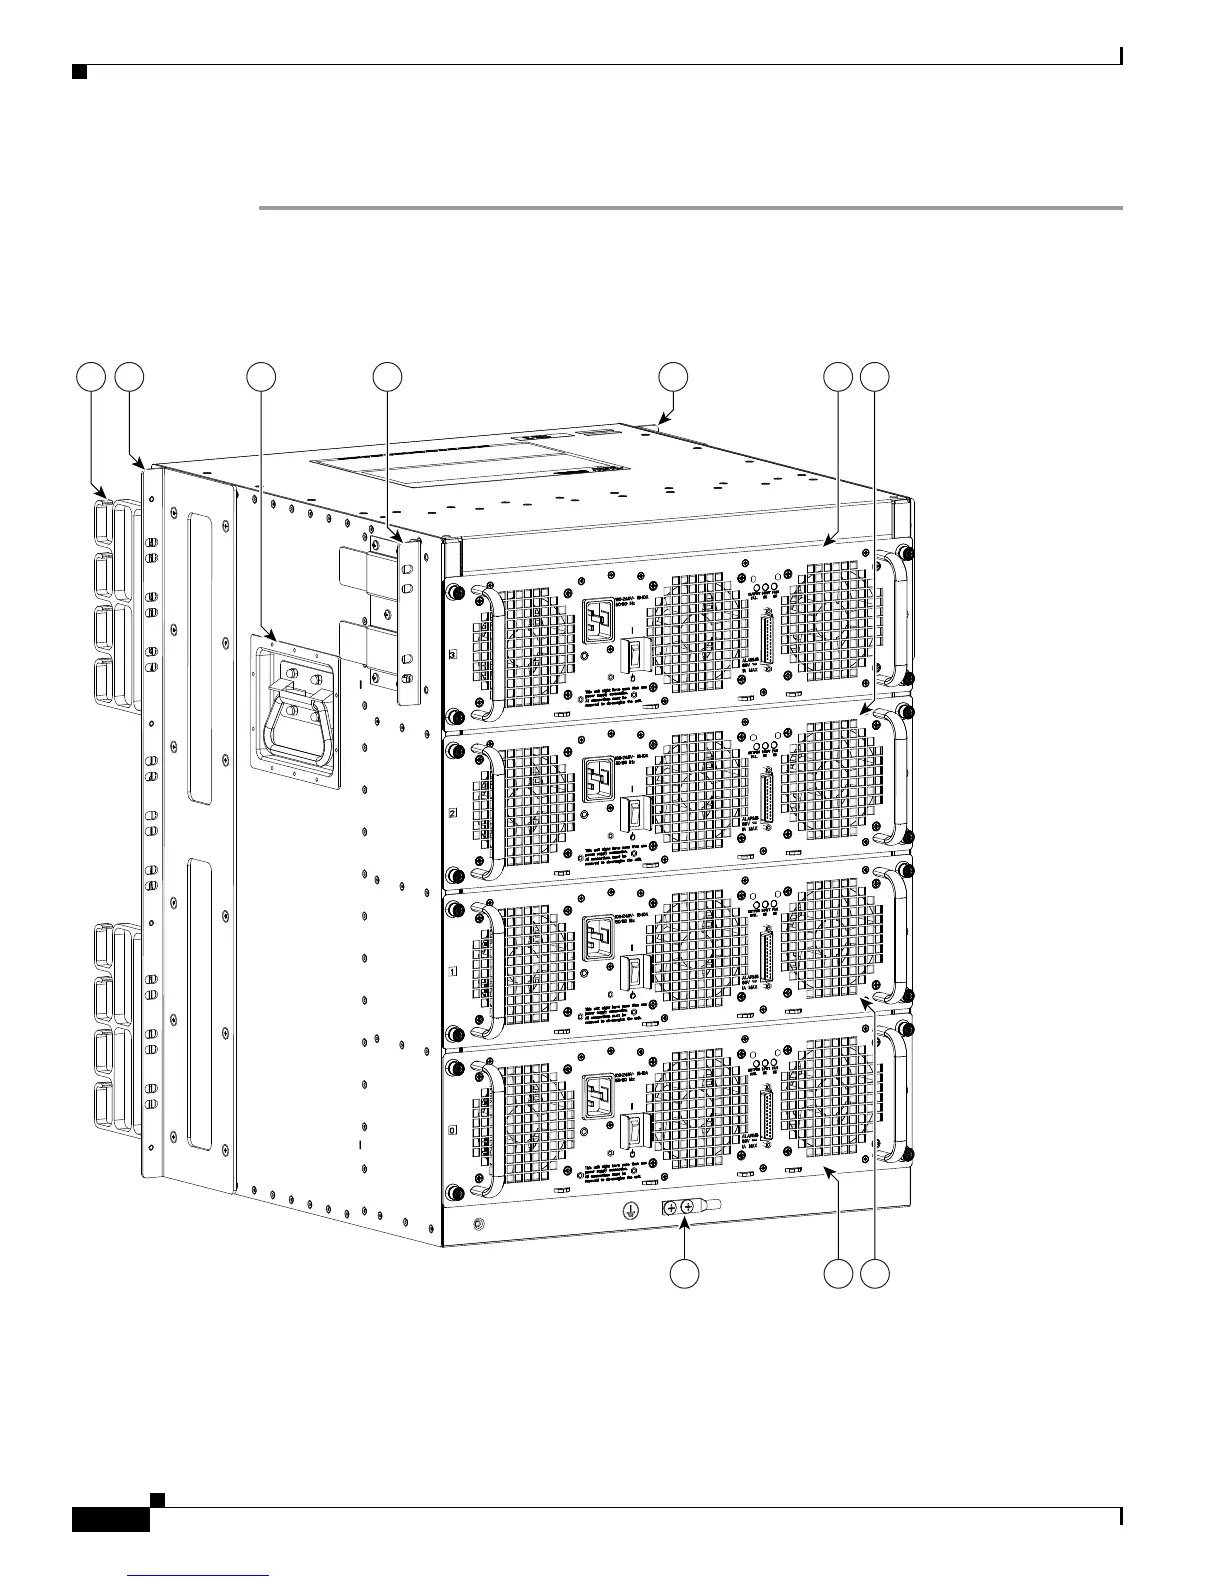
To install the rear rack-mount brackets on the Cisco ASR 1013 Router, perform the following steps:
Step 1 Locate the threaded holes on the rear side of the chassis. Make certain that you hold the rear t rack-mount
bracket with the ear and holes facing outward and towards the rear of the chassis (see Figure 11-4, callout
number 4).
Figure 11-4 Location of the Rear Rack-Mount Brackets on the Cisco ASR 1013 Router
Step 2
Position the rear rack-mount bracket top hole with the chassis second top hole from the back.
Step 3 Insert and tighten the screws on one side.
Step 4 After the bracket is secured to the side of the chassis, slide the two remaining components into the side
rack-mount bracket.

 Loading...


