12-22
Cisco ASR 1000 Series Aggregation Services Routers Hardware Installation Guide
OL-13208-11
Chapter 12 Cisco ASR 1001 Router Overview and Installation
Installing the Cisco ASR 1001 Router in a Rack
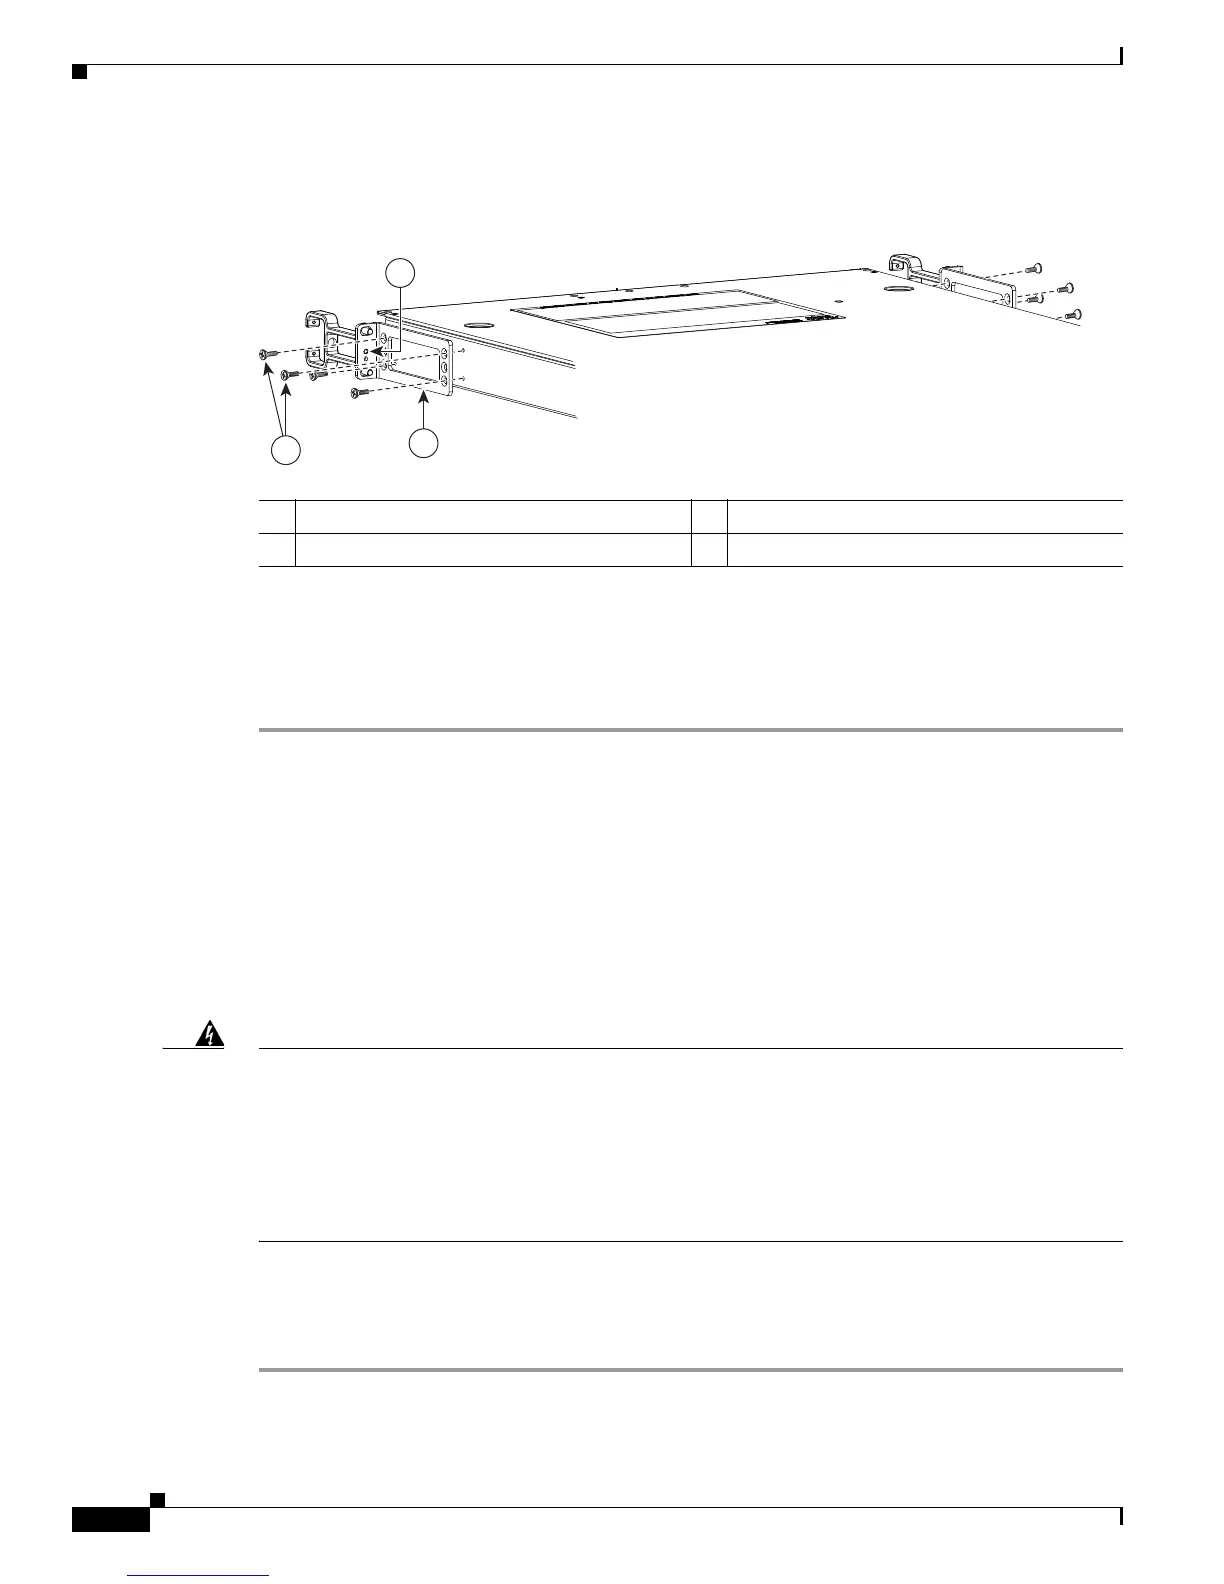
Figure 12-15 shows where to attach the front rack-mount brackets to the Cisco ASR 1001 Router.
Figure 12-15 Attaching the Front Rack-Mount Brackets to the Cisco ASR 1001 Router
Step 2
Position the front rack-mount bracket top hole with the chassis first top hole behind the side vent holes.
Step 3 Insert and tighten the black screws on one side.
Step 4 Repeat Step 1 through Step 3 on the other side of the chassis. Use black screws to secure the rack-mount
brackets to the chassis.
This completes the steps for attaching the front rack-mount brackets to the Cisco ASR 1001 Router.
Installing the Cisco ASR 1001 Router in a Rack
After installing the rack-mount brackets on the chassis, you mount the chassis by securing the
rack-mount brackets to two posts or mounting strips in the rack using the screws provided. Because the
rack-mount brackets support the weight of the entire chassis, be sure to use all screws to fasten the two
rack-mount brackets to the rack posts.
Warning
To prevent bodily injury when mounting or servicing this unit in a rack, you must take special
precautions to ensure that the system remains stable. The following guidelines are provided to ensure
your safety:
-This unit should be mounted at the bottom of the rack if it is the only unit in the rack.
-When mounting this unit in a partially filled rack, load the rack from the bottom to the top with the
heaviest component at the bottom of the rack.
-If the rack is provided with stabilizing devices, install the stabilizers before mounting or servicing
the unit in the rack.
Statement 1006
We recommend that you allow at least 1 or 2 inches (2.54 or 5.08 cm) of vertical clearance between the
router and any equipment directly above and below it.
To install the chassis in the rack, perform the following steps:
Step 1 On the chassis, ensure that all screw fasteners on the installed components are securely tightened.
1 Front rack-mount bracket ear and holes 3 Front rack-mount bracket screws
2 Front rack-mount bracket — —
 Loading...


