Managing the System
Administration
Cisco Small Business NSS300 Series Smart Storage Administration Guide 64
3
To configure DDNS settings:
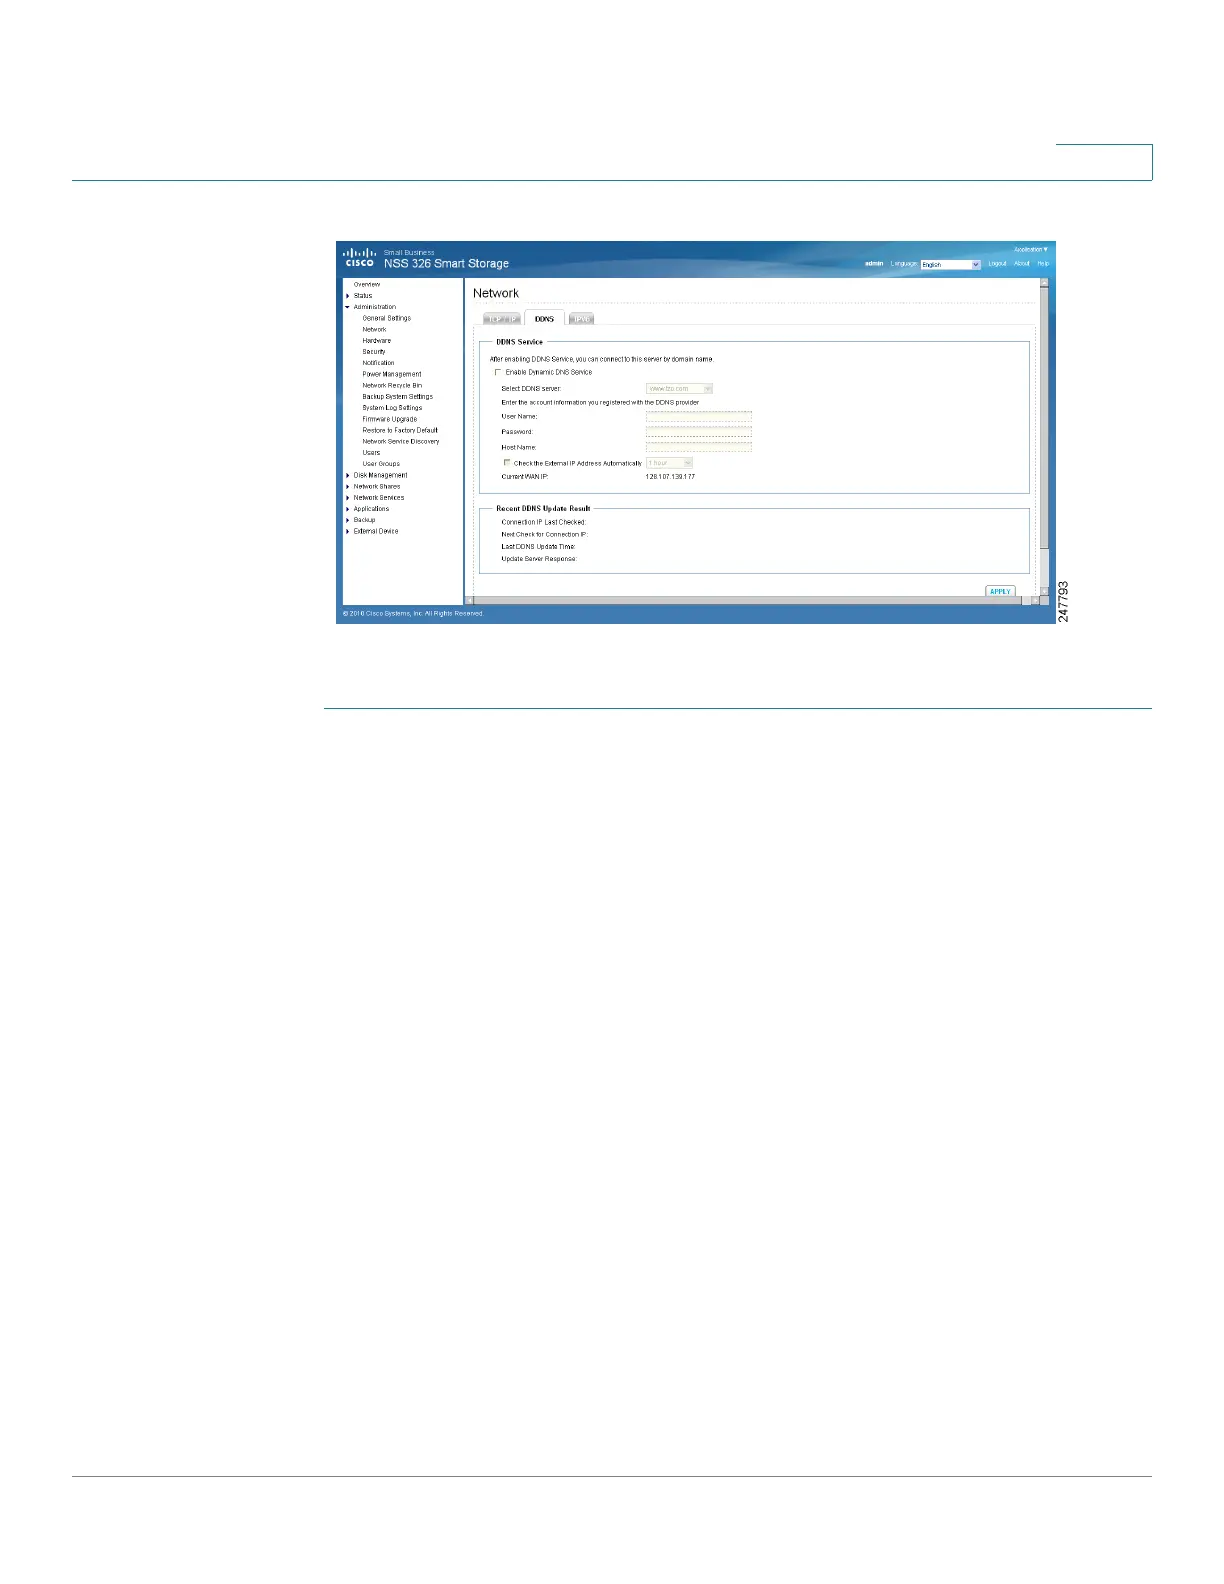
STEP 1 Choose Administration > Network > DDNS from the Navigation menu. The DDNS
window opens.
STEP 2 Configure the DDNS settings.
DDNS Service
• Enable Dynamic DNS Service—Click this option to enable a DDNS service.
DDNS is useful when you are hosting your own website, FTP server, or other
server behind the NAS. If DDNS is enabled, you can select a fixed host and
domain name to a dynamic Internet IP address. Before you can use this
feature, you need to sign up for a DDNS service.
• Select DDNS Server— From the drop-down list, select a DDNS server. The
NAS supports the following DDNS server providers:
- www.tzo.com
- www.dyndns.org
- update.ods.org
- members.dhs.org
- www.dyns.cx
- www.3322.org
- www.no-ip.com