Installing the Access Point
Wall-Mount Option
Cisco WAP200 Wireless-G Access Point with Power Over Ethernet and Rangebooster 11
4
Wall-Mount Option
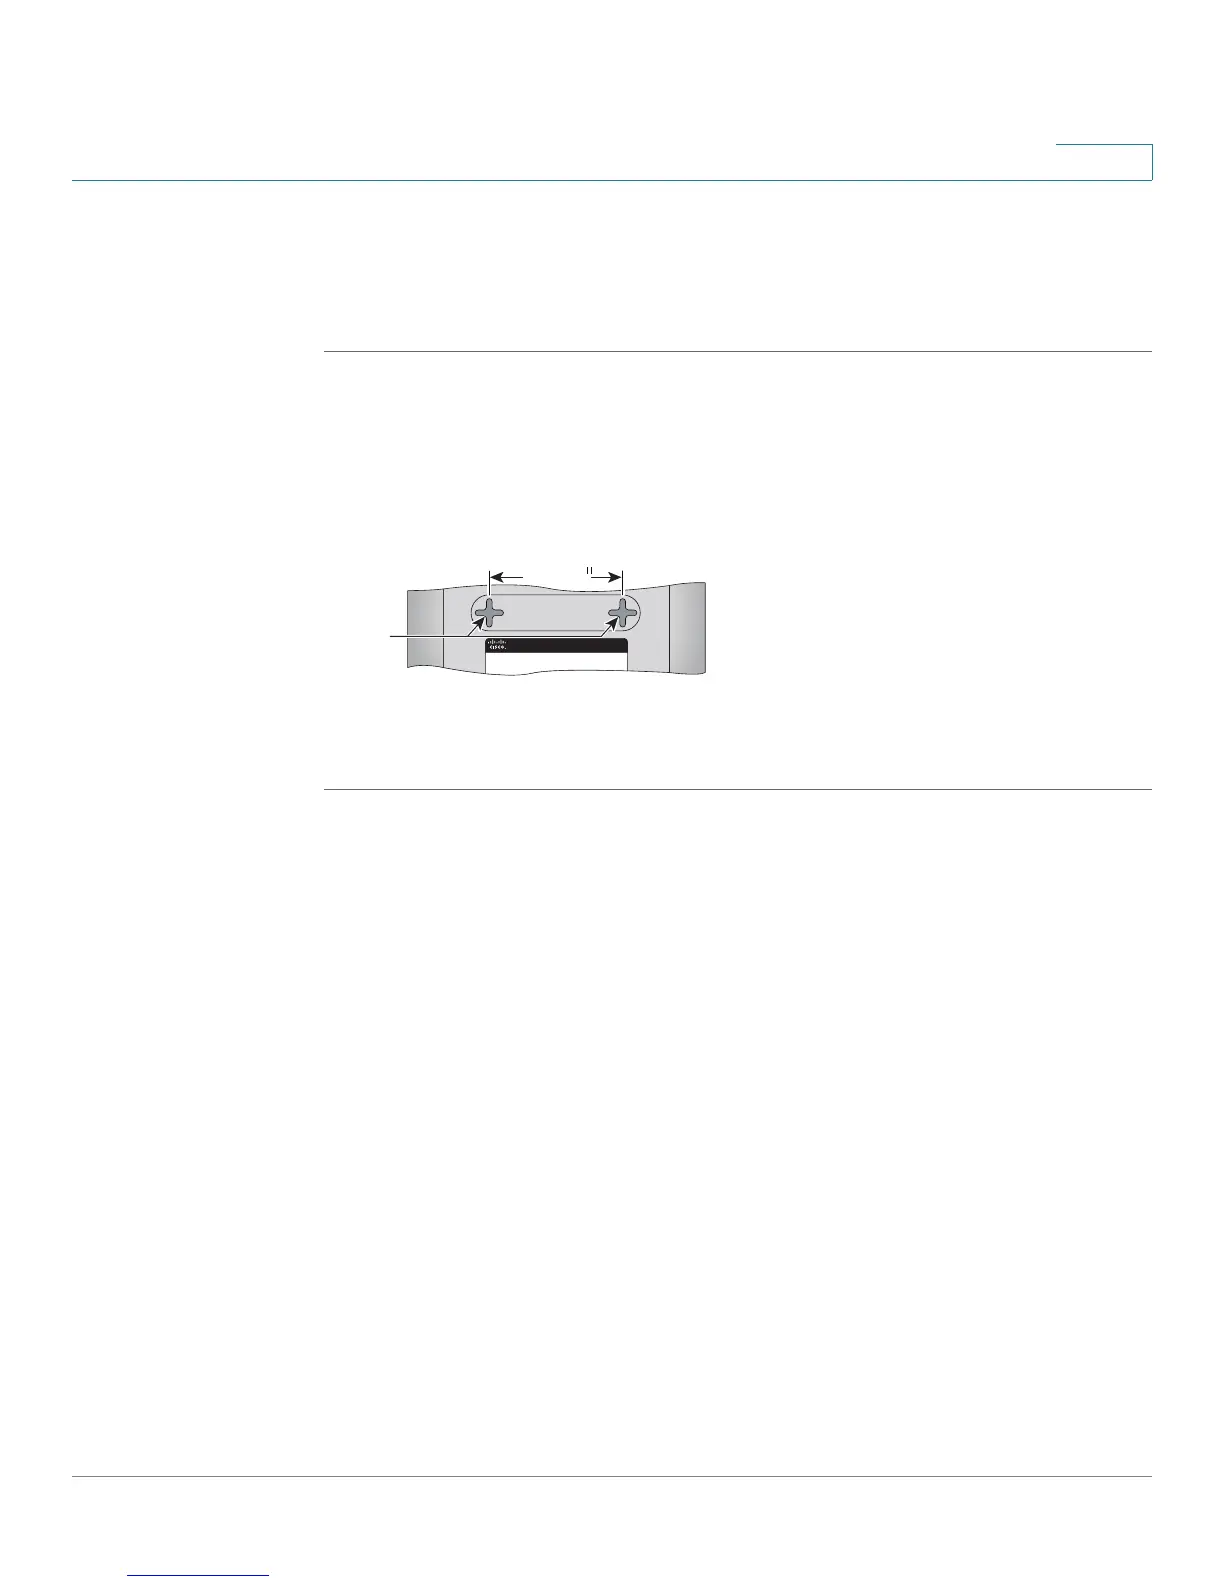
To mount the WAP200 access point on a wall, follow these steps.
STEP 1 Determine where you want to mount the WAP200 access point and install two
screws (not supplied) that are 2-15/16 inches apart (approximately 7.46 cm.).
STEP 2 With the back panel pointing up (if installing vertically), line up the WAP200 access
point so that the wall-mount crisscross slots on the bottom of the access point line
up with the two screws.
STEP 3 Place the wall-mount slots over the screws and slide the WAP200 access point
down until the screws fit snugly into the wall-mount slots.
251580
Wall
mount
slots
2-15/16
 Loading...