Chapter 3. Installation
51
Basic Wall Mount Installation Without Wall Mount Bracket
Detach both mounting brackets from the shelf by unfastening the four flat head #6-32 screws on
each bracket. Rotate the brackets 90 degrees so that the bent-up flanges extend
approximately one inch beyond the bottom of the shelf. The hole patterns on the brackets
should match the pre-drilled patterns on the side panels. Re-attach the brackets in the new
positions with the same four screws.
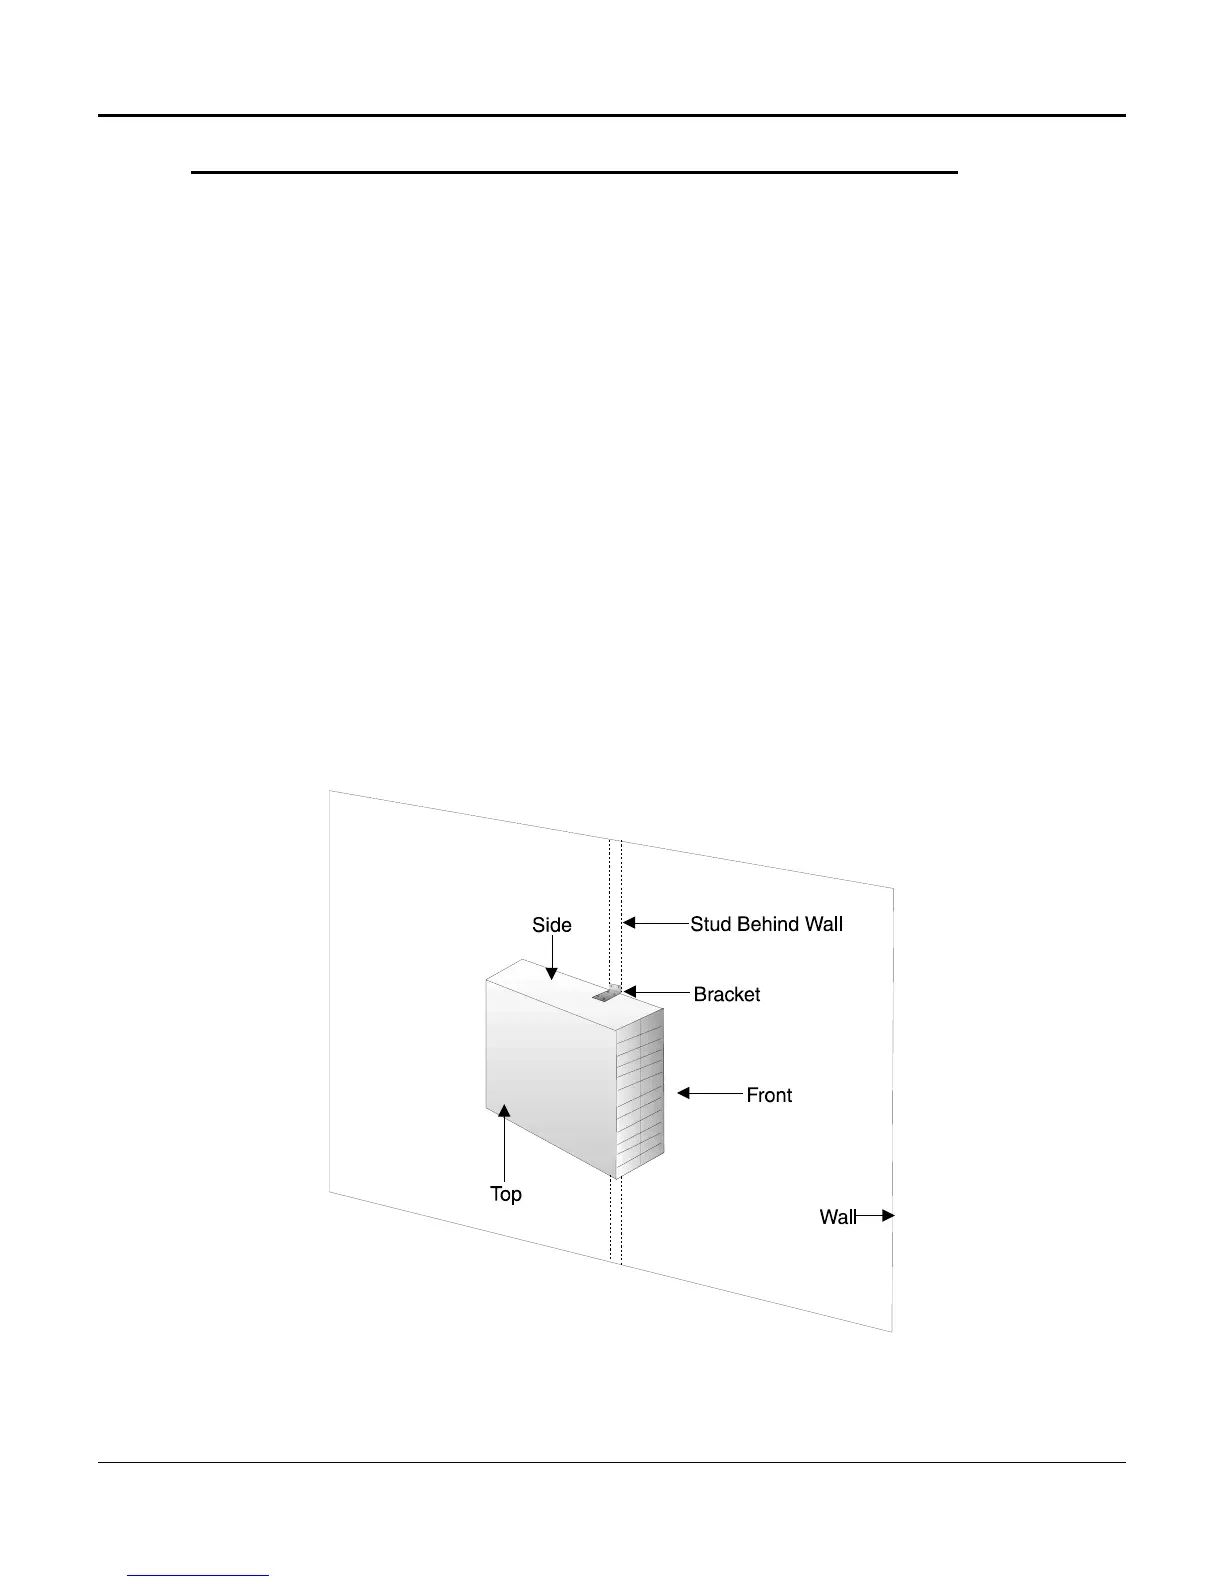
With the bracket now repositioned, the multiplexer must be mounted vertically with the bottom
of the shelf facing toward the wall, and the card slots facing either to the left or right. (Installing
the power supplies on top of the shelf allows for better heat dissipation.)
When mounting to concrete walls, use the outside holes of the mounting brackets as a template
to mark the wall. Leave the brackets on the shelf to expedite the job. Have an assistant steady
the shelf while marking the hole. A masonry drill is recommended for making the holes for the
#8 x 1-1/2 inch anchor bolts. Anchors can vary, so select the appropriate drill sizes. Insert the
anchors into the holes, then mount the multiplexer to the inserts.
To mount the multiplexer to a finished wall with 2 x 4 inch wood or metal studs, the multiplexer
must be mounted so that the two center holes are positioned over the stud, and the screws can
be toed inward to obtain better engagement of the stud. (The two center holes of each bracket
should straddle the vertical stud.) Both screws must engage the stud at top and bottom
brackets. If additional framework exists within the wall, this procedure can be modified to utilize
the additional holes in the brackets. Use #8 x 1-1/2 or 2 inch screws. A good variable speed
electric drill with a Phillips head type driver will help facilitate this installation. Refer to Figures
3-5 and 3-6 for depictions of this type of installation.
Figure 3-5. Basic Wall Mount Orientation
 Loading...