Installation & Commissioning Manual 6Mechanical Installation
5100607_CFD5000 T - CM2.2_Installation & Commissioning Manual_T_EN_2023_F
27
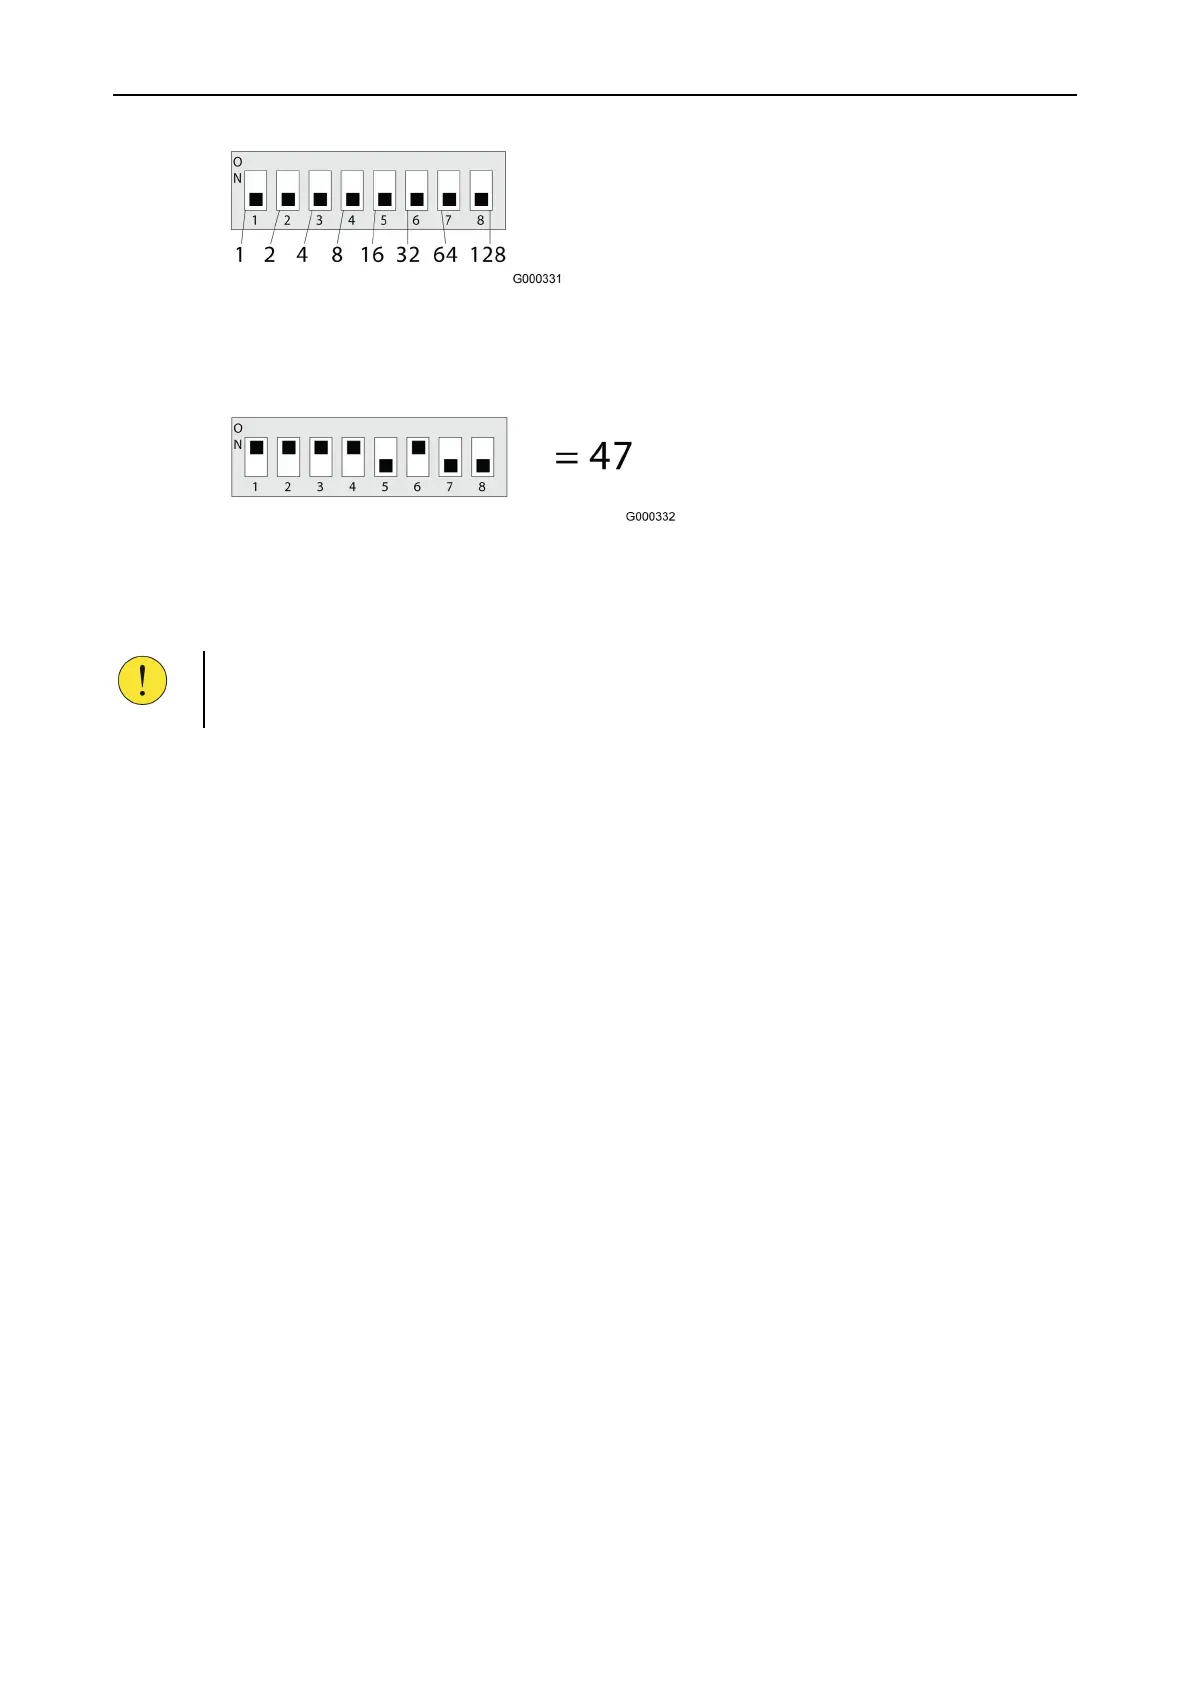
Figure 14. DIP switch with 8 poles.
The value of the address is set according to the switches set to ON position, as
shown in the following figure.
Figure 15. Setting DIP switches.
By setting the switches numbered 1,2,3,4 and 6 to the ON position, the address is
configured as 1+2+4+8+32 = 47.
CAUTION!
After setting the address on a smoke or heat detector, remove the adhesive label
attached to the detector and use it to seal the address switch.
I/O units
In addition to the loop address, I/O units are equipped with an ID DIP switch. This
ID DIP switch determines the unit’s functions.
More information can be found in the data sheet for the specific loop unit.
6.6 Installation examples for loop units
6.6.1 UB-6 base plate
6.6.1.1 General information
This section is intentionally left blank and may be replaced
by project specific product information.