EasyManuals Logo

D-Link DNS-320L User Manual

D-Link DNS-320L
407 pages
To Next Page IconTo Next Page
To Previous Page IconTo Previous Page
Page #77 background imageLoading...
Page #77 background image
71D-Link ShareCenter DNS-320L User Manual
Section 4 - Conguration
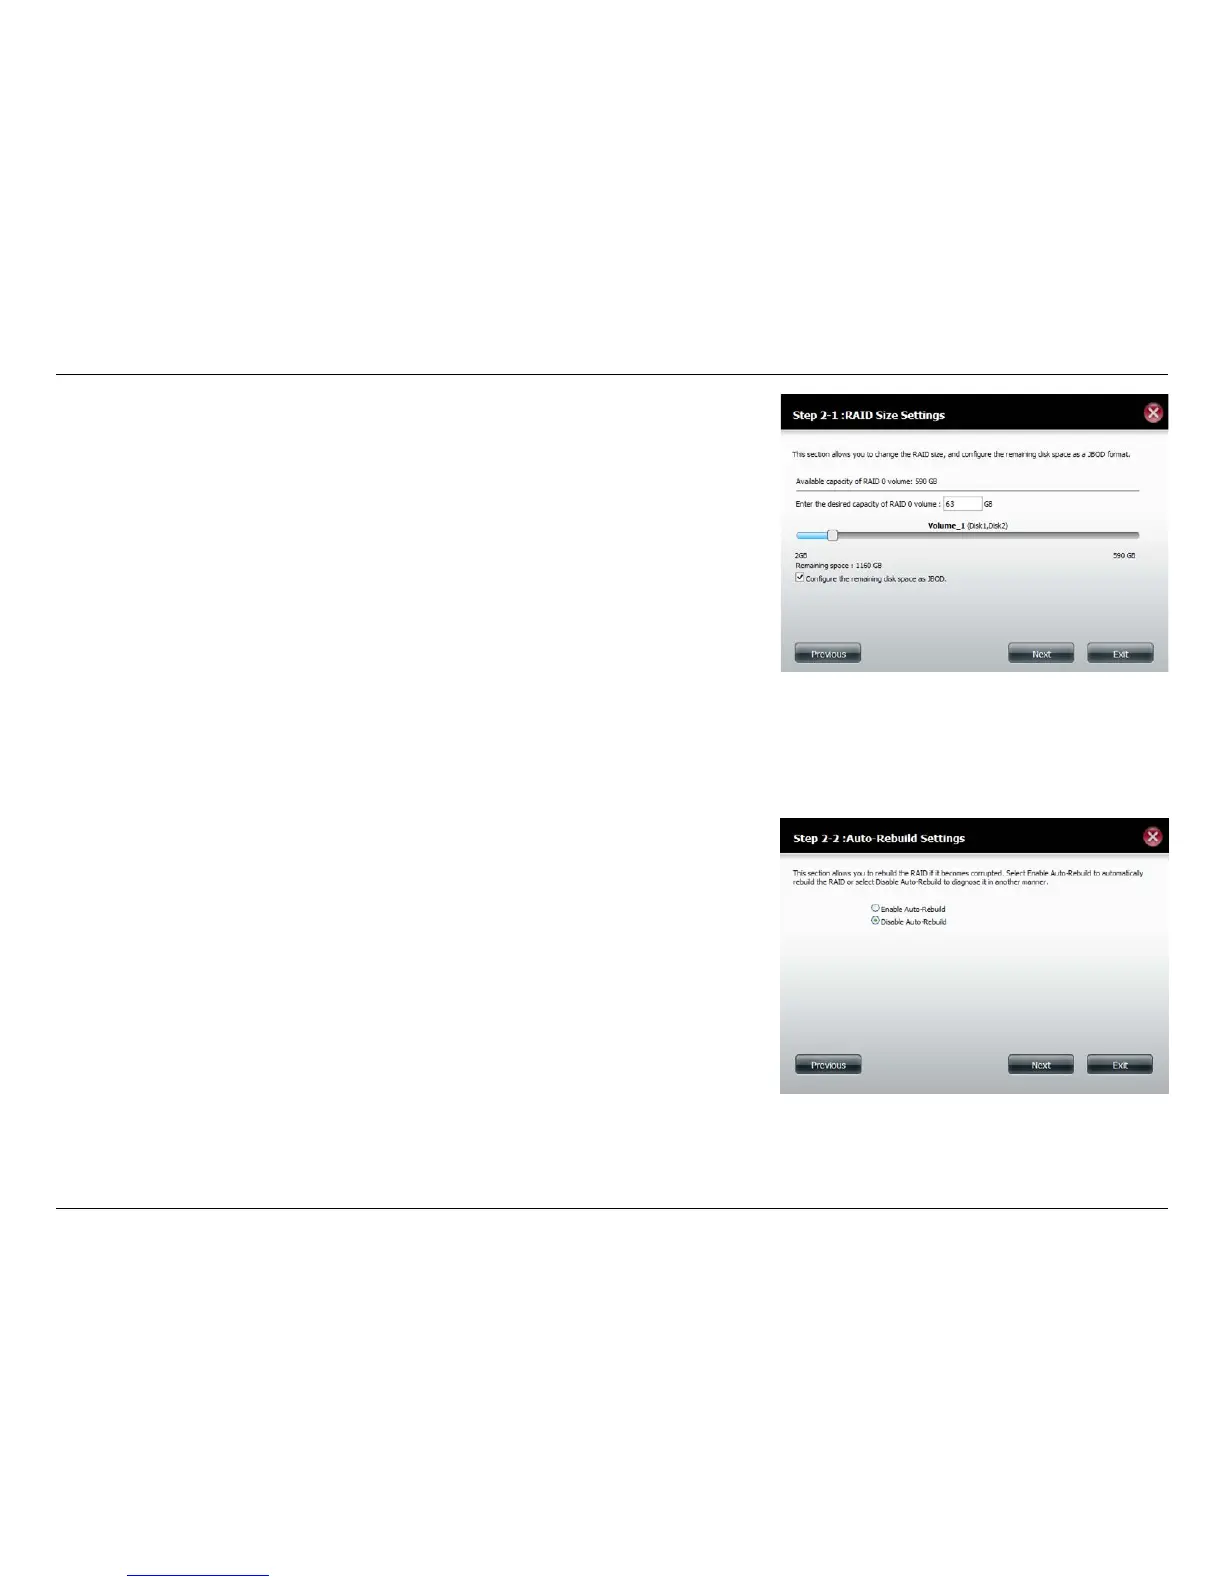
If you selected RAID 0 or RAID 1, this screen will appear to allow you to ad-
just the size of the RAID Volume.
Use the slider to change the RAID size or enter an amount in the eld provid-
ed. Check “Congure the remaining disk space as JBOD if you wish to use
the remaining space for another RAID conguration.
Click Next to continue.
If you selected RAID 1, this screen will appear to let you congure your
auto-rebuild settings.
Click Enable Auto-Rebuild to automatically rebuild a failed drive if it has
been replaced with a new one.
Select Disable Auto-Rebuild if you want to start the rebuild process manu-
ally after replacing a failed drive.
Click Next to continue.

Table of Contents

Other manuals for D-Link DNS-320L

Questions and Answers:

Question and Answer IconNeed help?

Do you have a question about the D-Link DNS-320L and is the answer not in the manual?

D-Link DNS-320L Specifications

Power IconPower
power supplyExternal DC 12 V / 3 A
power saving modeAuto power recovery
scheduled power offSupported
Operating Environment IconOperating Environment
operating temperature32 to 104 ˚F (0 to 40 ˚C)
storage temperature-4 to 158 ˚F (-20 to 70 ˚C)
humidity5% to 90% non-condensing
Ports & Interfaces IconPorts & Interfaces
ethernet port1 x 10/100/1000 Gigabit
usb port1 x USB 2.0
connection to UPSSupported through USB port
Weight and Dimensions IconWeight and Dimensions
weight0.25 lbs
dimensions3.54” x 5.68” x 7.6”
dimensions (mm)90 x 144.3 x 193.3 mm

Related product manuals