ESS Series User’s Manual
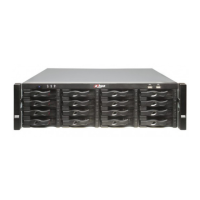
c) Press the power button on the front panel of disk array enclosure. The light is blue after
system boots up properly.
d) Please wait until the device boots up. The RUN light of the rear panel flashes when
system boots up successfully.
e) Boot up host after you have connected SAS cable.
5.10 Shut Down Disk Array Enclosure
a) Please make sure you have shut down host. See chapter 2.6.
b) Press power button to shut down disk array enclosure.
Important
Do not turn off disk array enclosure when the host is still running, or remove/insert the
SAS cable between these two devices. Otherwise, it may result in disk array enclosure
setup and data loss!
5.11 Disk Array Enclosure Setup
Please note disk operation and share applications of disk array enclosure are on WEB interface
of the host. Please refer to the following sheet for general setup information.
On Disk information interface to view disk array enclosure disk information.
Please refer to chapter 3.4.1.
On Raid interface, select a RAID group on the disk array enclosure. Please
refer to chapter 3.4.2.
On Pool interface to create storage pool on the disk array enclosure. Please
refer to chapter 3.4.3.
On logic volume interface, you can create logic volume on the storage pool of
the disk array enclosure. Please refer to chapter 3.4.4.
On iSCSI interface to create iSCSI share on the storage pool of the disk array
enclosure. Please refer to chapter 3.6.1.
On share interface to select the storage pool from the disk array enclosure.
Please refer to chapter 3.7.1.
5.12 Update
5.12.1 Preparation
The disk array enclosure is mainly to expand the network storage capacity.
a) Before the update operation, please make sure you have backed up the important data
on the disk array enclosure.
b) Login the WEB interface of the host; stop share service and RAID synchronization
process on the disk array enclosure manually.
c) Save the update application such as General_ESSXXXXX-
Internel_V1.500.0001.6T.130824.bin.
5.12.2 Update Steps

 Loading...