ESS Series User’s Manual
Refer to chapter 3.7.1 to enable NFS share mode.
4.2.3 Create FTP Share
Generally speaking, the following flow chart is the same as the NAS share/SAMBA share. Here
we are going to introduce share setup and FTP setup.
a) Refer to chapter 4.2.1 to complete the admin login, create RAID device and create
storage pool operation.
b) Refer to chapter 3.7.1 to enable FTP service.
c) Refer to chapter 3.7.2 to set FTP information such as transmission speed, IP
connection amount, and total client amount.
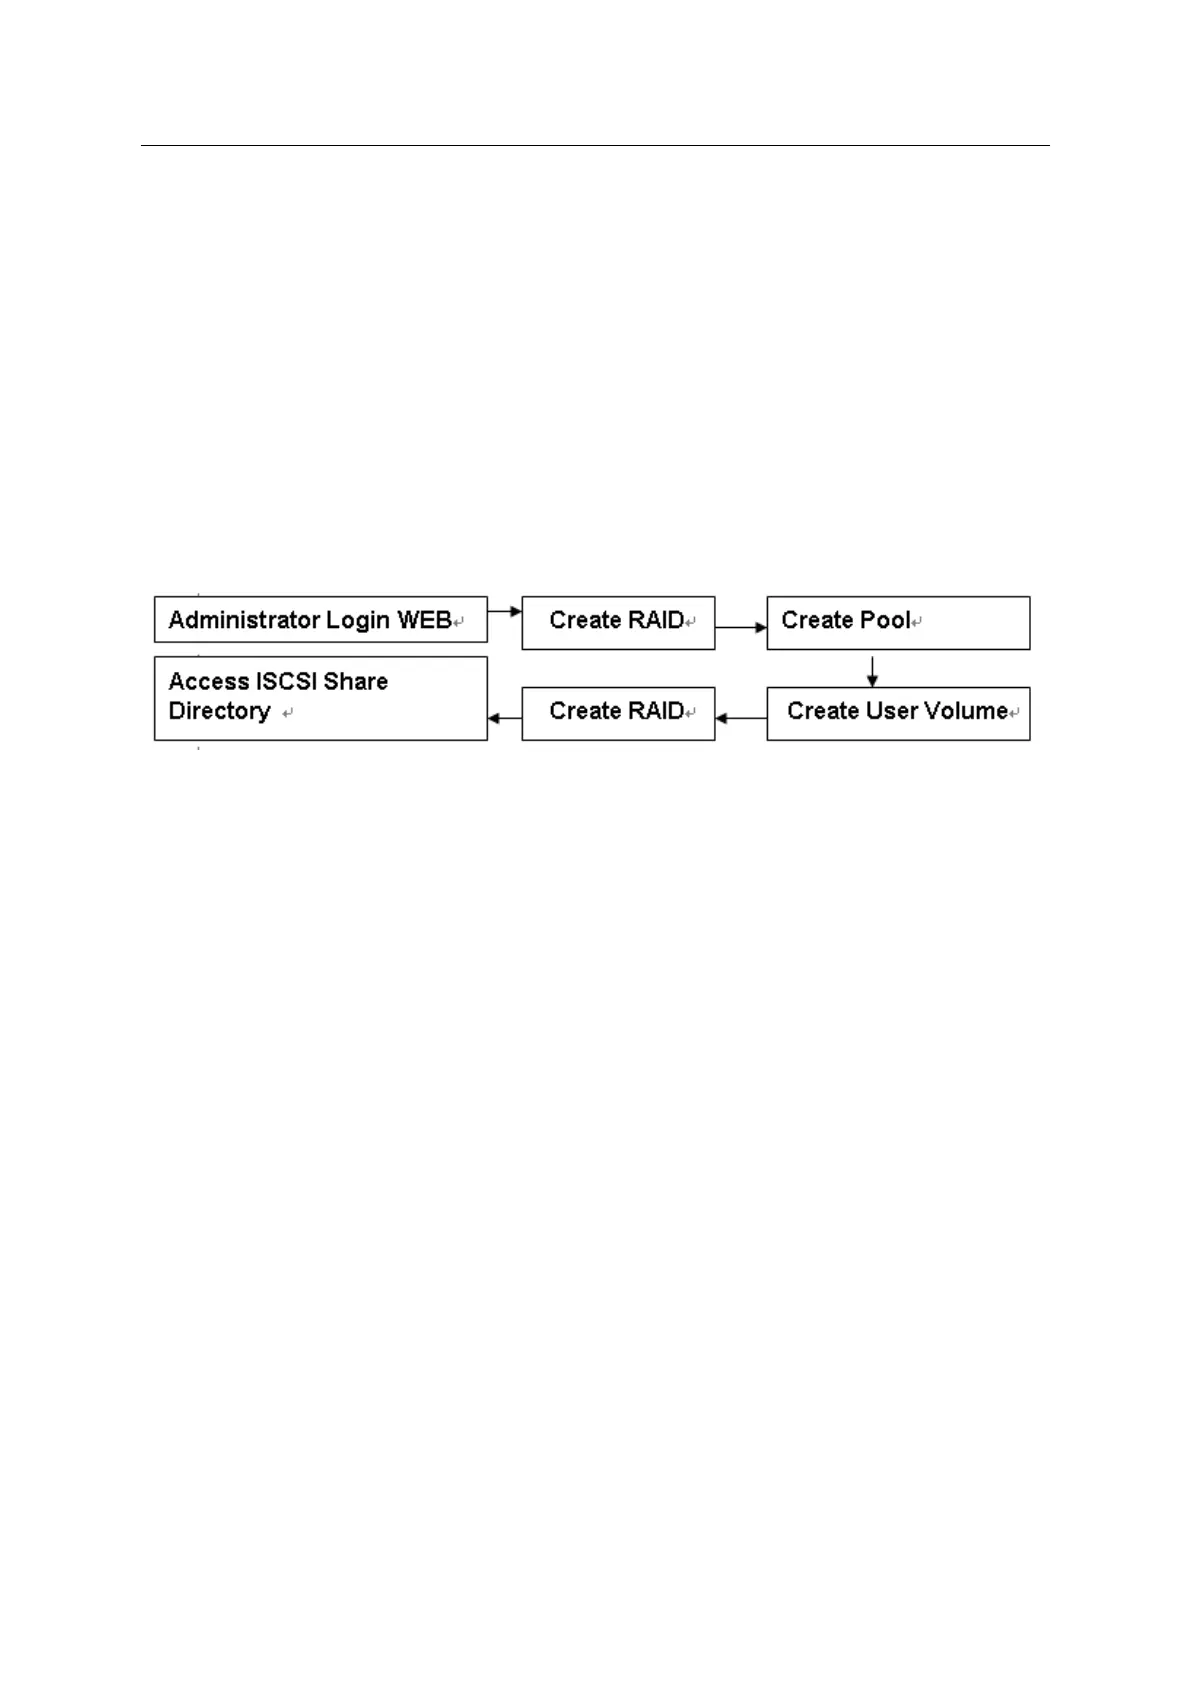
4.2.4 Create iSCSI share
Please refer to the following flow chart for detailed information.
From the above flow chart, you can see the first four steps are the same as the SAMBA share
creation. You can refer to chapter 4.2.1 for detailed information.
a) Admin logs in the system. Refer to chapter 3.1.
b) Create RAID group (optional). Refer to chapter 3.4.2.
c) Create and set storage pool if you have added the RAID group in the previous step.
Refer to chapter 3.4.3.
d) Add user volume. Refer to chapter 3.4.4.
e) Refer to chapter 3.5 to add iSCSI share.
4.3 Access Share Directory
4.3.1 Access SAMBA Share Directory
You can refer to the steps listed below to access SAMBA share directory.
Input ESS product IP address on the browser such as \\10.10.6.83.
Input user name or password on the long-in interface. See Figure 4-1.