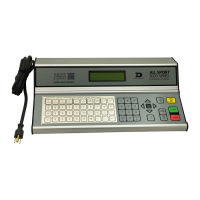
Timing System Setup
8
Connecting to Lane Modules
Refer to Figure 9 to verify proper connection of
the lane module to the touchpad, push buttons
and next lane connection. Refer to Figure 4 for
an overview of a typical swimming setup of lane
modules with the timing system.
Note: Do not connect the far end lane module
harness into the near end lane module
harness. Each harness system should
connect to the OmniSport 2000 console
separately. For more information on how
to connect to the timing console, refer to
Connections on the Console (p.12).
• Modules for each lane are connected through
the jacks labeled TO NEXT LANE. The lane cable
will t only one way. Position lane modules so
that they are out of the way of the swimmers
and are not directly submerged in water.
• Touchpads connect to the lane module jack
labeled TOUCHPAD.
• The push button connection jacks (marked
BUTTON 1, BUTTON 2, and BUTTON 3) accept
input from backup buttons held by up to three
timing judges per lane. As with the touchpad
connection, match the black jack with the
GND side of the plugs (Figure 10). If only one
backup button is used, connect it to the jack
marked BUTTON 1. Figure 11 illustrates a lane
module with all the connections made except
to the RTOP.
• The RTOP connection plugs into BUTTON 3,
again matching the black jack with the GND
side of the plug. If the system is only using 1 or 2
buttons per lane, plug the banana connector
from the RTOP directly into Button 3. If the
system is using all three buttons per lane, the
RTOP plug may be piggy-backed to the push
button plug using Button 3 (Figure 12). For more
information about RTOPs, refer to Section 9:
Relay Take-Off Platform (p.98).
• The Lane Extension Module (Figure 13) acts as
an extension cable between the OmniSport
2000 console and the closest lane module.
Standard lengths of lane extension available
are 25’, 50’, 100’, and 200’ (7.6 m, 15.2 m, 30.5
m, and 61 m).
Figure 9: Lane Module to Next Lane
Figure 10: Push Button
Figure 11: Lane Module with All
Connections (Except RTOP)
Figure 12: RTOP Connected to BUTTON 3
Figure 13: Lane Extension Module
 Loading...