E-GENIUS
104
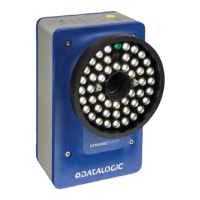
AV500/AV900 2D CAMERA
Select Enabled or Disabled from the drop-down. If enabled code filter options become
available. The camera offers several different conditions associated to the Continuous Mode
Settings. These different options allows the user to configure the camera to accommodate
Such conditions as reading unique bar code data, restrict reading the same bar code by time
(ms), or by distance (mm).
Filter Type
Select one of the following from the drop-down:
•
None: when None is selected the camera will continue to transmit the bar code data as
long as the bar code is held under the camera.
•
New Unique Code: when selected will read a bar code. The camera stores the data in a
memory location and transmits this data to the host. It will then continue to look for bar code
data. If the bar code data read by the camera matches the data that is stored in memory, the
cameras will not transmit it a second time to the host. If the bar code data is different, the
camera will replace the memory location with the new bar code data and transmit the new
data to the host.
•
Time - First Code/Last Code: Since the camera is an area camera it will acquire images at
32 frames per second. The first and last option is in respect to the bar code images found.
When the First option is selected the camera will use the first image with a decoded bar code
to start the timer. If the last code is selected, the camera will use the last decoded image to
start the timer. The camera will read a bar code and place the data into a memory location. It
will then start an internal timer. When the camera reads another bar code it will check the
new bar code data with the previous data stored in memory. If the new bar code data
matches the previous data the camera will check the timer. If the time appointed has not
been exceeded, and the data is the same, the camera will not transmit the data to the host. if
the data matches and the timer times out, the camera will transmit the data to the host.If the
new bar code data is different then the bar code in memory the camera will replace the bar
code in memory with the new bar code data and transmit the new bar code data to the host.
•
Distance - First Code/Last Code: operates the same as time, but the tachometer is used to
measure distance. the camera will not transmit that bar code data again until it has not been
decoded or the conveyor has traveled the specified distance as defined here.
Filter Timeout Time
When the Filter Type is selected the Filter Timeout Time option is made available. this option
allows the user to set the time before the camera will transmit the same bar code data as the
previous decode. Enter time in milliseconds.
Replicate same code when symbologies don’t match
Click the check-box to transmit the same bar codes when contain the same data but they are
not the same symbology.
Enable Encoder Settings
Click the Check-box to enable encoder settings. The Enable Encoder Settings is used when the
bar code data is compared by distance rather then time.When this option is enabled the
Distance - First Code and Distance - Last Code filter types are made available.
Encoder Settings
Physical Encoder
Select Disable or Enable from the drop-down list:
•Disable: External encoder is disabled, and internal encoder is active
•Enable: A physical encoder is connected to the Encoder input and is enabled
Encoder Step (mm/pulse)
Click to activate the Encoder Step input form. Enter the Encoder Wheel Circumference in
the field provided and select the in or mm option. Enter the Pulses / Revolution in the field
provided (See the table below for values). Click Submit to save the values, or click Cancel to
return to the Operating Mode window.
Encoder Resolution
Displays the encoder/tachometer resolution in pulses per inch (PPI) based on the Encoder Step
calculation. This field cannot be edited.
Conveyor Speed (Max/constant)(m/sec)
When Physical Encoder is Disabled, enter the conveyor speed in meters per second in the field
provided (see formula below).
When Physical Encoder is Enabled, enter the maximum belt speed using the formula below.
Setting the belt speed too high will affect image quality; setting it too low will give you an
 Loading...