89
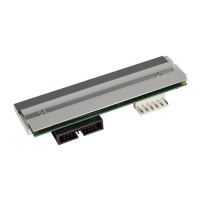
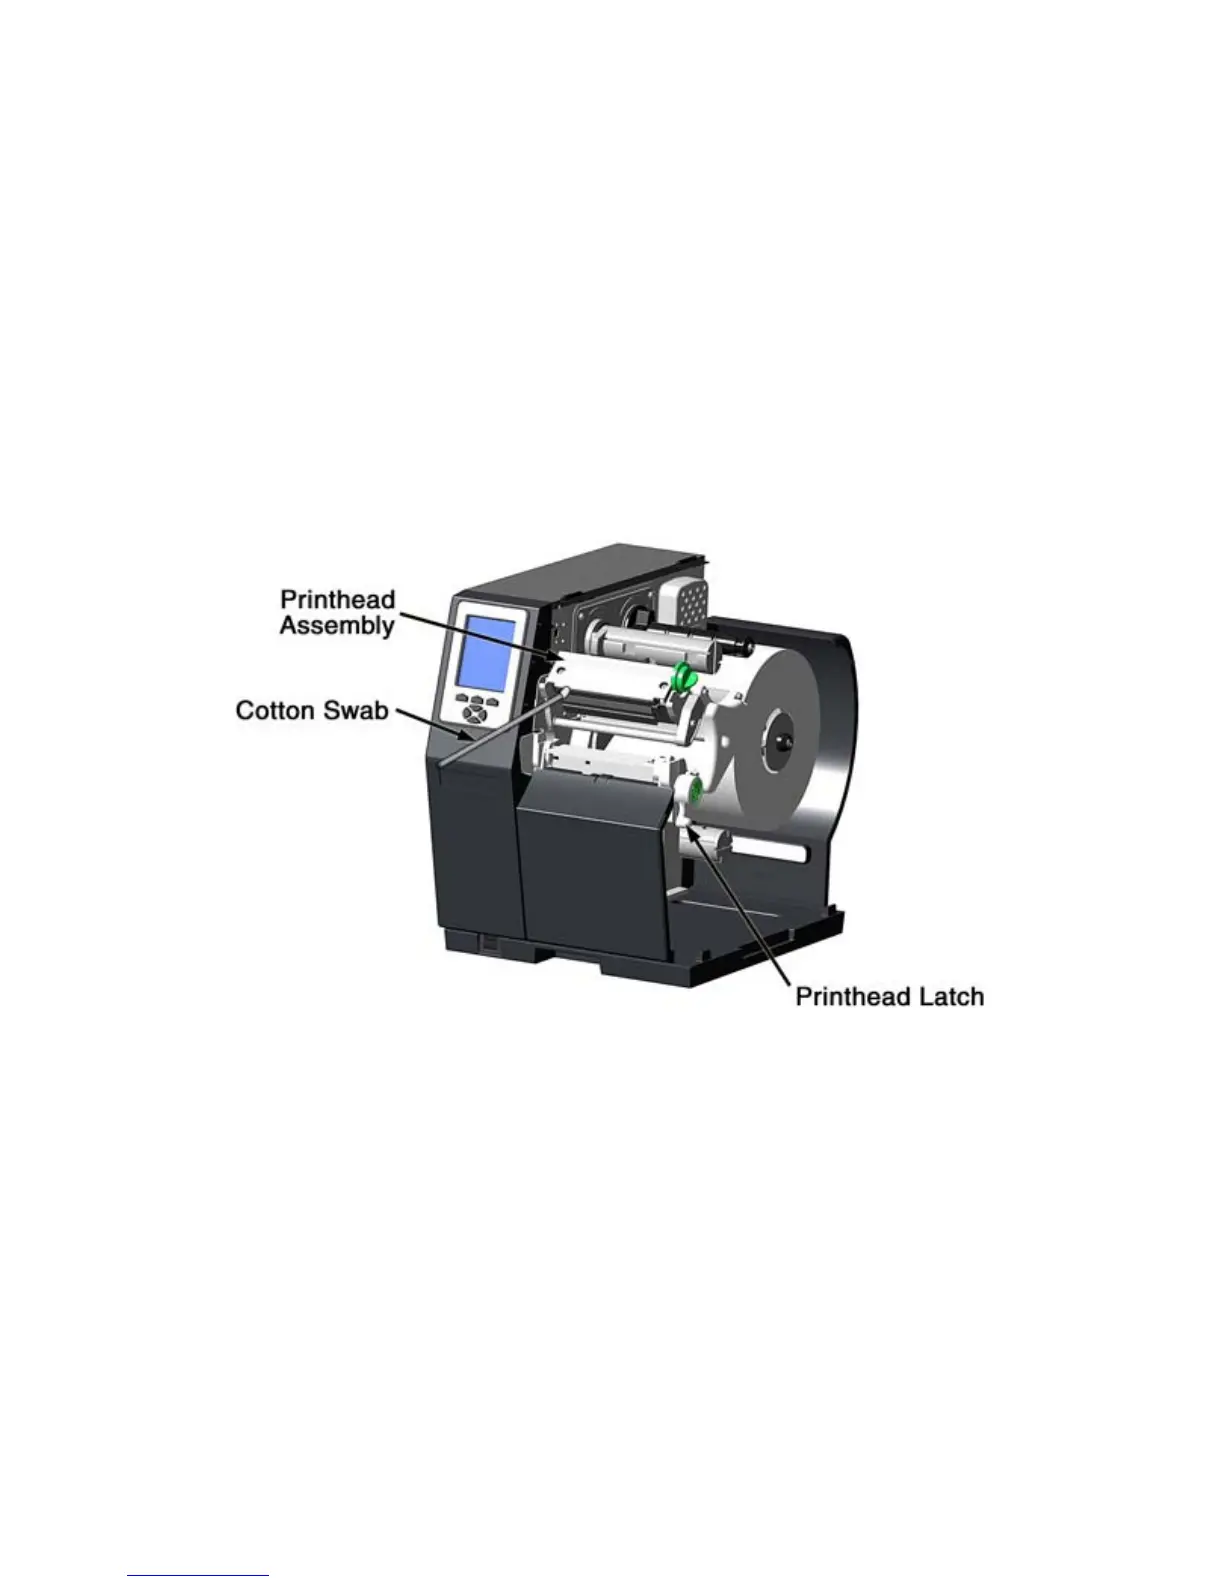
4. Unlock the Printhead Assembly then carefully raise the assembly. Grasp the printhead,
disconnect the two cables, and remove the printhead.
5. Position the new Printhead under the Printhead Assembly and connect the previously
removed cables.
6. Place the Printhead onto the locating pins under the Printhead Assembly and then
secure it in position with the Printhead Mounting Screw. (Do not over-tighten this
screw).
7. Be sure the printhead cables are not pinched and are routed correctly to avoid contact
with any moving parts.
8. Using a Cotton Swab moistened (not soaked) with isopropyl alcohol, gently clean the
entire printhead surface then allow it to dry.
9. If removed, reinstall your ribbon.
10. Lower the Printhead Assembly and lock it.
11. Plug in the printer and turn ON the power switch.
12. Download your label format (or generate a format using the Test Menu) and print a
sample label. Compare the contrast of a previously printed label to the label just printed
-- if necessary, adjust the Darkness Setting (in the Print Control menu) so that the
darkness produced by the new printhead matches the previous darkness level.