19
I-Class Mark II Maintenance Manual
Ad
ustments and Maintenance
6. Attach the ribbon to the Take-Up Hub. Enter the Quick Test Mode and select 100 Quick Ribbon Test Labels
then press TEST to begin printing.
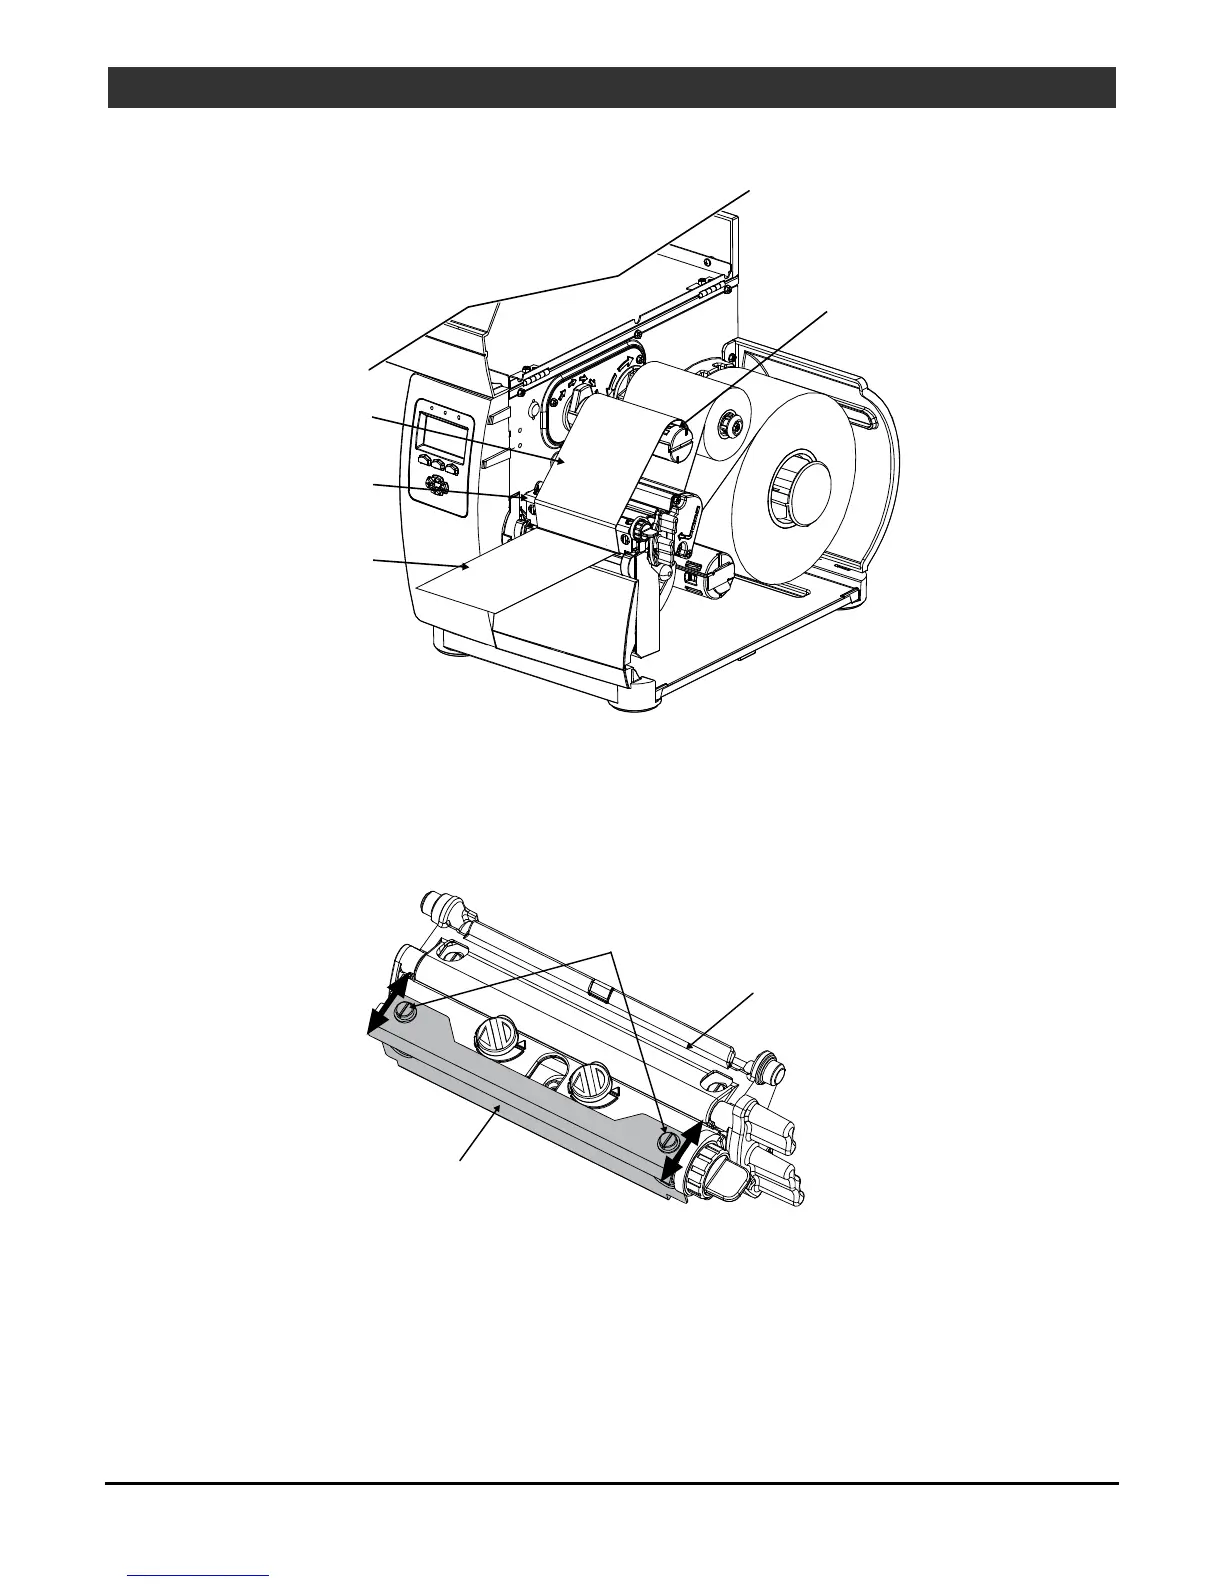
Ribbon
Take-up Hu
Printhead
Assembly
Ribbon
Media
7. Observe the ribbon for rippling and bagging as it travels from the Printhead Assembly to the Take-Up Hub.
If smooth and if printed labels show no evidence of ribbon wrinkling, proceed to Step 8; otherwise, slightly
loosen the Ribbon Shield Adjustment Screws. Move the Ribbon Shield forward or backward to smooth the
ribbon. Tighten the Ribbon Shield Adjustment Screws and print several more labels to verify adjustment;
repeat if necessary.
Ribbon Shield
Screws
Printhead
ssembl
Ribbon
Shield
8. Press TEST to stop printing.
9. Install operating media and ribbon. Adjust the Printhead Leveling Cam, if needed. Send a label format
from the host. Examine the printed labels and then, if needed, slightly readjust the Ribbon Shield.