EasyManuals Logo

Datamax I-Class Mark II Maintenance Manual

Datamax I-Class Mark II
74 pages
To Next Page IconTo Next Page
To Previous Page IconTo Previous Page
Page #72 background imageLoading...
Page #72 background image
68
I-Class Mark II Maintenance Manual
Removal and Replacement
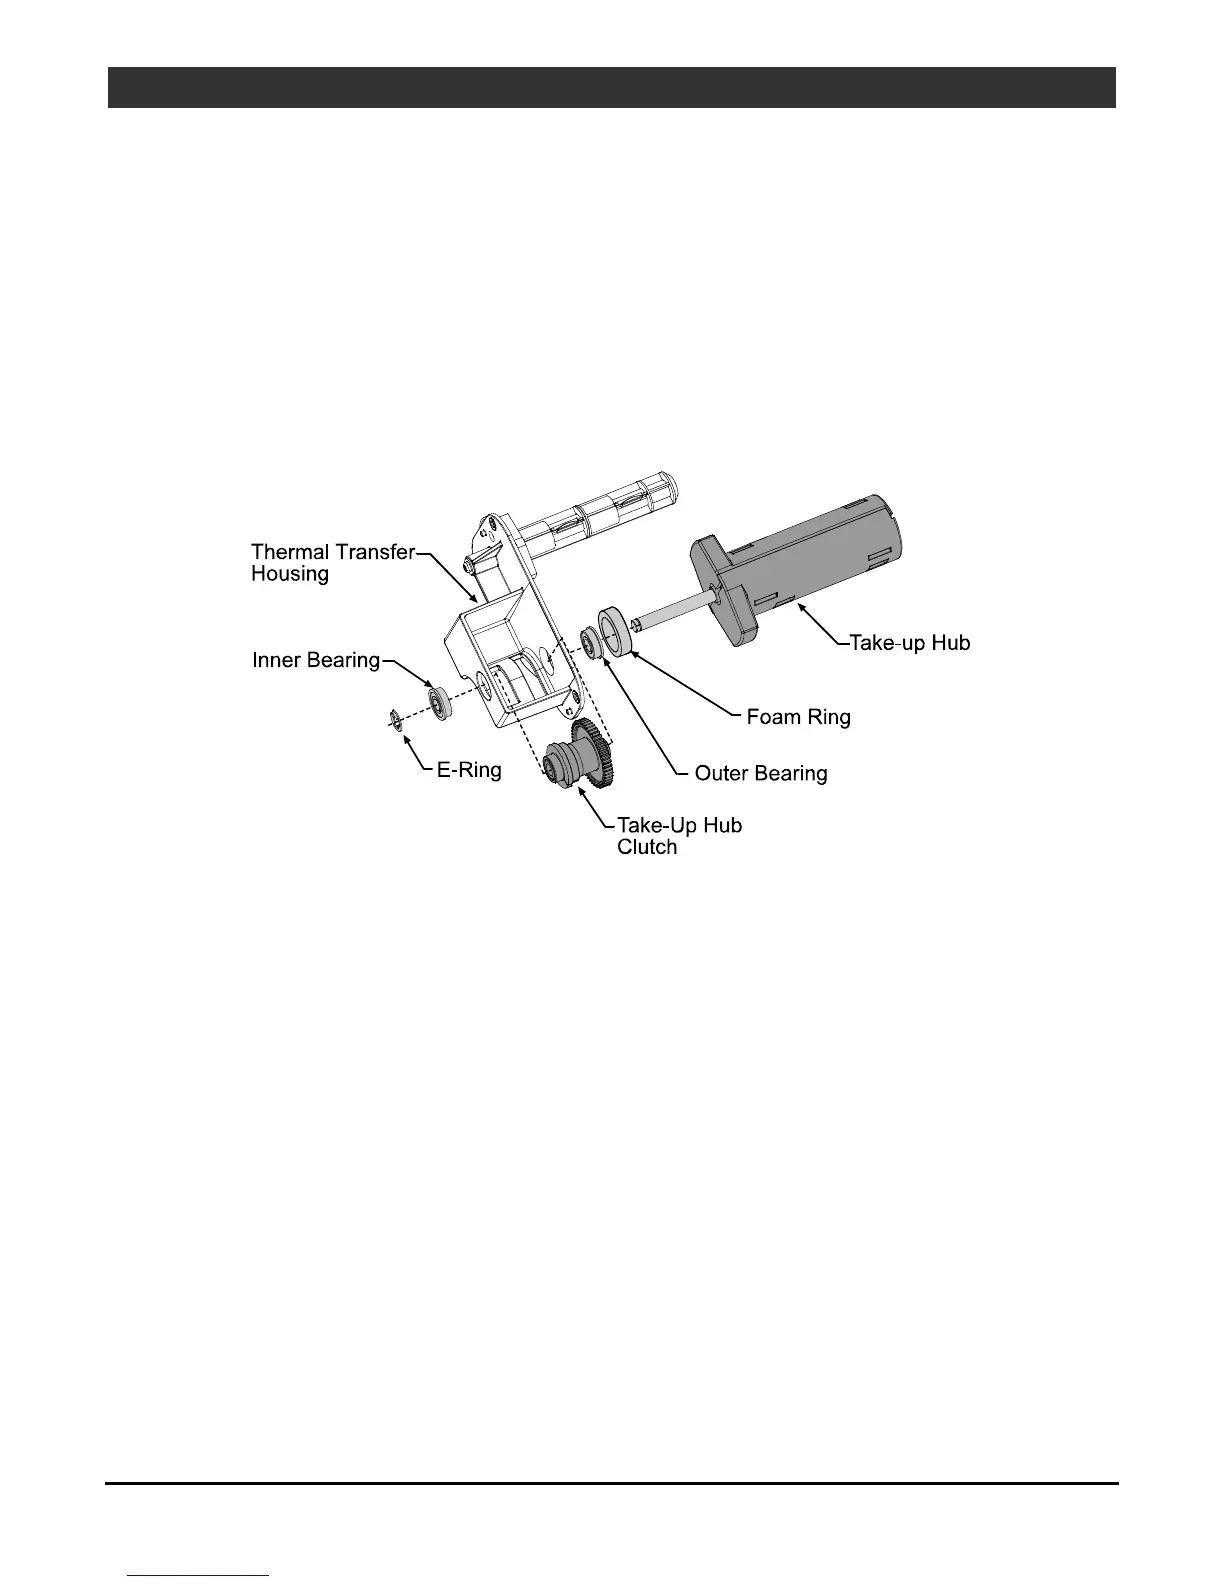
4.14.2 Ribbon Take-up Hub & Clutch Assembly
Removal:
1. Remove the Thermal Transfer Assembly; see Section 4.14.
2. Remove the E-Ring from the Take-Up Hub shaft and then remove the Inner Bearing.
3. Remove the Take-Up Hub and the Outer Bearing from the Thermal Transfer Housing.
4. Slightly compress the Take-Up Hub Clutch then remove it from the Thermal Transfer Housing.
Replacement:
1. Reinstall the Outer Bearing in the Thermal Transfer Housing.
2. Position the Take-Up Hub Clutch in the Thermal Transfer Housing
3. Slide the Take-Up Hub shaft through the Take-Up Hub Clutch and Thermal Transfer Housing.
4. Reinstall the Inner Bearing and clip the E-Ring onto the Take-Up Hub shaft.
5. Reinstall the Thermal Transfer Assembly; see Section 4.14.

Other manuals for Datamax I-Class Mark II

Questions and Answers:

Question and Answer IconNeed help?

Do you have a question about the Datamax I-Class Mark II and is the answer not in the manual?

Datamax I-Class Mark II Specifications

General IconGeneral
Power Supply100-240 VAC, 50-60 Hz
Print Resolution203 dpi
Print Width4.09 inches
Memory16 MB DRAM, 8 MB Flash
ConnectivityUSB, Serial, Ethernet
Media HandlingRoll-fed
Media Width1.0" – 4.65" (25.4 mm – 118 mm)
Media Thickness0.0025" – 0.010" (0.0635 mm – 0.254 mm)
Ribbon Width1.0" – 4.5" (25.4 mm – 114.3 mm)
Ribbon Length1968 feet (600 meters)
Print Speedup to 12 ips
Dimensions12.7" H x 12.6" W x 18.6" D (322.6 mm H x 320 mm W x 472.4 mm D)

Related product manuals