13
PULSE MX
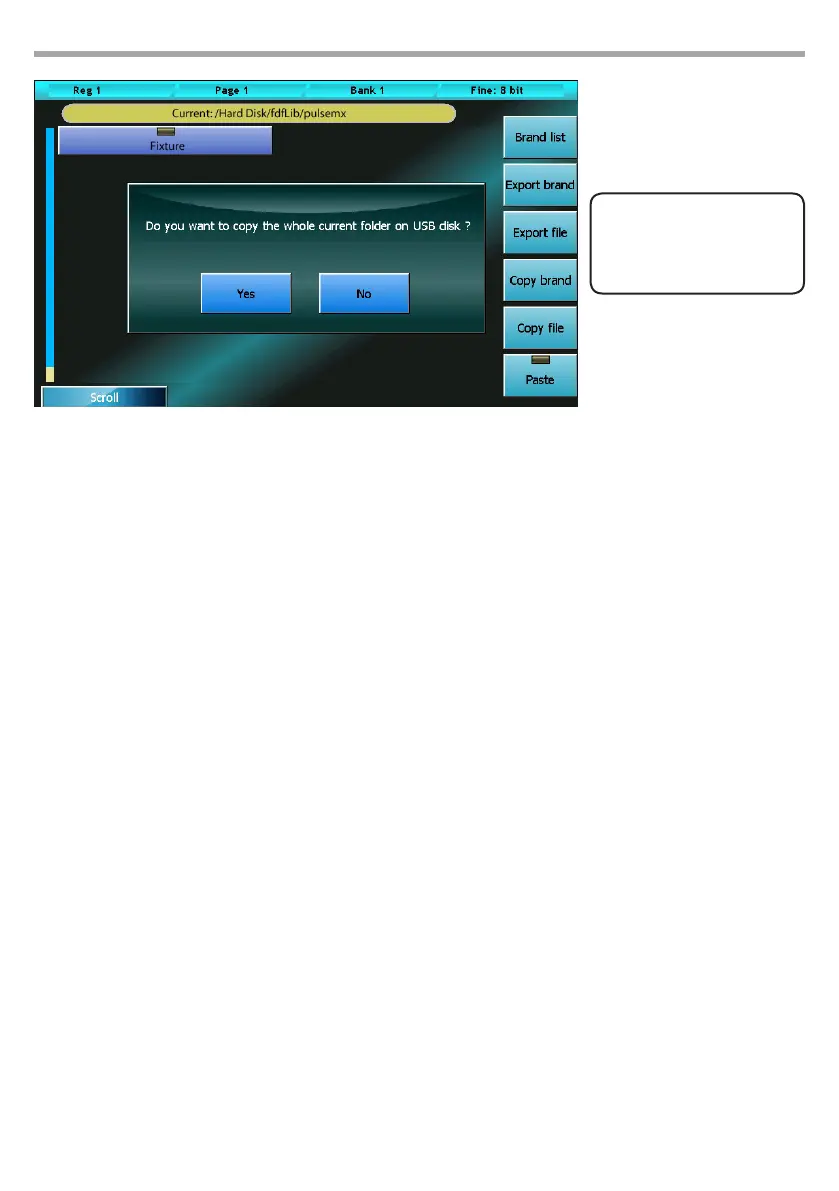
Fig.4
For example: importing a FIXTURE Ex.fxr le
Supposing the USB memory is recognised as a disk G: of our PC
1. We create the G:\FDFLIB folder and then a G:\FDFLIB\BRAND folder; we then copy the FIXTURE.fxr le
into the G:\FDFLIB\BRAND we have just created.
2. We place the USB drive into the USB port of the console, press the Menu key to recall the Setup menu
and select Library manager.
3. From the Library manager, we press the Menu key and then USB disk: all the folders available in FD-
FLIB will be displayed; by pressing the BRAND button, all existing les in the \FDFLIB\BRAND folder
will be displayed
4. We select our xture by pressing the BRAND button and then again on the FIXTURE. fxr button; the
LED of the FIXTURE button will turn red to conrm the selection.
5. We press the Import button and conrm. In this way, by going back to the internal disk (Internal disk
button of the context-specic menu) we will nd the new FIXTURE xture in the BRAND.
2.2 FIXTURES PATCH
This window enables you to tell the console which and how many xtures are involved in the show and
the information related to their DMX addressing.
Pressing the Address Patch button from the Setup Menu activates the patch window. This window is
divided into two sections: the left section allows us to navigate in the xtures library, while the right sec-
tion show the xtures which have already been added to the show enabling us to edit them.
For example, if we wanted to add 8 identical xtures, connected to the DMX 2 line and mapped next to
one another starting from the DMX 120 addressing, we would rst have to select the BRAND button on
the left-hand side of the window and then the FIXTURE button; the Add xtures window will appear and,
using the encoder wheels, we will set 8 in the Fixtures to add eld, 2 in the DMX universe eld and 120
in the DMX start add eld; nally, we will have to conrm the data by pressing the Add xtures button.
Once this has been completed, the Add xtures window disappears and the right-hand side of the Ad-
dress patch window is populated with 8 buttons, one for each xture added.
Importing a xture into the console library
THE FIXTURE PROFILES
CAN BE DOWNLOADED
FROM THE WEB SITE AT
www.digilite.eu