5•Service
Doc. 031851-05 12/04 5-13
5. Slowly release the head, allowing it to separate from the housing.
CAREFULLY disengage the head from the sapphire piston by pulling the
head straight off and away from the mounting guides (see Figure 5-5
). Be
especially careful not to snap the piston if the internal spring sticks to the
piston guide.
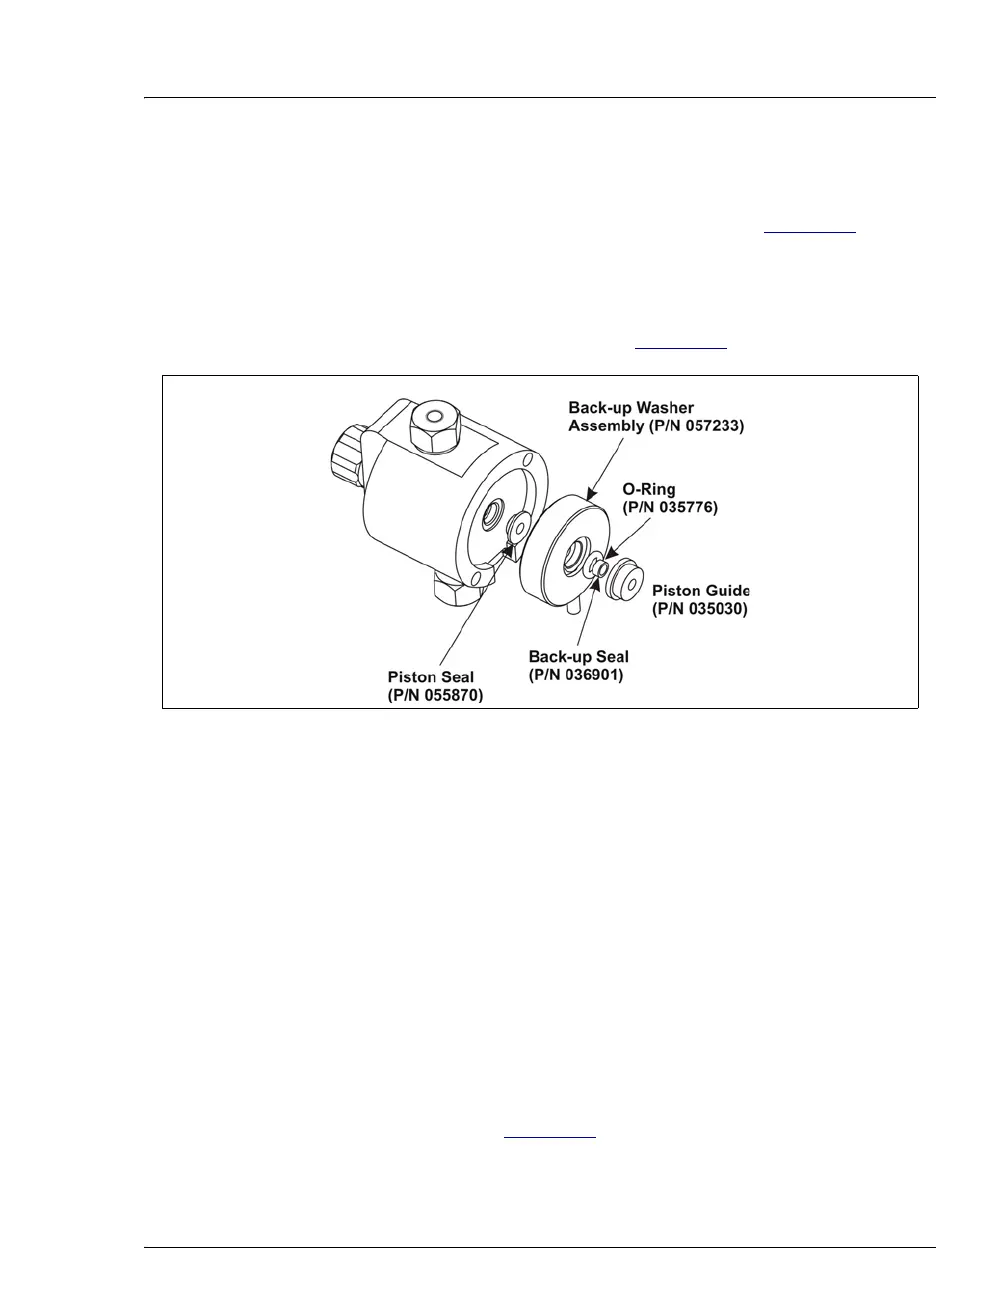
6. Place the head, front end down, on a clean work area. Lift off the piston guide
and back-up washer to expose the seal (see Figure 5-6
).
7. Remove the piston seal from the head. Discard the seal.
8. Remove the O-ring and back-up seal from the back-up washer.
9. Carefully push the new piston seal (P/N 055870) into the head. When
properly installed, the piston seal is almost flush with the indented surface of
the head.
10. Press a new back-up seal (P/N 036901) into the O-ring (P/N 035776). If
necessary, also replace the O-ring. Then press the O-ring and back-up seal
into the back-up washer assembly (P/N 057233).
11. Press the back-up washer assembly into the head, followed by the piston
guide (P/N 035030).
12. Remove the spring, spring guide, piston, spring retainer, and retainer ring
from the pump housing (see Figure 5-7
). Inspect the interior of the housing
for liquid and corrosion. Clean up any spills and carefully clean any signs of
corrosion from the interior of the housing.
Figure 5-6. Pump Head Assembly