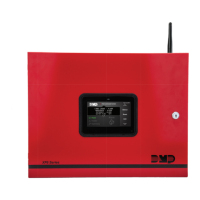
Digital Monitoring Products XF6 Series Installation and Programming Guide
6
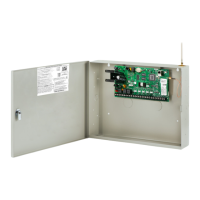
WIRE THE PANEL
WIRING SPECIFICATIONS
DMP recommends using 18 or 22 AWG for all LX-Bus, NAC, and Keypad Bus connections. The maximum wire distance
between any module and the DMP Keypad Bus or LX-Bus circuit is 1,000 feet. To increase the wiring distance, install an
auxiliary power supply, such as a DMP Model 505-12.
To maintain auxiliary power integrity when using 22-gauge wire on Keypad Bus circuits, do not exceed 500 feet. When
using 18-gauge wire, do not exceed 1,000 feet. Maximum distance for any bus circuit is 2,500 feet regardless of wire
gauge. Each 2,500 foot bus circuit supports a maximum of 40 LX-Bus devices. To increase the wire length or to add
devices, install an additional power supply that is listed for Fire Protective Signaling, power limited, and regulated
(24VDC nominal) with battery backup.
Maximum voltage drop between a panel or auxiliary power supply and any device is 2.0 VDC. If the voltage at any device
is less than the required level, add an auxiliary power supply at the end of the circuit.
For additional information refer to the LX-Bus/Keypad Bus Wiring Application Note (LT-2031) and the 710 Bus Splitter/
Repeater Module Installation Guide (LT-0310).
WIRE THE TRANSFORMER
The XF6 Series Series panel comes with a28 VAC 130VA transformer. Thetransformer must be wired to a dedicated,
unswitched120VAC60Hz circuit with at least 1.3Amps available.
Caution: Never share the Fire Alarm Control Panel circuit with any other equipment. Always ground the panel before
applying power to any devices and use 18 AWG or larger for all power connections.
WIRE THE BATTERIES
DMP recommends replacing batteries every3to5years under normal use. Connect the black battery lead to the
negative battery terminal. Connect the red battery lead to the battery positive terminal. The batteries will need to be
wired in series, meaning the black and red leads will be connected to dierent batteries with a jumper wire connecting
the two.
Caution: The XF6 Series panel requires two 12 VDC backup batteries wired in series. It cannot be powered by a
single 12 VDC backup battery.
For additional standby batteries, use a DMP Model349, 350or352S enclosure. All wiring shall run through conduit. The
enclosure shall be installed to the left of the panel enclosure to ensure Battery and AC wire separation.
Caution: Use sealed lead-acid batteries only. Batteries supplied by DMP have been tested to ensure proper charging
with DMP products. Do not use gel cell batteries.
Battery Only Restart
When powering up the XF6 Series Series panel without AC power, briefly short the battery start pads to pull in the
battery cuto relay. Once the relay has been pulled in, the battery voltage holds it in that condition.
If the panel is powered up with an AC transformer, the battery cuto relay is pulled in automatically.
Discharge/Recharge
The XF6 Series Series panel battery charging circuit float charges at27.6VDC at a maximum current of1.5Amps for a
maximum of 43 Ah. Battery voltage level conditions are determined by the following voltage ranges:
• Battery Trouble—Below23.4VDC
• Battery Cuto—Below20VDC
• Battery Restored —Above24.6VDC