14. Click the Edit link to change Device Conguration, Location, Network Settings or Passwords.
15. Make the necessary network changes and click Save Settings. Internet Explorer will no longer communicate with the
module because its IP address has changed.
After the module resets and the adapter has been re-configured, you can then use the new IP address to connect to the
internal webpage.
Also note you must choose an IP address that is not being used in the existing network.
16. Disconnect the Ethernet crossover cable and go back into the Ethernet adapter settings and restore the IP and subnet
values saved from step 6.
The module should now be set up to work on the new network.
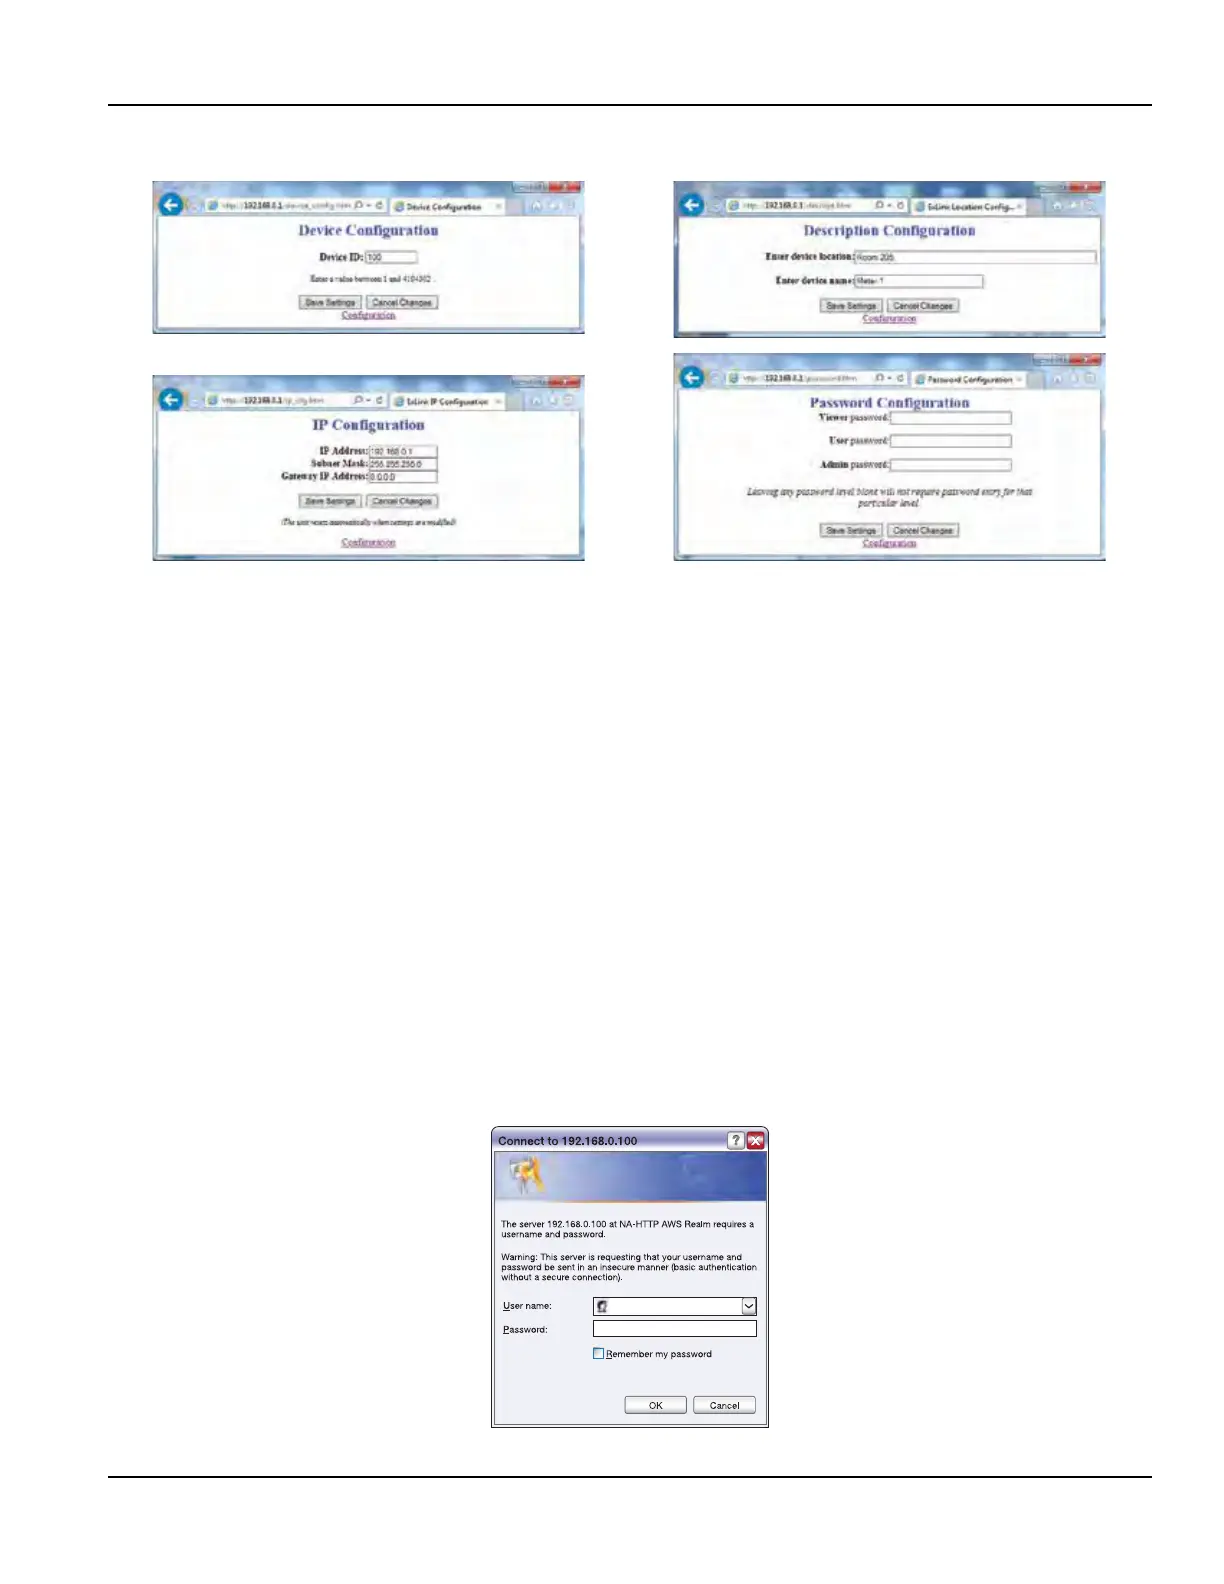
Network Settings
IP address, IP subnet, IP gateway, and Device Description are configured through the web interface. IP address and subnet
defaults to 192.168.0.100 and 255.255.255.0. Connection to the web interface requires an Ethernet crossover cable, power to
the transmitter, and a PC with a web browser. Typing http://192.168.0.100 in the address bar will allow connection to the
transmitter’s web interface for editing.
Access to the transmitter’s data requires the entry of a user name and password. The transmitter’s default user name is admin
and the password is blank from the factory.
OTE:N Changing the IP address will require use of the new number when trying to access the web page. Each transmitter
must be set up with a unique IP address when trying to network multiple transmitters.
MPORTANTI
When changes are made to the IP address, you must retain the new number for future access.
Figure 57: Network login screen
Communications Protocols
Page 87 May 2016 TTM-UM-00136-EN-06

 Loading...