8.1 SINGLE INVERTER
1. Ensure each inverter circuit breaker is in the open (OFF) position. No voltage should be
coming in or out of the inverter at this point.
2. Using a multimeter, check the following:
a. Check the battery bank voltage is within operating range at the inverter DC breaker,
or the external DC disconnect.
b. Check the PV voltage is within operating range at input connections of the inverter.
c. If using AC input, double check each hot line to neutral connection supplying power to
the inverter to ensure voltage is in operating range of the inverter.
3. Upon confirming all voltages are within the inverter’s operating range, set the inverter battery
breaker to the closed (ON) position. If equipped, close the external battery breaker installed
between battery bank and inverter.
4. Power on each battery one at a time, starting with the master, then each additional battery in
≈5 second intervals.
5. Power on the inverter using the power switch on the lower right side of the unit.
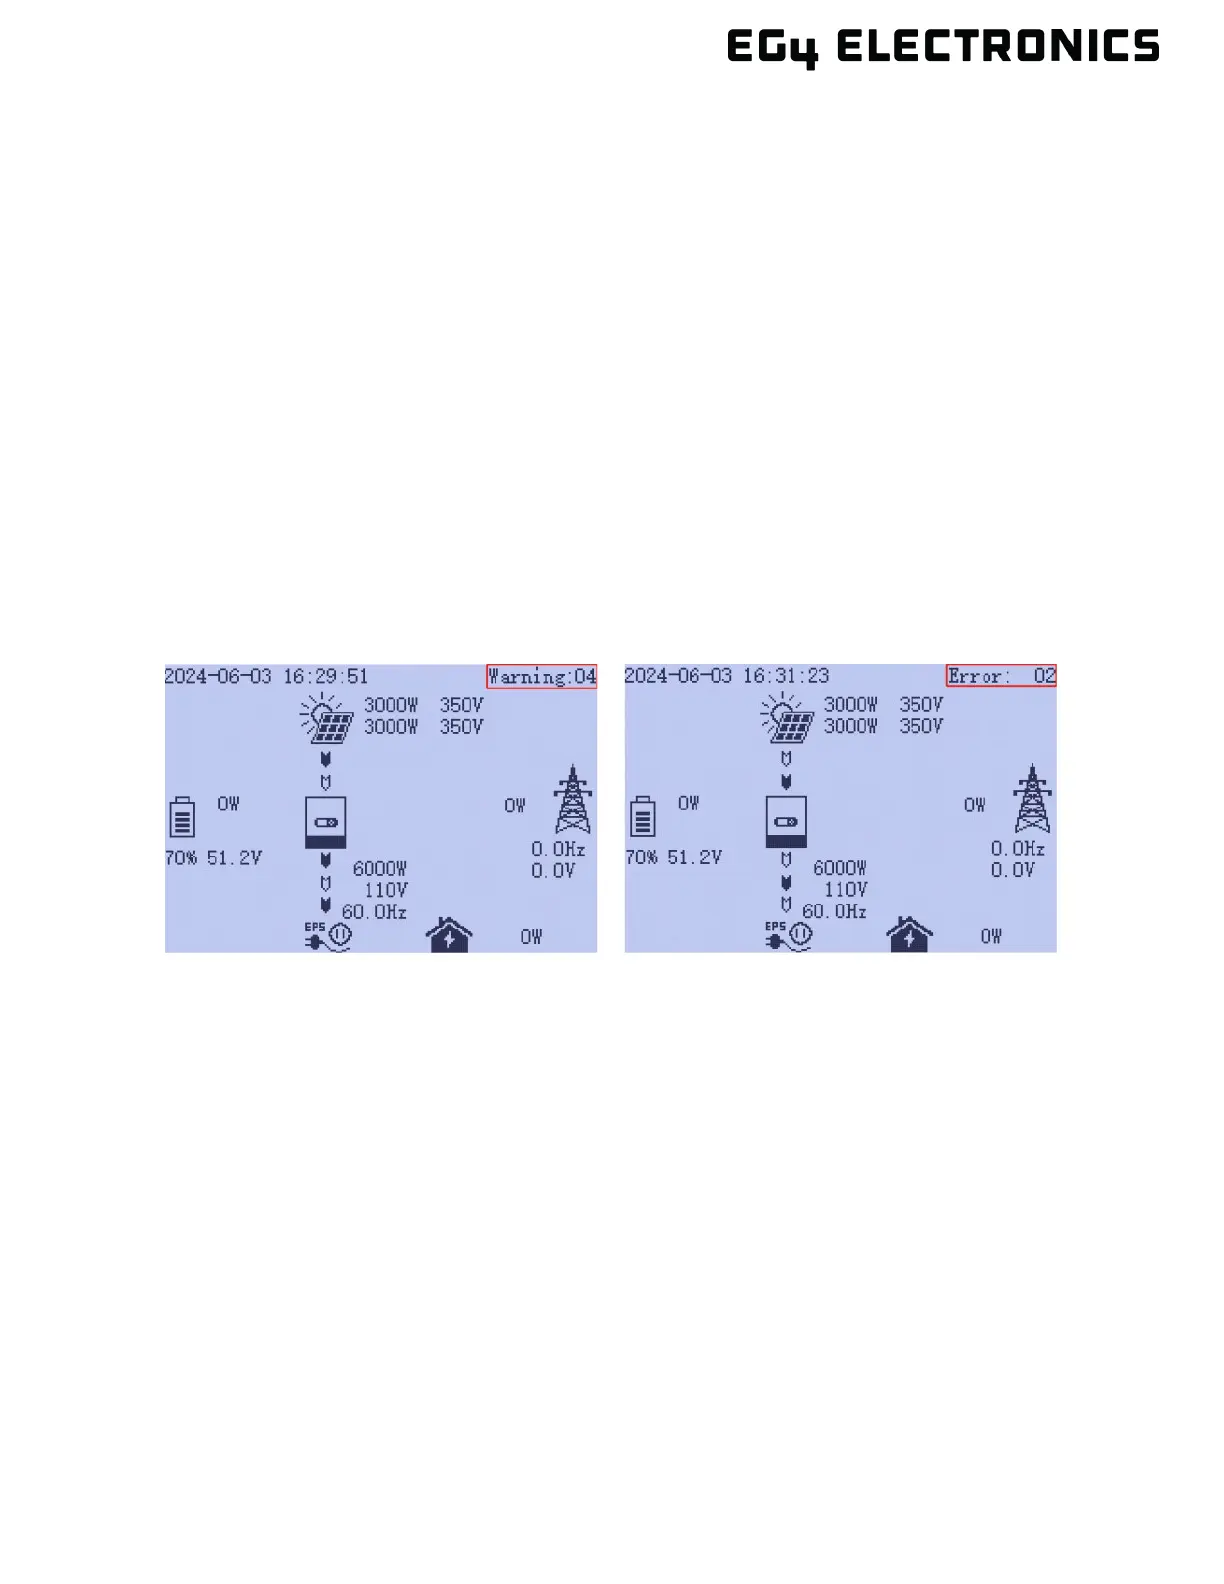
6. Check for warnings and errors on the upper right corner on the front display panel. If the
inverter shows “normal” move ahead to the next step.
7. Move the external PV isolator switch to the closed (ON) position. Set the PV switch on the
side of the inverter to the closed (ON) position. Again, check for errors or warnings on the
front display panel. If the inverter shows “normal” go ahead to the next step.
8. If using grid input, set the external breaker between input panel and inverter to the closed
(ON) position. Next, move the inverter GRID breaker to the closed (ON) position. This should
provide AC power to the inverter. Again, check for errors or warnings. If the inverter shows
“normal” go ahead to the next step.
9. As best practice, configure the following settings using the inverter display panel (see section
10 for more information on using the display panel).