PROline Prosonic Flow 93 PROFIBUS-DP/-PA 4 Wiring
Endress+Hauser 47
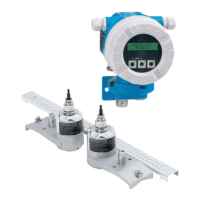
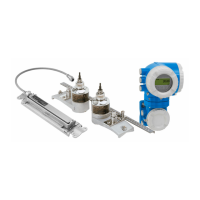
Legend:
A View A
B Detail B
1 Connection compartment cover
2 Sensor cable plug, channel 1, upstream
3 Sensor cable plug, channel 1, downstream
4 Sensor cable plug, channel 2, upstream
5 Sensor cable plug, channel 2, downstream
6 Cable gland cover
7 Rubber seal
8 Cable gland holder
9 Cable fixing sleeves
10 Earth contact terminals
11 Sensor cable plug
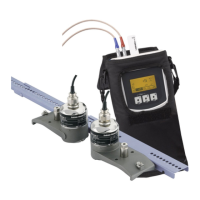
Procedure:
1. Transmitter: Loosen the screws and remove cover (item 1, Fig. 47) from the
connection compartment.
2. Remove the blank cover for the cable entries for channel 1 (CH1) and channel 2
(CH2).
3. Disassemble the special cable entry which is supplied with the sensors. Run both
sensor connection cables through the cover (6) of the cable gland and into the
connection compartment.
4. Position the cable fixing sleeves (9) of both sensor cables exactly next to each other
(Detail B). Push in the earth contact terminals (10) and screw tight. This ensures
perfect grounding.
5. Spread the rubber seal (7) along the side slit with a suitable tool (e.g. a large
screwdriver) so that both sensor cables can be fixed into place. Push up the rubber
seal in the cable gland (8). Close the cover of the cable gland (6) so that it is tight.
6. Plug in the sensor cable connectors in the way shown in Fig. 47.
7. Transmitter: Secure cover (1) on the connection compartment.
4.2.2 Cable specifications
Sensor cable:
Use the ready-to-use cables supplied by E+H with each sensor pair.
The cables are available in lengths of 5 m, 10 m, 15 m and 30 m.
You can choose between PTFE and PVC cable materials.
Operation in zones of severe electrical interference:
The measuring system complies with the general safety requirements in accordance
with EN 61010, the EMC requirements of EN 61326/A1 (IEC 1326) “Emmision to class A
requirements” and NAMUR Recommendation NE 21.
"
Caution!
Grounding is by means of the ground terminals provided for the purpose inside the
connection housing.