Connecting High-Speed Stacking Cables
2-6 Installation
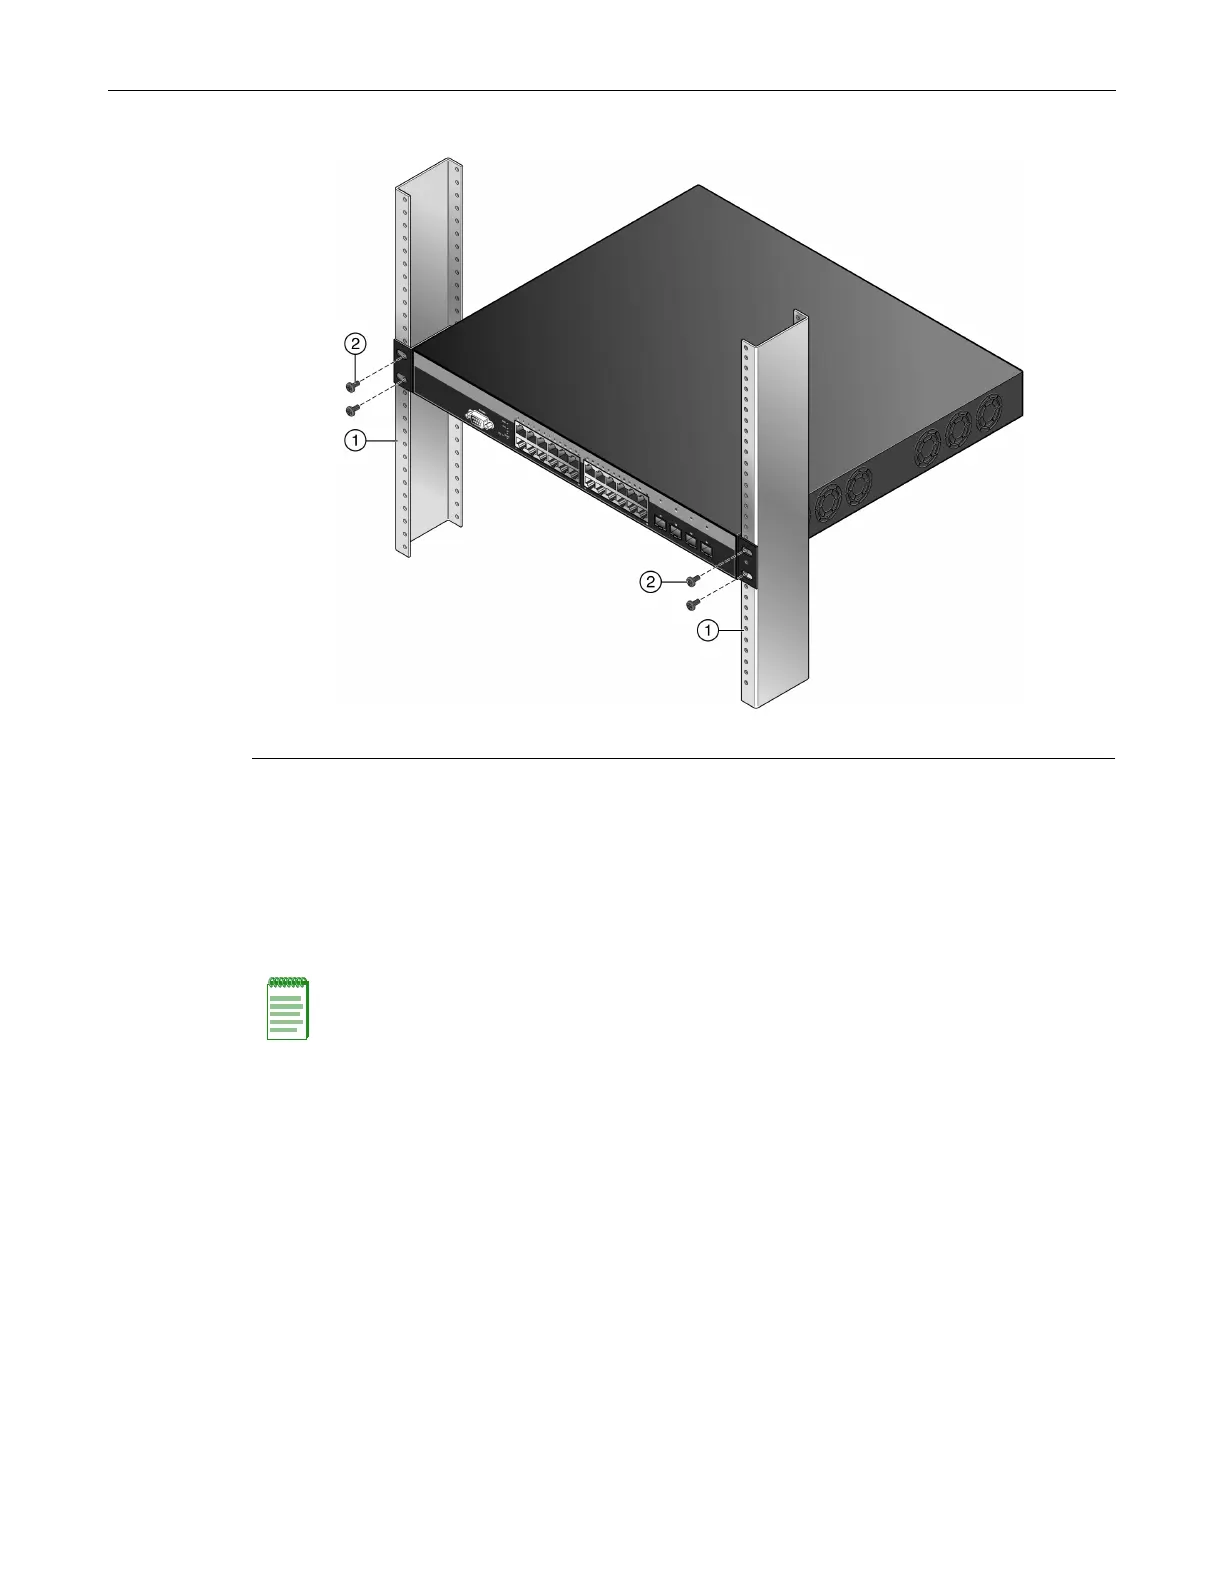
Figure 2-4 Fastening the Switch to the Rack
3. Ifyouare installingthisswitchinastackedconfiguration,repeatthisprocedureforeach
switchuntilallswitcheshavebeeninstalledinthestack,thenproceedto“ConnectingHigh‐
SpeedStackingCables”onpage 2‐6.Otherwise,proceedto“ConnectingACPower”on
page 2‐10.
Connecting High-Speed Stacking Cables
Thestackofswitchescanbeconnectedinaringordaisychaintopology.Inaringtopologyallthe
switchesareconnected.Theonlydifferenceinthecableconnectionsinadaisychaintopologyis
thatonecable isnotinstalled.Uptoeightswitchescanbestackedtogetherand
connectedbyhigh‐
speedstackingcables.Youcanaddswitchesandreachuptoamaximumof384Ethernetportsper
stack.Thehigh‐speedstackingcablesallowtheentirestacktooperatewithasingleIPaddress.
Thehigh‐speedstackingcablesareoptionalitemsthatyoumustorderseparately.
TheB5supports
thefollowingstackingcables:
•STK‐CAB‐SHORT,a30cmcable
•STK‐CAB‐LONG,a1mcable
•STK‐CAB‐2M,a2mcable
•STK‐CAB‐5M,a5mcable
Figure 2‐5showsanexam pleofafour‐highstackconnectedinaringtopology.AllSTACKDOWN
andSTACKUP
connectorsareusedintheinstallation.Thehigh‐speedstackingcableconnections
1 Rails of 19-inch rack 2 Mounting screws
Note: By default, the stack connection ports are covered with removable covers. If you are not
connecting stacking cables, keep the covers on the stack connection ports. If you remove the
stacking cables, you must replace the covers on the stack connection ports.

 Loading...