Changing Alarm Relays from Normally Closed to Normally Open
2-6 Installation
Changing Alarm Relays from Normally Closed to Normally Open
Depending on your desired alarm configuration, you may need to change either of the two alarm
relays from normally closed (default) to normally open. This procedure requires a Phillips
screwdriver and needle-nosed pliers. For more information about alarm relays, see “Connecting
the Relays” on page 2-22.
This procedure applies only to the following I-Series switches and hardware revisions:
• I3H252-02 — revision 5E or later
• I3H252-12TX — revision 5F or later
• I3H252-4FX-MEM — revision 5E or later
• I3H252-4FXM— revision 5F or later
• I3H252-6TX-MEM— revision 5E or later
• I3H252-8FXM— revision 5F or later
• I3H252-8TX-2FX— revision 5E or later
Refer to the label on the bottom of the I-Series switch to determine the revision of your hardware.
To change an alarm relay from normally closed to normally open:
1. If necessary, disconnect the switch from any power sources.
2. Place the switch upside down on a secure location.
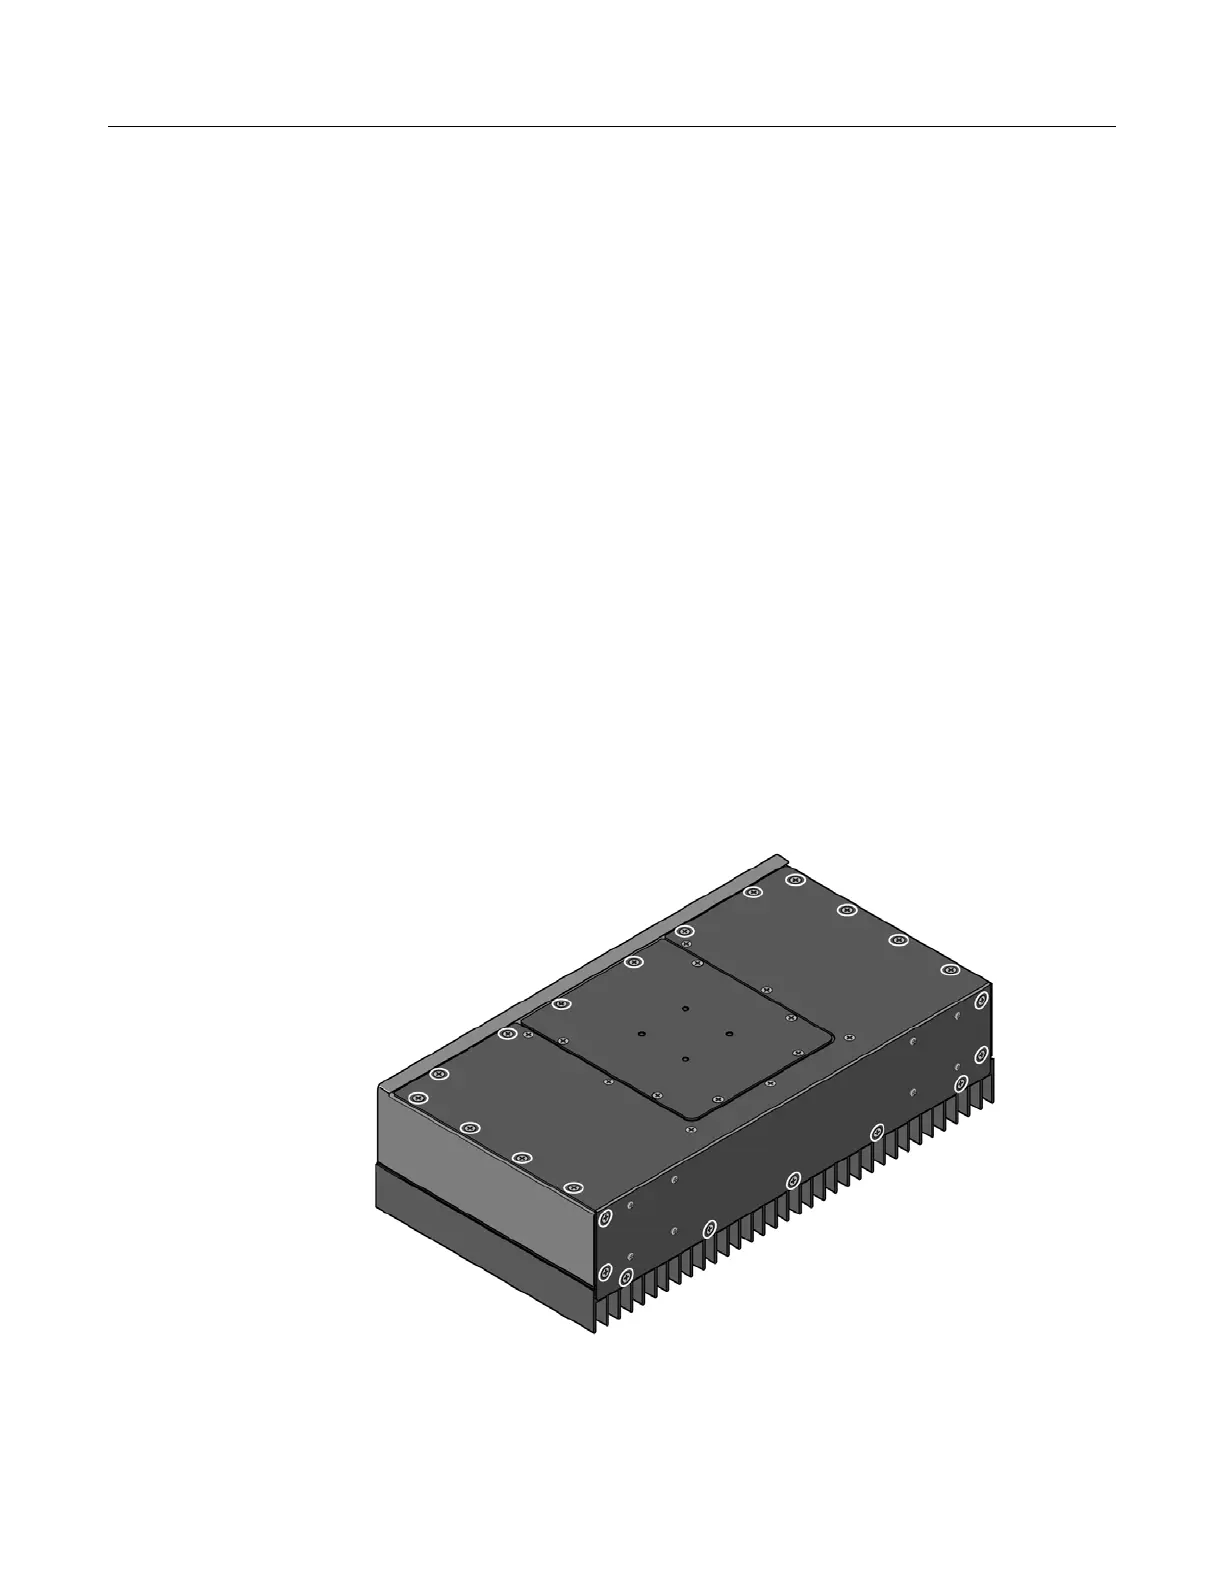
3. Remove the screws securing the bottom cover to the switch as shown in Figure 2-1 on
page 2-6, then remove the bottom cover.
Figure 2-1 Removing the Bottom Cover
4. With the switch upside down, look towards the front of the switch from the rear. Locate the
two jumper blocks behind the Alarm Relay front-panel ports as shown in Figure 2-2.
 Loading...