Mounting the Switch
2-12 Installation
To install the rack-mount kit and then install the switch into the rack:
1. Place the switch on a sturdy flat surface.
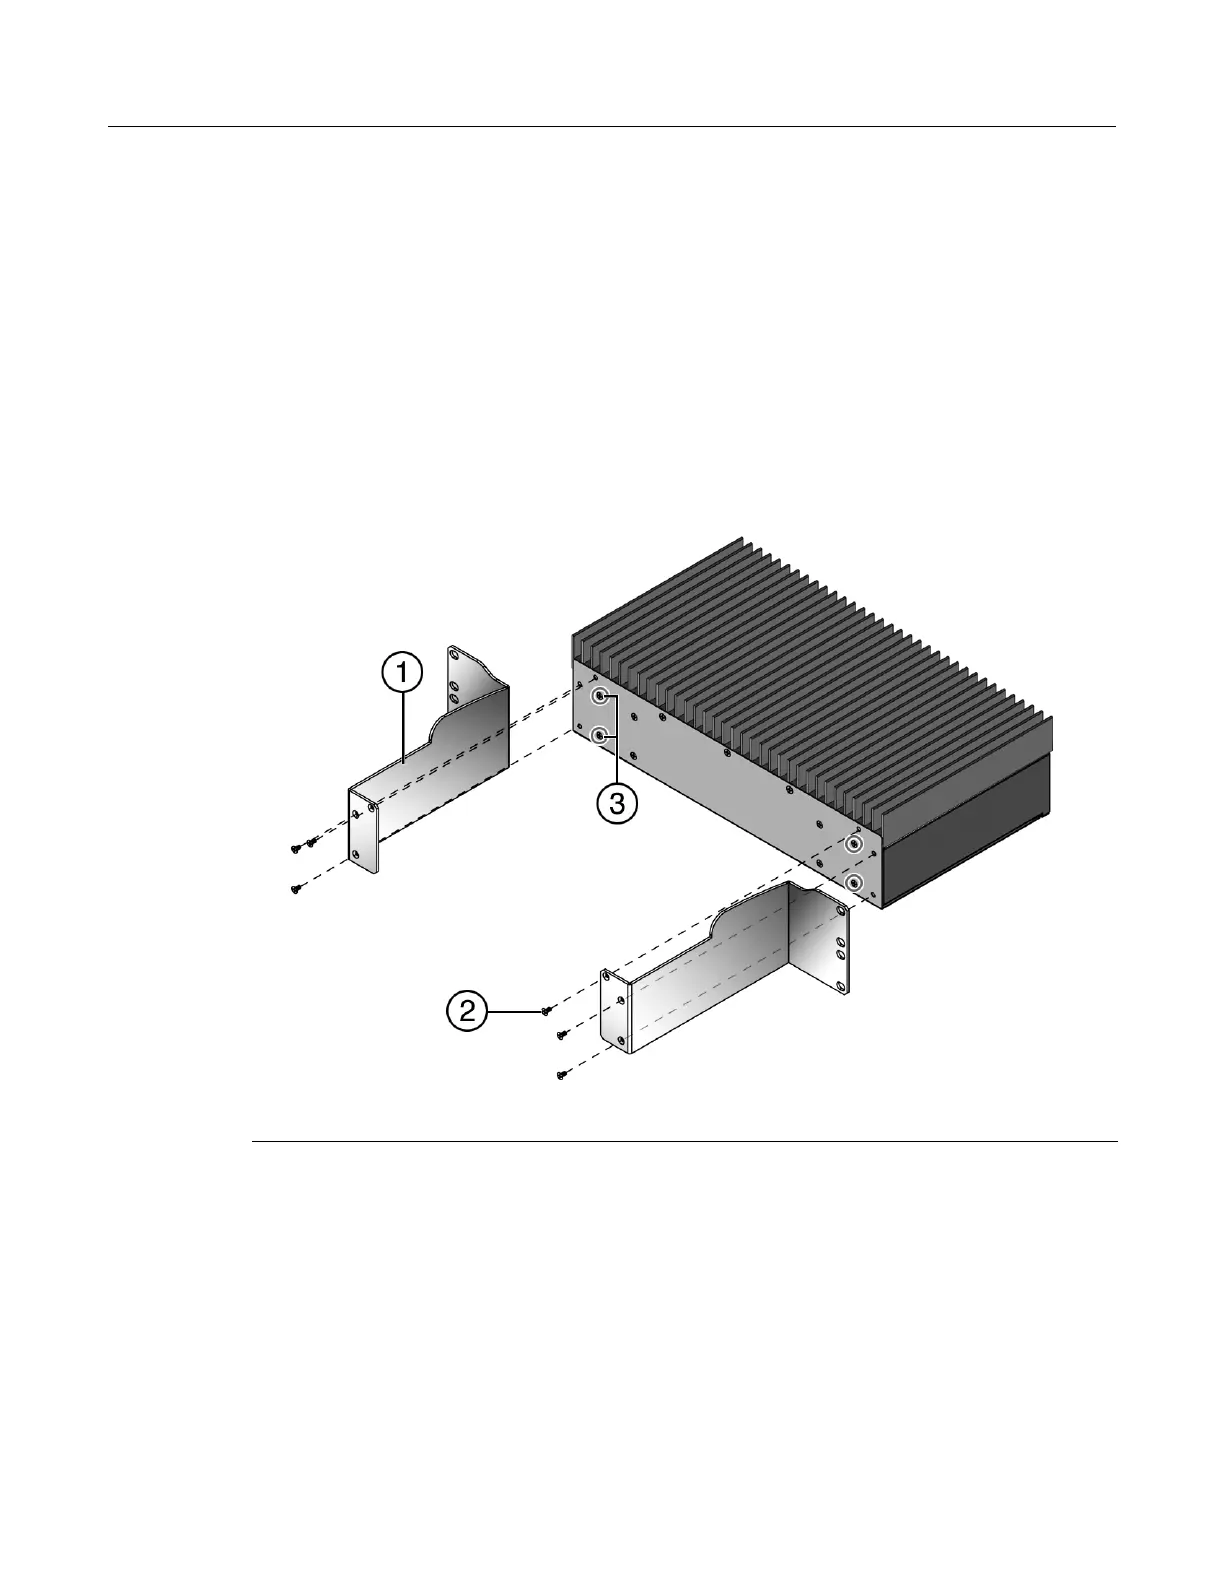
2. At the back of the switch, locate and remove the two DIN mounting screws as shown circled
in Figure 2-6. Retain the screws in case you want to mount the switch on a DIN rail at a later
time.
3. Locate and remove the two side screws and top screw in each corner as shown in Figure 2-6.
Save the screws.
4. Install one of the brackets provided in the rack-mount kit to the back of the switch using the
screws you removed in Step 3.
5. Repeat the previous steps to install the other bracket to the other side.
Figure 2-6 Attaching the Brackets to the Switch
6. If you are installing the I3H-PWR external AC to DC power supply, refer to “Attaching the
External Power Supply to the Rack Mount Bracket” on page 2-13, then return to Step 7 below.
7. Using the mounting hardware provided, attach the front of the brackets to the rack as shown
in Figure 2-7 on page 2-13. Tighten securely.
1 Rack-mount brackets 2 Rack-mount screws 3 DIN screws (4 need to be removed from chassis)
 Loading...