Replacing the IOM in Slot 1
Enterasys I-Series Hardware Installation Guide 3-7
Replacing the IOM in Slot 1
To replace the IOM in slot 1:
1. If necessary, remove the switch from the rack or DIN rail, as described in “Removing the
Switch from a Rack” on page 3-5 or “Removing the Switch from a DIN Rail” on page 3-6.
2. Place the switch on a secure location and turn it upside down.
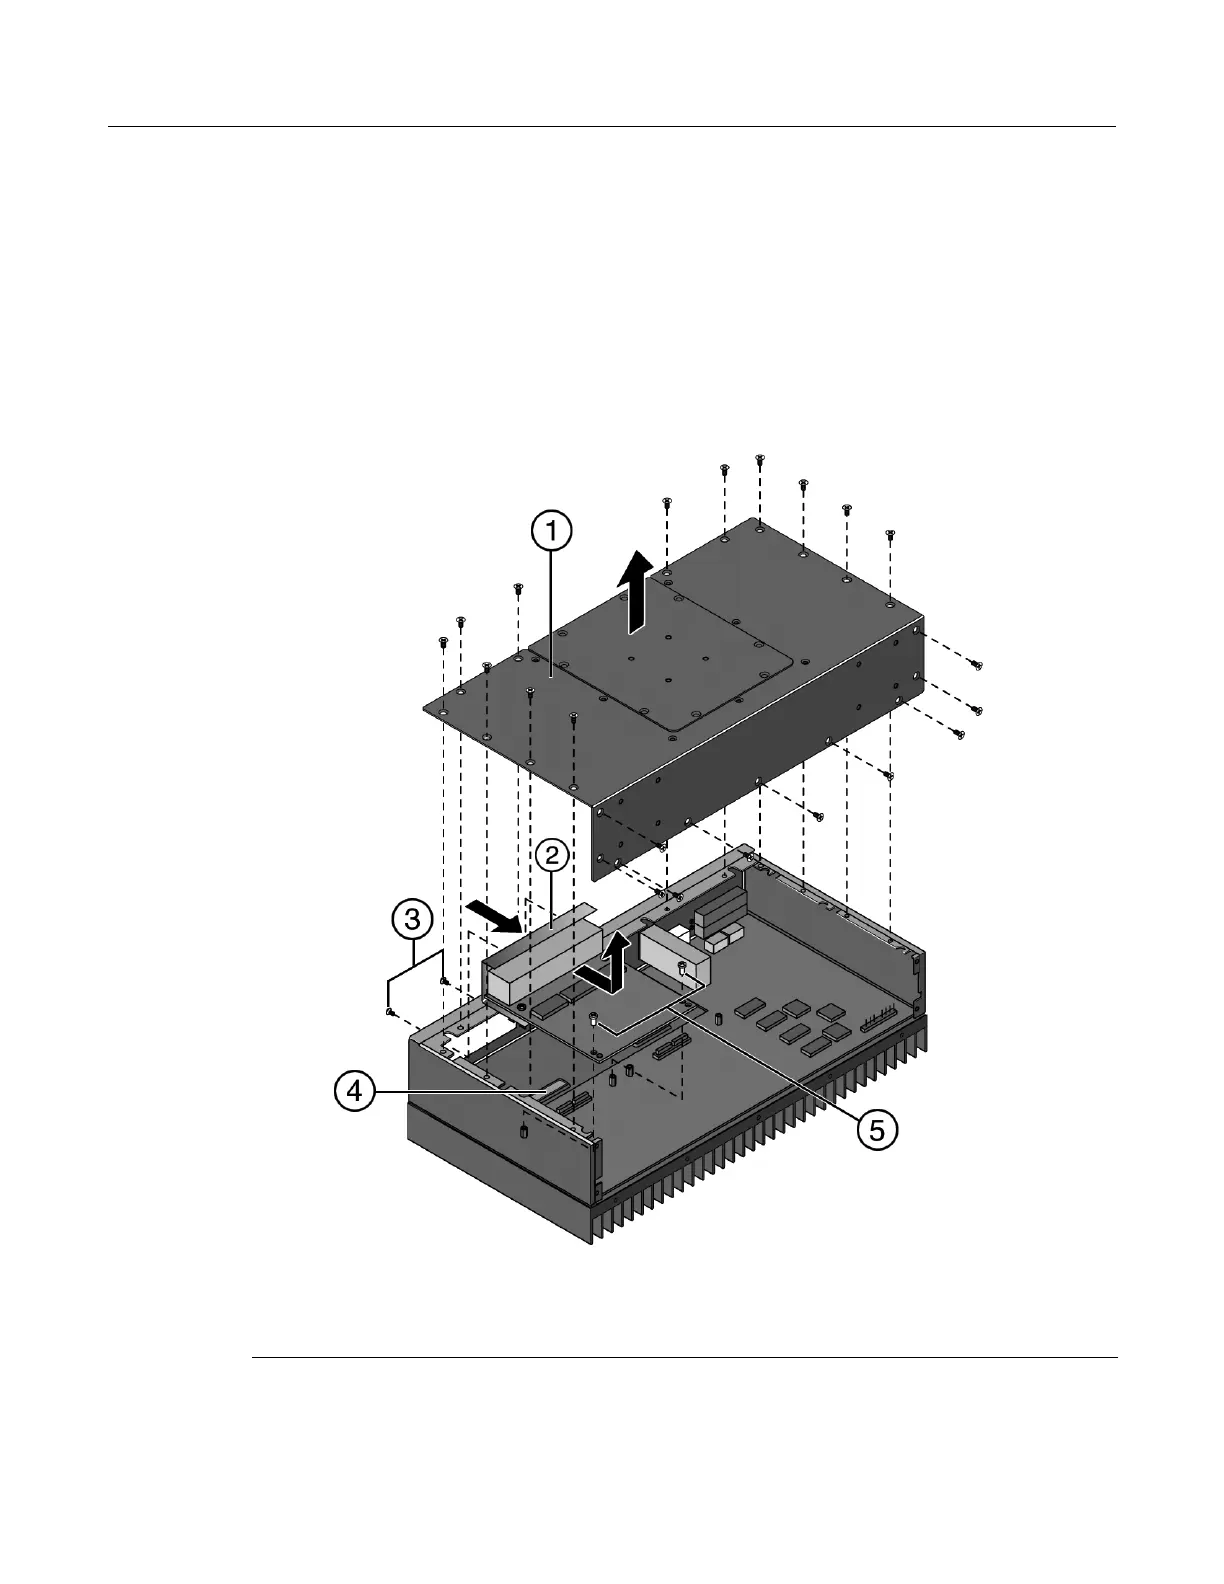
3. Remove the bottom cover by removing the screws from the bottom and the side, as shown in
Figure 3-5. You do not need to remove the screws holding the access panel in place.
Figure 3-5 Removing the IOM
1 Bottom panel 4 Heat block
2 IOM 5 IOM rear screws
3 IOM front panel screws
 Loading...