Rackmount Installation
Hardware Installation 3-11
Installation
Proceed as follows to install the switch into a 19-inch rack:
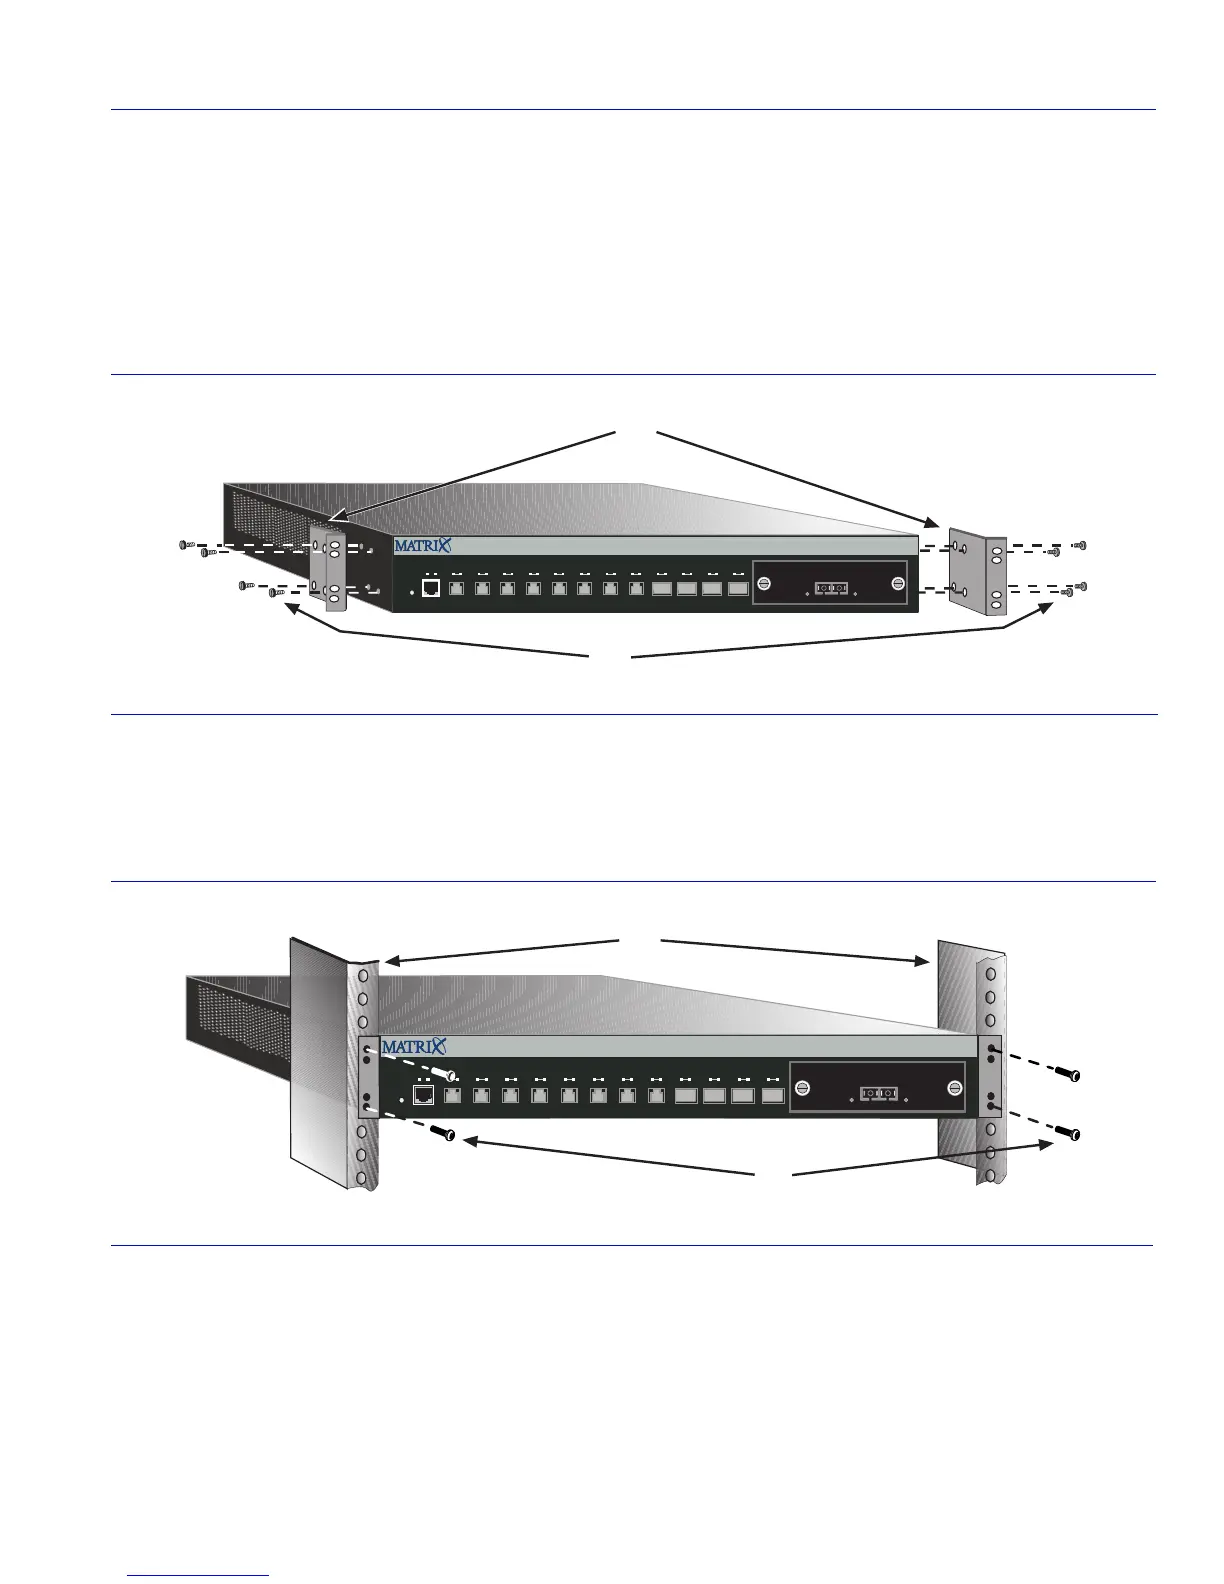
1. Attach the rackmount brackets
➀ to the switch, as shown in Figure 3-6, using the eight M3 x
6 mm flathead screws
➁ from the rackmount kit.
Figure 3-6 Attaching the Rackmount Brackets
2. Position the switch between the rails of the 19-inch rack ➀ as shown in Figure 3-7. Then fasten
the switch securely to the frame using four mounting screws
➁ (user supplied).
Figure 3-7 Fastening the Switch to the Rack
➀
Rackmount brackets
➁
M3 x 6 mm flathead screws (8)
➀
Rails of 19-inch rack
➁
Mounting screws (4)(supplied by user)
1G694-13
2345678
9101112
Reset
Console
CPUPWR
1
À
Á
ZPIM1-01
RX TX
ZPIM1-01
RX TX
1G694-13
1234567 8
9101112
Reset
Console
CPUPWR
Á
À
 Loading...