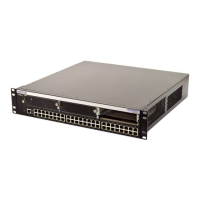
Installing an Optional XENPAK (10GBASE-LR) Module
Hardware Installation 3-7
3. Locate the locking tab ➅ under the front end of the Mini-GBIC ➀. Push in on the locking tab as
far as it will go to release the Mini-GBIC from the switch port slot
➃.
4. Grasp the sides of the Mini-GBIC
➀ and pull it straight out of the switch port slot ➃.
If storing or shipping the Mini-GBIC, insert the protective dust cover
➄ into the Mini-GBIC to
protect the fiber ports.
3.6 INSTALLING AN OPTIONAL XENPAK (10GBASE-LR) MODULE
This section describes how to install a XENPAK module.
To prepare and install a XENPAK module, proceed as follows:
Preparation
Before installing the XENPAK module, proceed as follows:
1. Attach the antistatic wrist strap (refer to the instructions in the antistatic wrist strap package)
before removing the XENPAK module from the antistatic packaging.
2. Remove the XENPAK module from the packaging.
Installation
To install a XENPAK module, refer to Figure 3-4 and proceed as follows:
1. Hold the XENPAK module
➀ with the top side ➁ facing up (as shown in Figure 3-4) and its
edge connector
➂ facing the port slot ➃.
2. Carefully align the XENPAK module
➀ with the port slot ➃.
3. Push the XENPAK module
➀ into the switch port slot ➃ until the back of the XENPAK module
faceplate is flush against the Ethernet expansion module.
4. Turn the two thumbscrews
➄ clockwise and tighten to secure the XENPAK module to the
ZPIM1-06. This completes the XENPAK module installation.
Caution: Carefully follow the instructions in this manual to avoid damaging the XENPAK module
and switch.
The XENPAK module and switch are sensitive to static discharges. Use an antistatic wrist strap
and observe all static precautions during this procedure. Failure to do so could result in damage to
the 10GBASE-LR and switch. Always leave the 10GBASE-LR in the antistatic bag or an
equivalent antistatic container when not installed.
 Loading...