200 Functions of the Control Panel
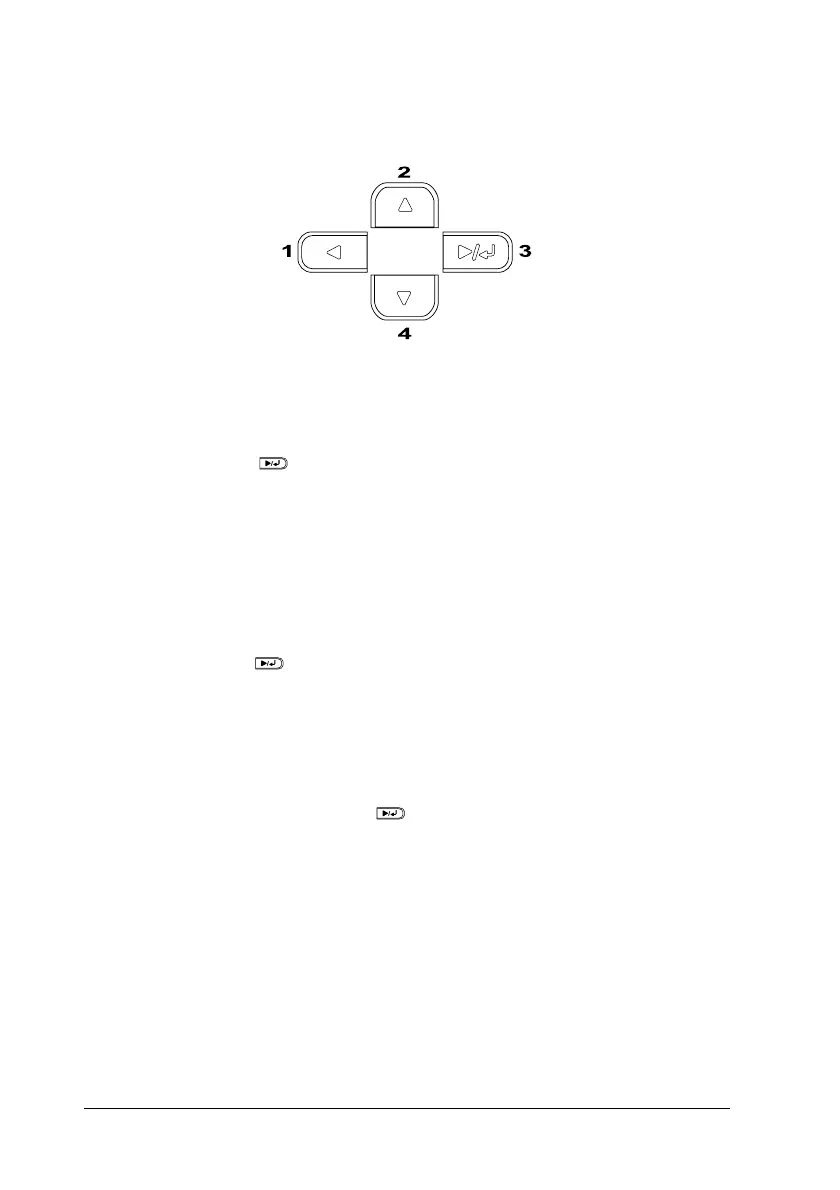
1. When the printer’s Ready light is on, press any of the control
panel buttons shown below accesses the control panel menus.
2. Use the u Up and d Down buttons to scroll through the
menus.
3. Press the Enter button to view the items in a menu.
Depending on the menu, the LCD panel displays an item and
the current setting separated by an asterisk (YYYY
*ZZZZ), or
only an item (YYYY).
4. Use the u Up and d Down buttons to scroll through the items,
or press the l Back button to return to the previous level.
5. Press the Enter button to carry out the operation indicated
by an item, such as printing a status sheet or resetting the
printer, or to view the settings available for an item, such as
paper sizes or emulation modes.
Use the u Up and d Down buttons to scroll through available
settings, and press the Enter button to select a setting and
return to the previous level. Press the l Back button to return
to the previous level without changing the setting.
Note:
You need to turn the printer off and then on to activate some settings.
For details, see “Control Panel Menus” on page 203.
6. Press the N
Start/Stop button to exit the control panel menus.